Understanding Garage Door Sensor Wire Types
Published: May 7, 2026
You’ve been there. You hit the button on your garage door remote, hear the familiar hum of the motor, but then… it stops. The door reverses, and the lights on your opener start blinking frantically. You check for obstructions, wipe the sensor lenses, but nothing works.
It’s a frustratingly common scenario, and while our first instinct is to blame the safety sensors themselves, the real culprit is often hiding in plain sight: the thin, unassuming wire that connects them. More often than not, it’s not the sensor that has failed, but the cheap, damaged, or incorrect wire that’s causing the communication breakdown.
Think of it like a phone call with bad reception. Your sensors are trying to talk to the opener, but a faulty wire creates static, and the safety message—"All clear!"—never gets through. This guide will help you understand that "reception," demystifying the wire that is the lifeline of your garage door’s most important safety system.
Foundation: Sensor Wiring 101 - The Language of Wires
Wire Gauge: The "Thickness" That Matters

Polarity: The "Positive" and "Negative" Connection
- The White Wire: This is the negative (-) conductor.
- The White Wire with a Black Stripe: This is the positive (+) conductor.
Shielding: The Pro-Tip Armor Against Interference
Building: The 3 Wires You'll Encounter in the Wild
The Good: Standard Bell Wire (22/2 Gauge)

The Bad: UTP/Network Cable (Cat5/Cat6)
The Bulky: Thermostat Wire (18/4 or 18/5 Gauge)
Mastery: How to Wire & Splice Like a Pro
- Strip the Ends: Use a wire stripper to remove about ½ inch of insulation from the white and striped wires.
- Twist the Strands: Tightly twist the exposed copper strands of each wire so no stray "whiskers" are sticking out.
- Connect to the Sensor: Loosen the screws on the sensor terminal, loop the wire around the screw in the direction it tightens (clockwise), and secure it firmly.
- Connect to the Opener: For screw terminals, follow the same process. For quick-connect terminals, press the tab and insert the wire fully before releasing.

- Cut Out the Damage: Remove the frayed or broken section of the wire.
- Strip All Four Ends: Strip the insulation from the two ends on each side of the break.
- Connect Polarity: Twist the white wire from one side to the white wire from the other. Do the same for the striped wires.
- Secure the Connection: Use wire nuts or insulated crimp connectors to secure each splice. Never just wrap them in electrical tape, as this can easily come loose.
Action: The 60-Second Troubleshooting Checklist

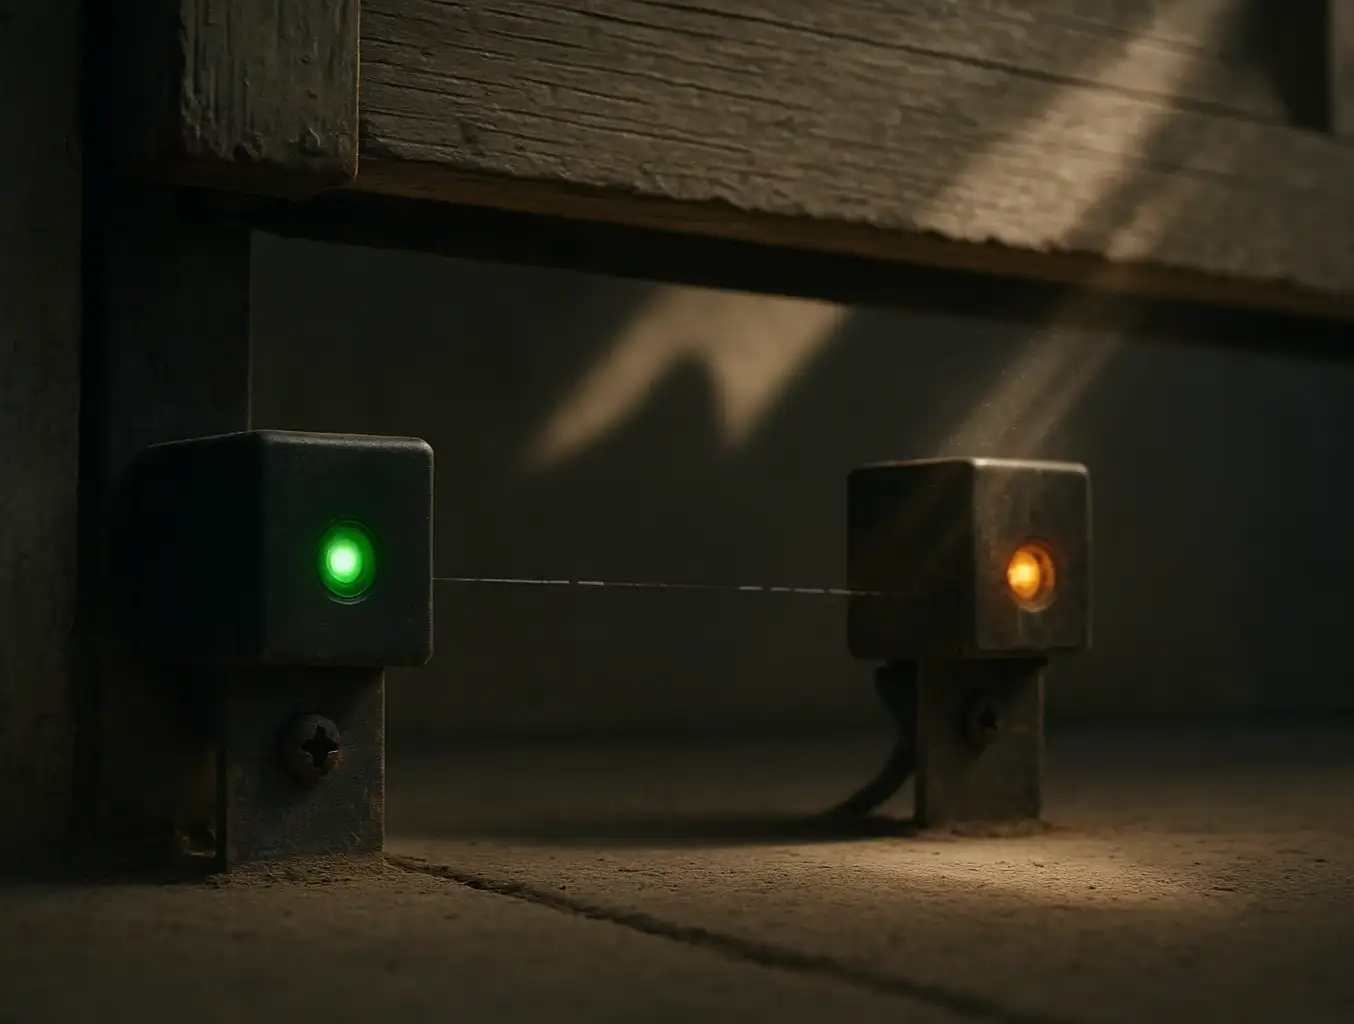
- Check the Sensor Lights: Are the LEDs on both sensors lit? A sending sensor usually has an amber light, and the receiving sensor has a green light. If one or both are off, you have a power issue—likely a cut wire or a bad connection.
- Is a Light Blinking? A blinking light on the receiving sensor means it's not seeing the sender's beam. This is usually an alignment issue.
- Check Alignment: Ensure the sensors are pointing directly at each other. Nudge them into place until both lights are solid.
- Clean the Lenses: Wipe both sensor "eyes" with a soft cloth to remove any dust, cobwebs, or grime.
- Inspect the Connections: Gently tug the wires at the back of each sensor and at the motor head. Do any feel loose?
- Walk the Wire: Visually inspect the entire length of the wire from sensor to opener. Look for damage from staples, kinks, or signs of being chewed by pests.
Need more information?
Get a free quote
Frequently Asked Questions (FAQ)
What is the correct gauge for garage door sensor wires?
What do the white and black-and-white wires mean?
Can I use telephone or speaker wire for my sensors?
Are all garage door sensors and their wires the same?
When the Wire Isn't the Problem
You may also like