The Ultimate Guide to Automated Garage Entry with Geofencing
Published: Feb 4, 2026
Imagine this: You're driving home after a long day. As you turn onto your street, your garage door magically begins to open, welcoming you home without you ever touching a button. You pull straight into the garage, protected from the rain or snow, and the door closes securely behind you.
This isn't magic—it's geofencing. And while it promises a seamless, automated experience, many homeowners find the reality can be a little less reliable. One day it works perfectly, the next it doesn't. Or it works for you, but not for your partner.
If you've been intrigued by the promise but frustrated by the performance, you're in the right place. This guide moves beyond the "what is it" articles to give you a complete playbook for setting up, troubleshooting, and mastering geofencing for your smart garage door.
Foundation: How Geofencing Works (in Plain English)

- GPS: For outdoor positioning.
- Wi-Fi & Cellular Data: To refine your location, especially near your home, and communicate the command.
Building: Your Step-by-Step Setup Guide

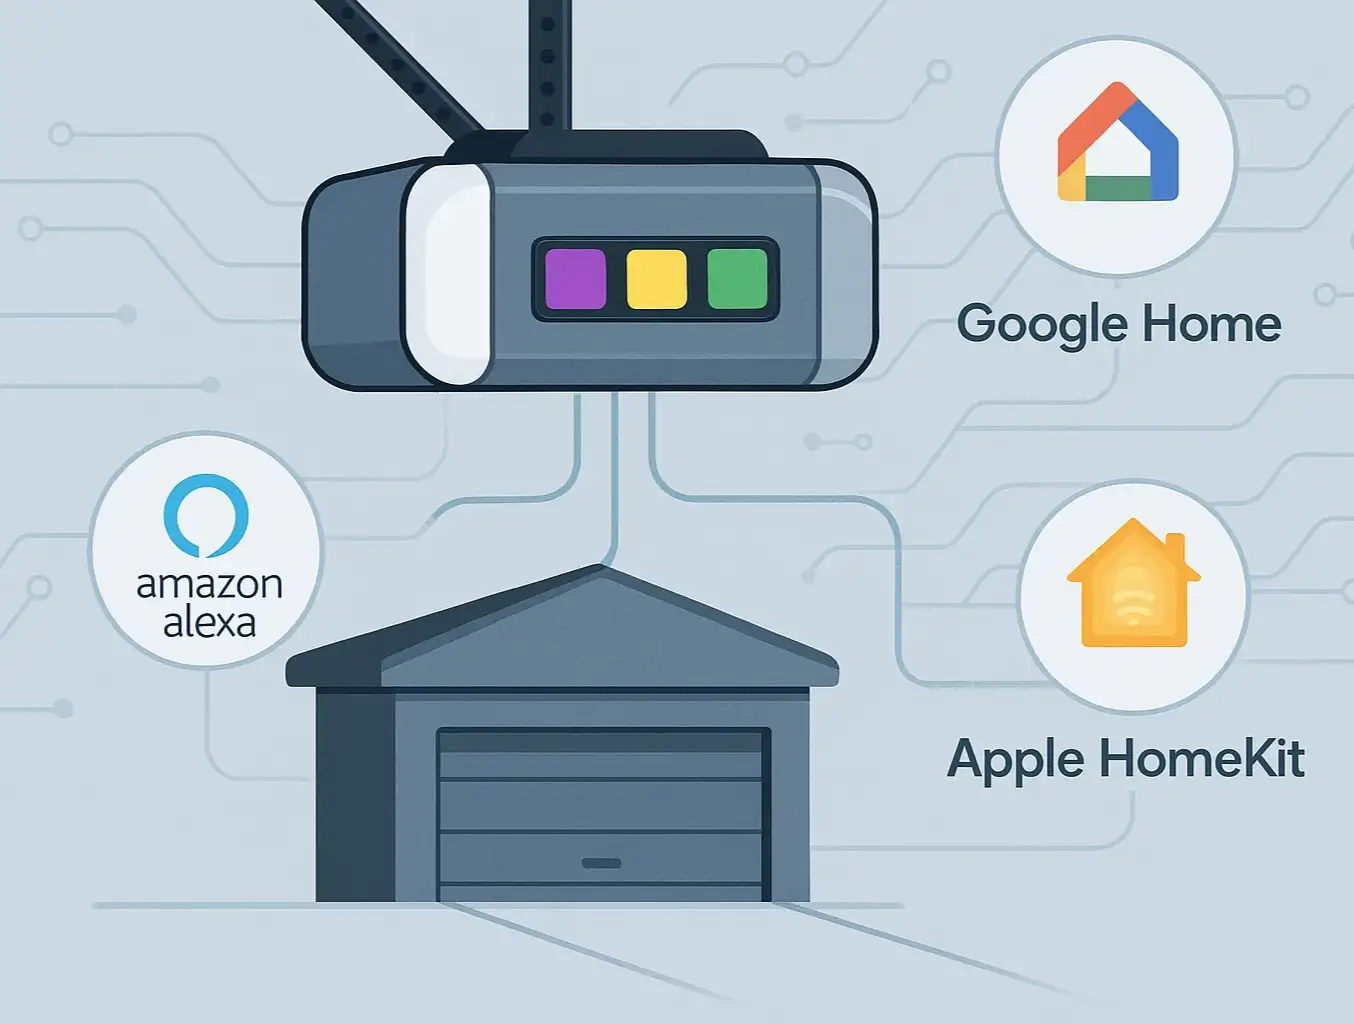
Common Setup Platforms
- Native Apps (like myQ): Many smart opener brands, such as Chamberlain and LiftMaster, use the myQ app. Their geofencing feature, often called "myQ Smart Access," is typically straightforward. You'll navigate to the settings, add a geofence automation, and follow the on-screen prompts to set your home's location and desired actions (open on arrival, close on departure).
- Apple HomeKit: If your opener is HomeKit-compatible, you can create a more powerful automation within the "Home" app. You can set rules like "When the first person arrives home, open the garage door." This allows for more nuanced control in multi-user households.
- Google Home & Amazon Alexa: Using "Routines," you can set up location-based triggers. For example, in the Alexa app, you can create a routine that says, "When my phone arrives at home, open the garage door."
Platform Face-Off: Native App vs. Smart Home Hub
Mastery: The Definitive Troubleshooting Manual
The Reliability Recipe: A Checklist for Your Phone

Solving the "Two-User Problem"
- In Apple HomeKit: Create an automation and specify it should only run "When the First Person Arrives." Create a separate automation that runs "When the Last Person Leaves." This prevents conflicting commands.
- In Google Home/Alexa: This is trickier. You may need to create routines that only trigger an "open" command on arrival and rely on a separate "close" command on departure, but these platforms are generally less adept at handling multi-user presence than HomeKit.
Fine-Tuning Your Geofence Radius
- Start Small: Set the radius to the smallest possible size (usually around 100-150 meters).
- Test and Expand: If the door doesn't open by the time you reach your driveway, gradually increase the radius. The goal is to find the sweet spot that's large enough to be reliable but small enough to prevent false triggers.
Is It Secure? Geofencing Security & Best Practices
- Use Strong Passwords: Your smart garage app account should have a unique, strong password, just like your banking app.
- Enable Notifications: Set up push notifications for every time your garage door opens or closes. This way, you'll be alerted immediately of any unexpected activity.
- Use Two-Factor Authentication (2FA): If your app or smart home platform offers 2FA, enable it. This adds a critical layer of security.
- Review App Permissions: Periodically check which apps have access to your location and smart home devices, and revoke access for any you no longer use.
Need more information?
Get a free quote
Frequently Asked Questions (FAQ)
Does geofencing drain my phone battery?
Do I need to keep the app open for geofencing to work?
What if I don't have a smart garage door opener yet?
Can geofencing close the door, too?
The Takeaway: From Convenient to Truly Reliable
You may also like