How To Install the Insulation On a Garage Door: Easy DIY Guide
Published: Nov 14, 2025
A properly insulated garage door can make a noticeable difference in your home’s comfort and energy bills. It keeps the space warmer in winter, cooler in summer, and more usable year-round. Many homeowners are surprised to learn that DIY garage door insulation is a manageable weekend project. This guide will walk you through how to install the insulation on a garage door step-by-step. And for those who prefer a professional touch or are considering new insulated garage doors, the team at Up & Down Garage Doors is always here to help.
What You’ll Need for DIY Garage Door Insulation: Materials and Tools
Before you start, gather all your supplies. This will make the process much smoother. Many of these items can be found in garage door insulation kits.

- Insulation panels (such as rigid foam board insulation)
- A reliable measuring tape
- A sharp utility knife or razor blade
- A straight edge or square for guiding cuts
- Adhesive (like liquid nails) or heavy-duty double-sided tape
- Garage door insulation clips (optional, but recommended)
- Metal foil tape or weatherstripping for sealing gaps
- Safety gloves and eye protection
Need help choosing the right material? Take a look at the best garage door insulation types compared.
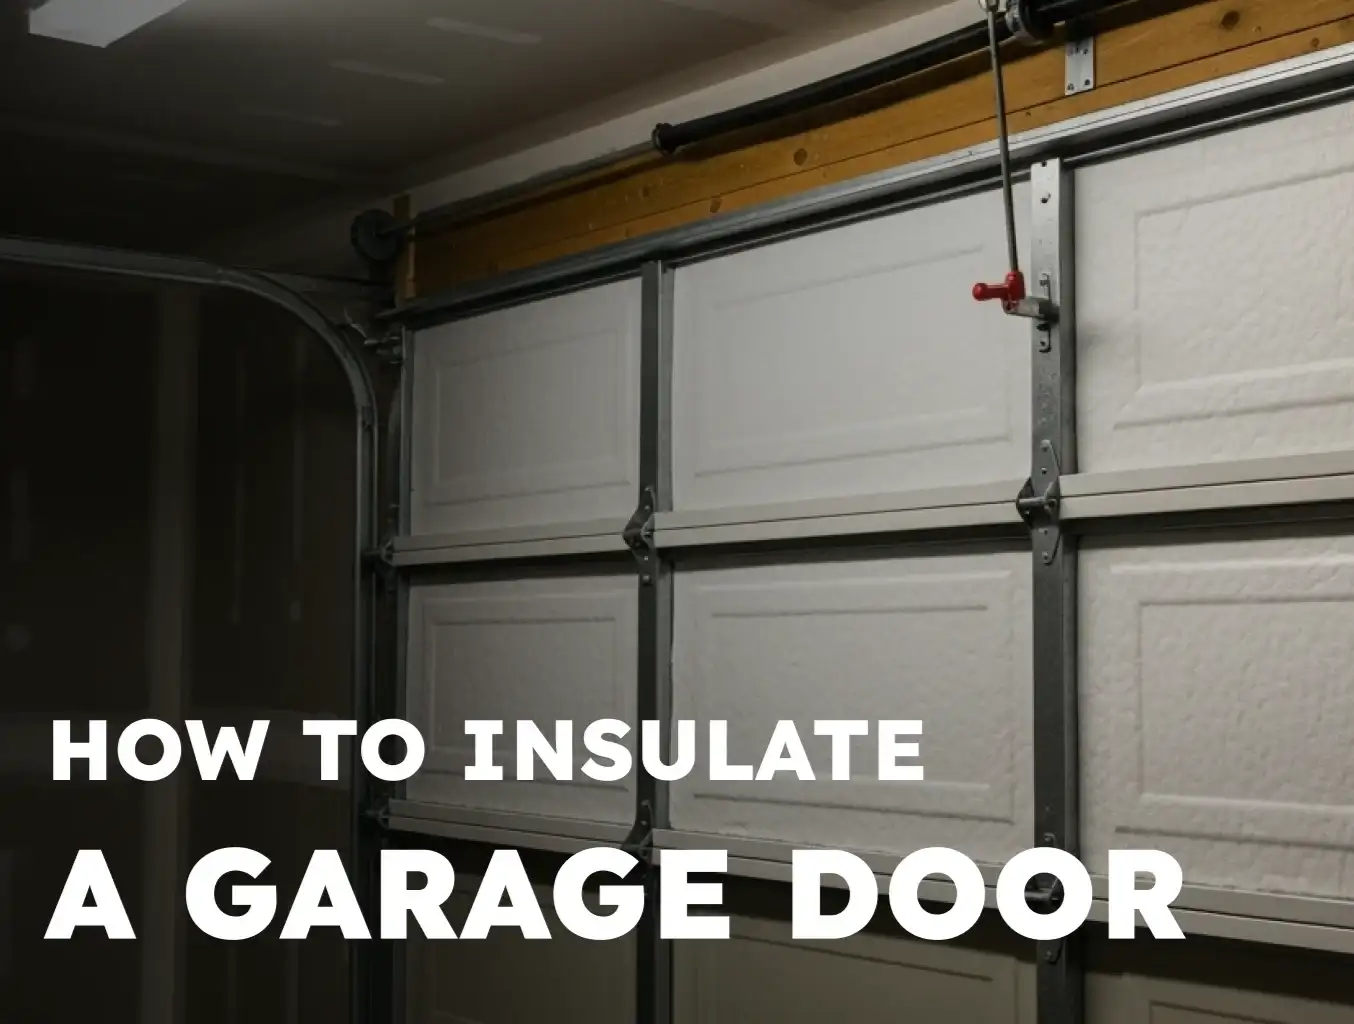
Step 1: Prepare Your Garage Door
Before you begin, it’s important to prepare the surface for a clean, strong hold. A smooth, clean surface helps insulation panels stick and stay in place.
Here’s how to prep:
- Wipe down the inside of each panel with a dry cloth
- Remove any dust, grease, or debris
- Set all tools nearby for a smoother workflow
This step prevents peeling, bubbling, or sagging later in the process.
Helpful tip: Avoid working in direct sunlight — metal panels can get too hot and affect adhesives.
Step 2: Measure and Cut the Insulation

This step is all about precision. Here’s how to insulate garage door panels correctly:
- Measure each garage door insulation panel from edge to edge
- Add about ½ inch to your measurements to create a “friction fit”
- Transfer measurements onto the foam board insulation or reflective garage door insulation
- Use a straight edge and utility knife to make smooth, accurate cuts
Take your time — a clean cut ensures easier installation and better insulation performance.
Step 3: Install the Insulation Panels
Now that your panels are cut, it’s time to secure them in place. Depending on your insulation type and how long you want it to last, you can use a friction-fit method or apply adhesive and garage door insulation clips for extra hold.

Method 1: Friction Fit
This is the simplest method. Slide the top edge of your cut insulation panel into the top lip of the door’s recess. Then, gently bend the panel, allowing you to push the bottom edge into the bottom lip. The snug fit you created by adding that extra half-inch should hold the panel firmly in place.
Method 2: Using Adhesives or Clips
For a more permanent hold, apply a few dabs of adhesive or strips of double-sided tape to the back of the insulation panel. Press it firmly into the door’s recess. If your kit includes garage door insulation clips, press them through the insulation and into the door’s frame to secure the panel.
Whichever method you choose, make sure your insulation matches your climate zone. Need help understanding garage door R-value? Our guide breaks it down so you can match the right insulation to your region.
Step 4: Seal Gaps and Finish the Job
This is the step that prevents energy loss:
- Use foil tape or weatherstripping to cover edges and small gaps
- Pay close attention to the seams between panels and the corners of the door
- Fill small cracks with spray foam if needed
- Clean the surface one more time after sealing
Proper sealing keeps warm air in and cold drafts out. For more help, check out how to seal gaps for better insulation.
After installation, always test your door:
- Slowly open and close the door by hand
- Check for stiffness, uneven movement, or added weight
- If the door feels heavy or misaligned, you may need a spring adjustment
Wrapping It Up
Congratulations! You’ve just completed a DIY garage door insulation project that will improve your home’s comfort and energy efficiency. You’ll now enjoy the benefits of insulated garage doors and have a more stable temperature in your garage year-round.
Still, while this is a great DIY project, some homeowners prefer the peace of mind that comes with professional garage door insulation. If you’re short on time, unsure about the process, or considering brand-new insulated garage doors, the team at Up & Down Garage Doors is here to help. Contact us anytime to explore your options or schedule a professional visit.
FAQs About Garage Door Insulation
How do I make my garage warmer?
Insulating your garage door is one of the best ways to make your garage warmer. You should also seal any air leaks around windows, doors, and the foundation for better temperature control.
Is a Home Depot garage door insulation kit worth it?
Many DIYers report good results using a Home Depot garage door insulation kit. These kits usually come with foam or reflective panels, and they’re designed for quick home installation with minimal tools.
What is an Owens Corning garage door insulation kit?
The Owens Corning garage door insulation kit includes pre-cut fiberglass panels and fasteners designed to fit standard metal garage doors. It’s a popular option for homeowners seeking high R-value and a cleaner appearance.
Can you add insulation to an insulated garage door?
Generally, it’s not recommended to add insulation to an already insulated garage door. Factory-insulated doors are already optimized for weight and performance, and adding extra layers can affect door balance or damage the opener.
How to install a garage door insulation kit?
Measure each garage door panel, cut the insulation to fit, then attach using adhesive, tape, or clips. Follow the specific instructions included in your garage door insulation kit.
How to install reflective insulation on a garage door?
Cut the reflective garage door insulation panels to match each recessed section. Face the reflective side toward the garage interior and secure it with tape or clips to hold in place.
How to install foam board insulation on a garage door?
Insert cut foam board insulation panels into the door’s recesses. Use strong adhesive or garage door insulation clips to secure the boards without bulging or falling.
How to install insulation panels on a garage door?
Start by measuring and cutting the insulation panels accurately. Fit each one snugly into place, then seal edges using foil tape or weatherstripping to reduce air leaks.
You may also like