Our company logo

State

Your Guide to Resetting a Linear Garage Door Remote for Total Security


Published: Apr 1, 2026

You reach into your pocket or purse, and a small moment of panic sets in. The garage door remote is gone. Did it fall out at the store? Is it lost in the car somewhere? Or worse, did someone take it? Suddenly, the simple convenience of your garage door feels like a major security vulnerability.

Whether you've lost a remote, just moved into a new house, or need to revoke access from a former contractor, simply programming a new remote isn't enough. The old ones might still work.

This guide is about taking back complete control. We’ll walk through the crucial difference between just adding a new remote and performing a full security reset on your Linear garage door opener. It’s the digital equivalent of changing the locks on your front door, and it’s easier than you think.

The Most Important Step Everyone Skips: The Full Memory Wipe


A person's finger pressing the 'Learn' button on a garage door opener motor, illustrating the first step in resetting the system.
Here’s the single most important "aha moment" when it comes to garage door security: resetting and reprogramming are two different things.

  • Reprogramming simply adds another key to the keychain. It teaches your opener to recognize a new remote, but it doesn't forget the old ones.
  • A Security Reset is a full memory wipe. It forces the opener to forget every single remote it's ever been paired with—including the one you lost. This is the only way to be 100% certain that only your remotes can open the door.
Think of the "Learn" button on your opener motor as a gatekeeper. A quick press tells it to expect a new remote. A long, deliberate press tells it to erase its entire access list and start fresh. For true security, we always start with the memory wipe.
A person's finger pressing the 'Learn' button on a garage door opener motor, illustrating the first step in resetting the system.

A Step-by-Step Guide to Securing Your Garage


Ready to secure your garage? Let's walk through the two-part process. You'll need a sturdy ladder and a few minutes of uninterrupted time.

Part 1: Erasing All Codes (The Security Reset)

This first phase clears the slate and ensures any lost or unaccounted-for remotes are locked out for good.
  1. Safety First: Unplug any vehicles from the garage and make sure the door's path is clear.
  2. Locate the Motor Unit: Position your ladder safely under the garage door opener motor that’s mounted to your ceiling.
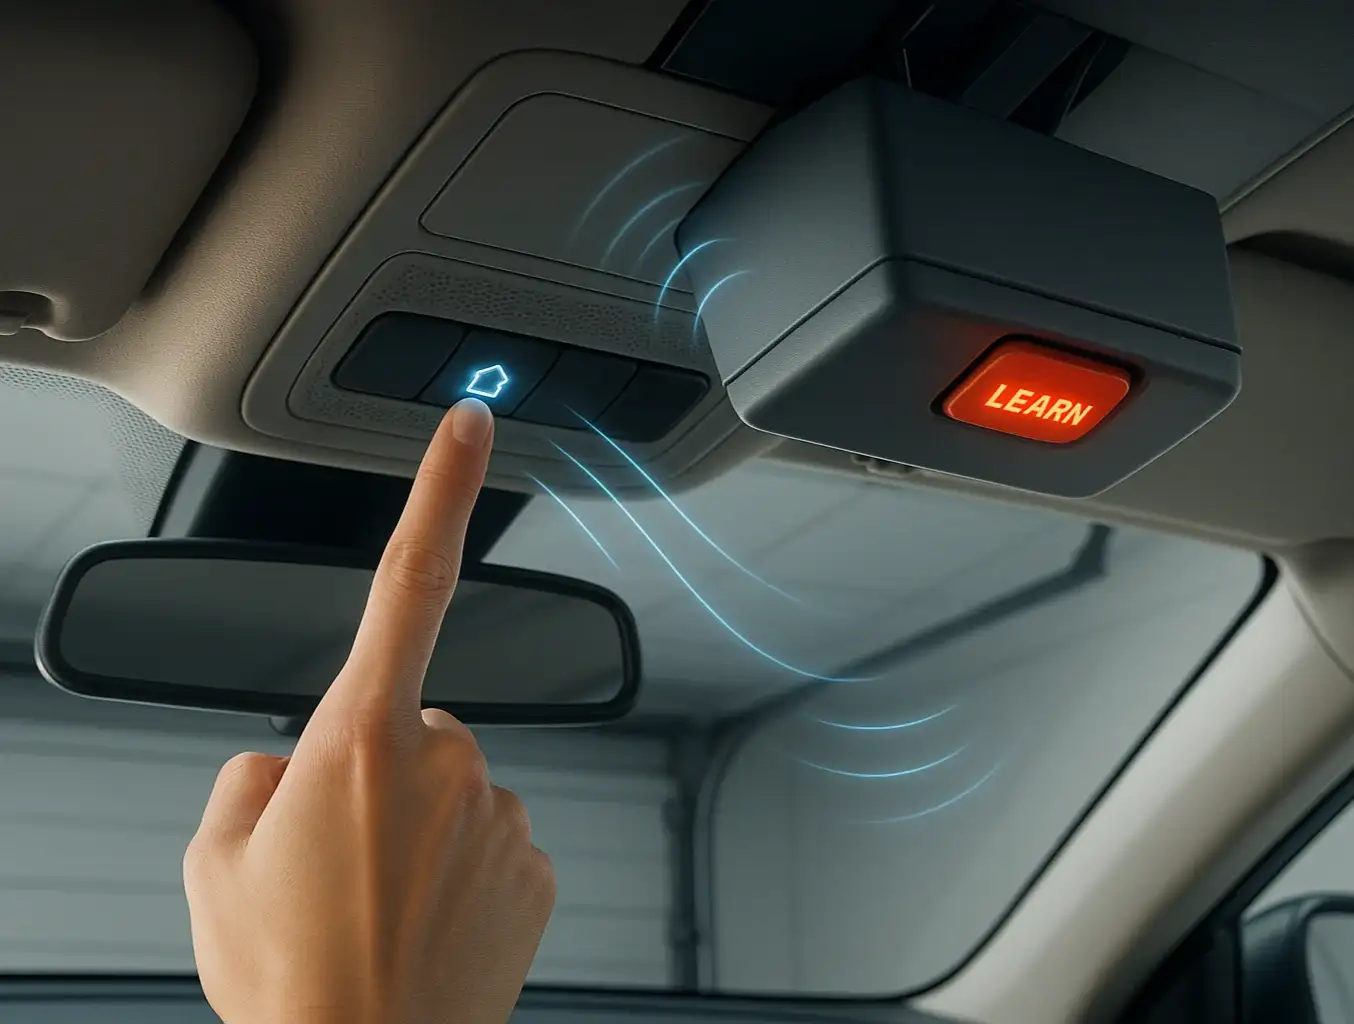
  3. Find the "Learn" Button: Look for a small, often square button on the back or side of the unit. It might be near an LED light and is typically labeled "Learn," "Smart," or "Radio."
  4. Press and Hold: Press and hold the "Learn" button down for about 10-15 seconds. You're waiting for the nearby LED indicator light to blink and then turn off completely. This confirms that the memory has been wiped.
  5. Confirm the Wipe: Grab one of your existing remotes and press the button. It should no longer open the garage door. If it does, repeat step 4, holding the button a bit longer.
A visual guide showing the location of the 'Learn' button on several different models of Linear garage door openers.

Part 2: Reprogramming Your Remotes

Now that your opener has a clean memory, you need to re-introduce the remotes you want to use. You'll do this one by one. The steps for proper linear garage door opener programming are straightforward.

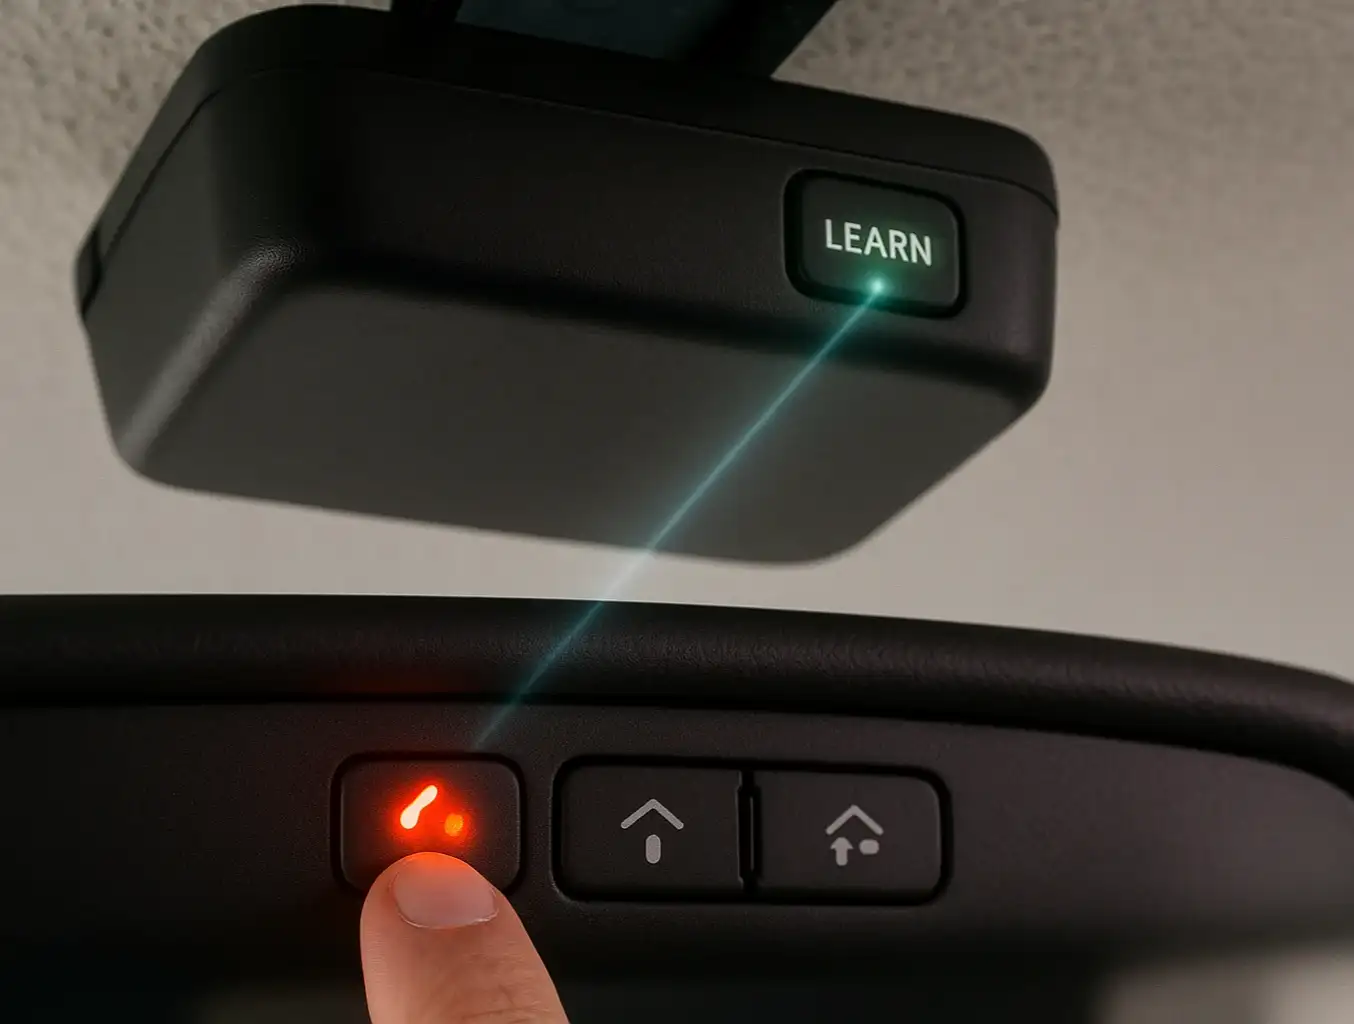
  1. Press and Release: This time, just press and immediately release the "Learn" button on the motor unit. The LED indicator light should turn on and stay lit for about 30 seconds.
  2. Pair the Remote: Within those 30 seconds, grab your first remote and press and hold the button you want to use.
  3. Confirm Pairing: Release the remote button once the garage door opener lights blink or you hear two clicks. The LED on the motor unit will also turn off.
  4. Test It: Press the button on your newly programmed remote. The garage door should operate.
  5. Repeat: If you have more remotes, repeat steps 1-4 for each one.

Find Your Learn Button: A Visual Guide to Common Linear Models

The most common point of frustration is simply finding that little button. While its exact location varies, it's almost always on the rear or side panel of the motor housing. To help you find the learn button on garage door opener models like yours, check the visual guide below.
A visual guide showing the location of the 'Learn' button on several different models of Linear garage door openers.

Beyond the Basics: Advanced Access Management with Linear Keypads


A hand entering a code on a Linear garage door keypad mounted outside a garage, showing advanced access control.
Your remotes aren't the only way to control access. A wireless keypad is a fantastic tool for granting access to family, friends, or service professionals without handing over a physical remote. After a full system reset, you will need to reprogram your keypad as well. This is also the perfect time to set a new, secure PIN. If you need a refresher on how to reset garage door code, the process is very similar to pairing a remote.

A hand entering a code on a Linear garage door keypad mounted outside a garage, showing advanced access control.

Troubleshooting Common Issues


Sometimes technology doesn't cooperate. If you're running into trouble, don't worry—the solution is usually simple. Before you get frustrated, run through this quick checklist.
Flowchart of remote troubleshooting: check battery, learn light, pairing, then test opener.
Problem: The remote doesn't seem to be pairing.
Solution: Check the LED on the remote itself when you press the button. If it doesn't light up or is dim, you may just need a new garage remote battery. Also, make sure you are pressing the remote button within the 30-second window after pressing the opener's "Learn" button.
Problem: The opener's "Learn" light isn't behaving as expected.
Solution: For the memory wipe, ensure you're holding the button down long enough (a full 10-15 seconds). For programming, be sure you're pressing and releasing it quickly. Holding it too long by mistake can trigger the reset process again.
Problem: My garage door still won't open or close.
Solution: If the remote is programmed but the door isn't moving, the issue may be with the opener itself. Double-check that it's plugged in and that the safety sensors at the bottom of the door are aligned and unobstructed. If your remote isn't the problem, our guide on how to fix garage door remote and opener issues can help.

Flowchart of remote troubleshooting: check battery, learn light, pairing, then test opener.

Need more information?

Frequently Asked Questions (FAQ)


How do I know for sure my lost remote is disconnected?

After you perform the memory wipe (Part 1), none of your remotes should work. Test one of the remotes you still have. If it doesn't activate the door, you can be confident the lost one won't either.

Will resetting my remote affect my wireless keypad?

Yes. A full memory wipe erases all paired devices from the opener's memory, including keypads and any built-in vehicle remotes (like HomeLink). You will need to reprogram everything you wish to use after the reset.

What's the real difference between resetting and reprogramming?

This is the key to security. Think of it this way: resetting is "forget everyone," while reprogramming is "meet someone new." If you want to know how to reprogram garage door opener systems, the process always involves pairing, but a security-focused approach starts with a reset.

Can I just reset the opener itself without needing a remote?

Absolutely. The entire reset process is performed on the garage door opener motor unit mounted in your garage. You don't need a working remote to begin the memory wipe. For a broader overview, see our complete guide on how to reset garage door opener systems of all types.

Your Home Security is Back in Your Hands


By following these steps, you’ve done more than just program a remote; you’ve performed a critical security update for your home. You now have a clean slate and the peace of mind that comes from knowing exactly who has access to your property.
Managing your garage door access is an empowering DIY skill. But if you've tried these steps and are still running into issues, or if you'd simply prefer a professional touch, our team at Up & Down Garage Doors is here to help 24/7.

You may also like


blog photo

Decoding Rolling Codes: Your Guide to Car-to-Garage Programming

You’ve tried it once. You’ve tried it a dozen times. You’re sitting in your car, pressing the built-in button, pointing it at your garage, and… nothing. The blinking light on your visor taunts you, and the garage door remains stubbornly shut. If you’ve ever felt the frustration of trying to sync your car to your garage door opener, you’re not alone. The problem isn’t you—it’s the sophisticated security technology working inside your opener. That technology is called a “rolling code,” and while it’s fantastic for keeping your home secure, it can make the programming process feel like you’re trying to solve a puzzle without all the pieces. But here’s the good news: there's a clear logic behind it, and you can master it. This guide will be your single source of truth, transforming you from a frustrated button-pusher into someone who understands the why behind the process, especially for the tricky scenario of programming without a handheld remote.

blog photo

Troubleshooting HomeLink & Car2U Programming Failures Without a Remote

It should be simple, right? Press a button on your garage door opener, hold a button in your car, and voilà—the two are paired. But if you’re reading this, you probably know it’s rarely that easy, especially when you don't have the original remote. You’ve followed the manual, watched a few videos, and now you're stuck in a loop of blinking lights that don’t actually open the door. It’s a common frustration, and most guides don't cover the real-world glitches that stop you in your tracks. This isn’t just another set of instructions. This is a diagnostic guide. We’re going to walk through why these systems fail and provide the troubleshooting steps that are usually buried in the comments section of enthusiast forums. Think of this as the conversation you’d have with a knowledgeable friend who’s seen—and solved—this problem a dozen times.