Our company logo

State

Safety Precautions and Essential Tools for DIY Garage Door Chain


Published: Apr 23, 2026

It’s a sound every homeowner dreads: a sudden clatter and grind from the garage, followed by the sight of a sagging, useless chain dangling from the opener. Your first thought might be an expensive repair call, but for many, reattaching a garage door opener chain is a manageable DIY project.

The difference between a successful fix and a frustrating, dangerous afternoon comes down to two things: prioritizing safety and having the right tools. Many online guides gloss over these critical details, but we believe you should feel confident and secure before you even touch the ladder.

This guide is different. We’ll walk you through the essential safety precautions and the specific tools you need, transforming this intimidating task into an empowering home repair win.

Foundation: Anatomy & Safety


Before we get into the "how," we need to cover the "what" and the "what not to do." Understanding the machinery you're working with is the first step toward a safe repair. A garage door system is simple in principle, but its components work under significant tension.

The Unskippable 5-Point Safety Checklist

If you only remember one part of this guide, make it this. Attempting any work without following these steps can lead to serious injury or damage to your property.
  1. Disconnect All Power: Unplug the garage door opener from the electrical outlet. Don't just rely on the wall switch. This eliminates the risk of the motor engaging unexpectedly.
  2. Ensure the Door is Fully Closed: A closed garage door is in its most relaxed state. The powerful springs that help lift the door are under the least amount of tension, making the entire system more stable and safer to work on.
  3. Visually Inspect the Springs: Look at the large springs (either torsion springs above the door or extension springs along the sides). If you see any cracks, gaps, or signs of breakage, STOP IMMEDIATELY. Broken springs are extremely dangerous and require a professional.
  4. Wear Protective Gear: At a minimum, wear safety glasses to protect your eyes from falling debris or dust. A pair of work gloves is also highly recommended to protect your hands from grease and sharp edges.
  5. Use a Sturdy Ladder: You'll be working above your head. Make sure your stepladder is stable, placed on level ground, and allows you to work comfortably without overreaching.
Anatomy of a garage door opener system
Familiarizing yourself with these key parts of a garage door opener will make the following steps much clearer. The sprocket on top of the motor unit is where the chain often slips off. The trolley is the piece that moves along the rail, connected to the door. The tensioner is what you'll use to adjust the chain's tightness.

Your Essential Toolkit

Having the exact tools ready prevents frustrating trips back and forth to the toolbox. Vague advice like "get a wrench" isn't helpful. Here’s what you’ll actually need:

  • Two wrenches or socket wrenches: Most opener models use a 1/2" nut for the tensioner and a 7/16" nut for the lock nut. Having two allows you to hold one in place while turning the other.
  • Flathead screwdriver: For prying open the master link clip.
  • Needle-nose pliers: Helpful for maneuvering the master link back into place.
  • Stepladder: Sturdy and tall enough for you to work comfortably.
  • Safety glasses and gloves: Non-negotiable safety gear.
  • Rag or paper towels: To clean up excess grease.
Anatomy of a garage door opener system

Building: The Step-by-Step Reattachment Process


With your safety checks complete and tools in hand, you're ready to begin. This process is for when the chain has come off the sprocket but is not broken.

Step 1: Disconnect the Trolley

First, pull the emergency release cord (the red-handled rope) to disconnect the trolley from the chain assembly. This allows you to move the chain freely without moving the entire door. If you need a refresher, check our guide on how to manually open a garage door safely.

Step 2: Loosen the Chain Tensioner

Using your wrenches, locate the tensioner nuts on the trolley. There will be an inner nut and an outer lock nut. Hold the inner nut steady with one wrench and use the other to loosen the outer lock nut. Once it's loose, you can turn the inner nut to create slack in the chain. Give it several turns until the chain is visibly loose.
Visual guide for proper garage door chain tension

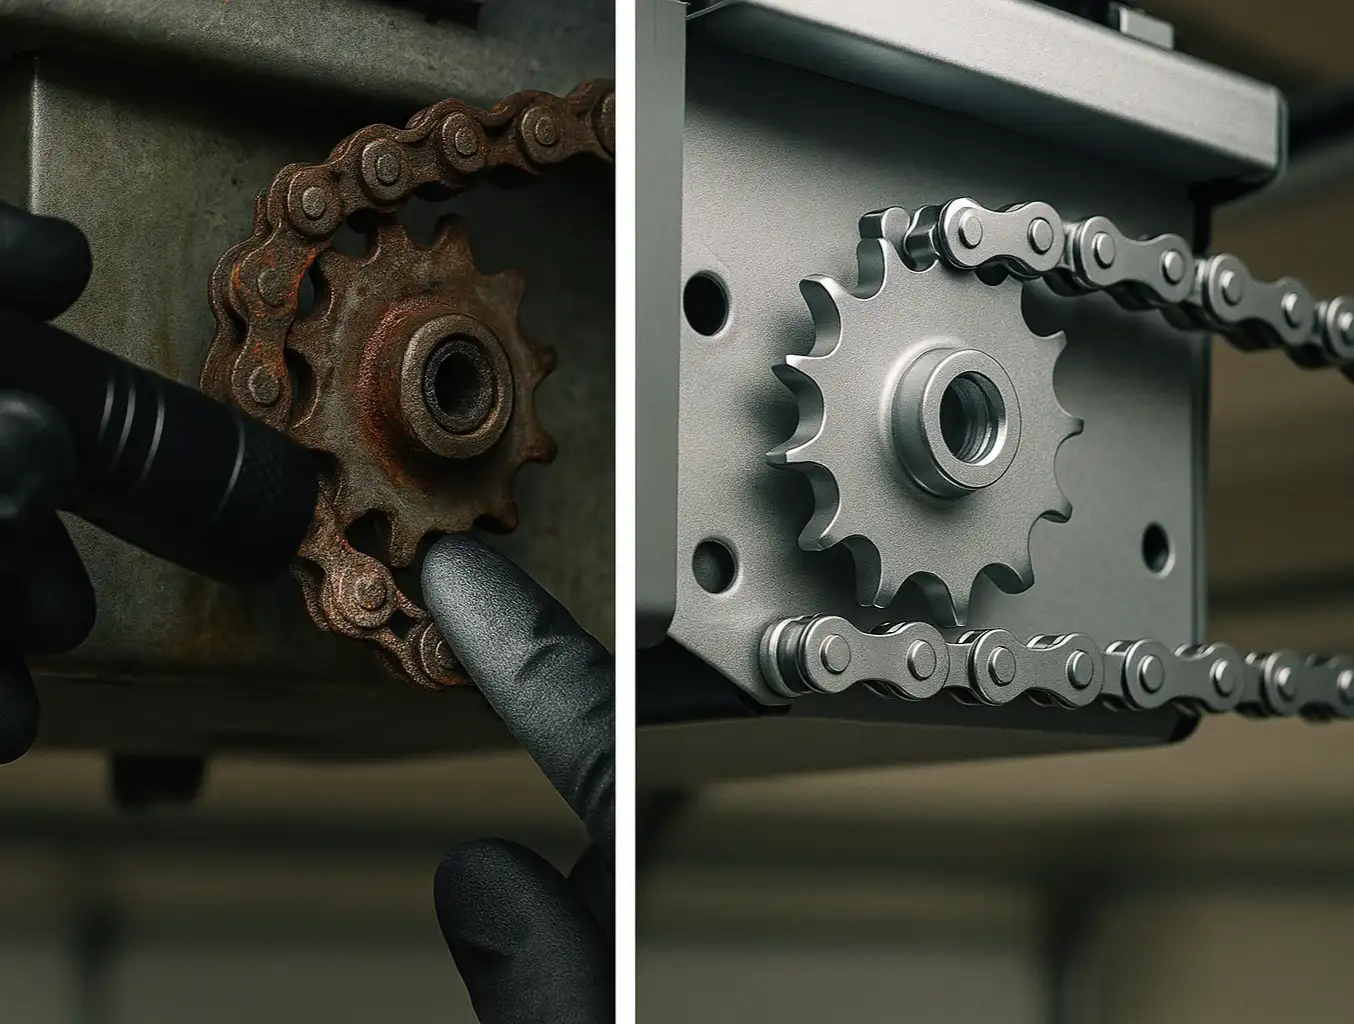
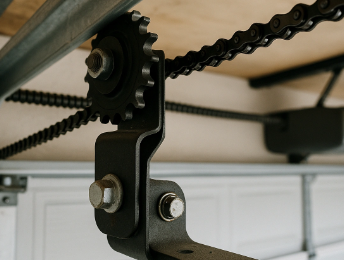
Step 3: Re-seat the Chain on the Sprocket

Climb your ladder to access the motor unit. Carefully lift the chain and guide the links back into the teeth of the sprocket. Ensure it's seated properly and centered. If the garage door chain came off the sprocket, this is the moment you're correcting that core issue.

Step 4: Reconnect the Chain to the Trolley (If Needed)

Sometimes, the chain detaches at the master link connection to the trolley. If so, use your flathead screwdriver to gently pry off the master link's clip. Re-insert the pins through the chain and trolley connector, then use your needle-nose pliers to snap the clip securely back into place.

Step 5: Set the Correct Tension

This is where many DIY attempts go wrong. Go back to the tensioner nuts. Tighten the inner nut to remove slack from the chain. So, how tight should the chain be on a garage door opener? The goal is not to make it guitar-string tight.
The "Aha!" Moment: A correctly tensioned chain should have about 1/4 to 1/2 inch of slack, allowing you to lift it slightly off the rail. It should never droop down and touch the rail. Once you have the right tension, hold the inner nut in place and firmly tighten the outer lock nut against it.

Step 6: Test and Adjust

Plug the opener back in. Re-engage the trolley by running the opener until it clicks back into place. Now, run the door through a full open and close cycle. Watch the chain and listen for any unusual sounds. If it runs smoothly, you're done!

Visual guide for proper garage door chain tension

Need more information?

Mastery: Troubleshooting & Maintenance FAQ


Sometimes, things don't go perfectly. Here are answers to common questions and problems.
Common mistakes to avoid during garage door repair

Why does my garage door chain keep falling off?

This usually points to one of two issues: incorrect tension (either too loose or too tight) or a worn-out sprocket. Inspect the sprocket's teeth on the motor unit. If they look worn down, rounded, or broken, the chain won't be able to grip them properly, and the sprocket will need to be replaced. This is often a sign it's time for more in-depth garage door opener troubleshooting.

What if a link in the chain is broken?

You can purchase a replacement master link from a hardware store. You'll need to remove the broken link (which may require a chain breaker tool or bolt cutters) and insert the new master link to splice the chain back together.

How often should I maintain the chain?

Preventative maintenance is key. At least once a year, you should lubricate the garage door chain with a white lithium grease or a spray lubricant specifically designed for garage doors. Avoid thick grease like WD-40, which can attract dirt and gunk up the system.

Common mistakes to avoid during garage door repair

When to Call a Professional


Empowerment is knowing what you can do, but wisdom is knowing what you shouldn't. This DIY guide is for a simple chain reattachment. You should stop and call a professional service if you encounter any of the following:

  • Broken or damaged springs: This is the most critical one. Spring replacement is not a DIY job.
  • A bent or damaged rail: If the rail the chain runs along is bent, it will cause chronic chain issues.
  • A worn-out drive sprocket: Replacing the sprocket itself is a more involved repair.
  • You simply don't feel comfortable: There is no shame in prioritizing your safety. If you feel unsure at any point, it's always better to get an expert opinion.
By following these safety guidelines and using the right tools, you can confidently tackle a loose garage door chain and get your door running smoothly again.

You may also like


blog photo

Identifying Damaged Garage Door Opener Chain Components

You’ve done everything right. You noticed your garage door opener chain was sagging, you looked up a guide, and you tightened it. For a few days, everything was perfect—the door ran smoothly and quietly. But now, that annoying sag is back, and maybe it’s brought some new grinding or popping sounds with it. It’s a frustratingly common scenario. While many guides show you how to tighten a chain, they often miss a crucial point: sometimes, a loose chain isn’t the core problem, but a symptom of a much bigger issue. Repeatedly tightening a chain without addressing the root cause is like pumping air into a tire with a slow leak—it’s a temporary fix for a permanent problem. Before you grab that wrench again, let's take a closer look. This guide is designed to help you become a chain drive detective. We’ll walk you through a visual inspection to determine if your opener components are healthy or if they’re too worn for a simple adjustment and need to be replaced.