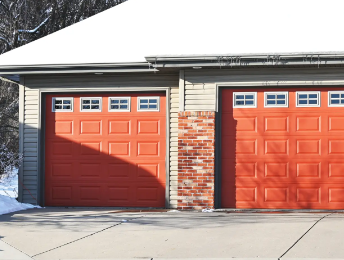
How to Measure a Garage Door for Installation
Published: May 14, 2025
A new garage door is a big step in improving your home, and the very first thing to nail is the measurements to ensure a smooth installation. Regardless of your choice, precise measurements are important not only to choose the right door but also to effectively use a door cost calculator to get a realistic understanding of the investment involved. With this guidance and a little effort on your part, you’ll be able to measure your garage door accurately and find the ideal garage door for your home.
Choosing Garage Door Insulation
Some garages feel warmer than others despite the area they’re located in. It happens because of different insulation. Garage door insulation, typically made of foam or other insulating materials, helps regulate the temperature inside the garage. This means it keeps the warmth in during winter and the coolness during summer, which is especially helpful for attached garages.
The effectiveness of this insulation is measured by its “R-value,” which tells you how well it blocks heat. If your garage connects to your home, aiming for a higher R-value (usually above 9) is a good idea to keep the temperature comfortable, even when it’s hot or cold outside.
How to Choose the Right Insulation Level
If you wonder what level of garage door insulation to choose, think about a few key things: what’s the weather usually like where you live, how important is it to save on energy bills, and what do you use your garage for?

- R-Value 6-9: If you have a garage that’s not connected to your house (a detached garage) and live in a place where the weather is pretty mild, this level might be fine. It offers a little bit of temperature control without being too expensive.
- R-Value 9-13: If your garage is attached to your home or you live in an area where the temperature changes more throughout the year, this is often preferable. It provides a good balance of energy efficiency and comfort.
- R-Value 14+: If you live in areas with extremely hot or cold weather, or if you spend a lot of time in your garage — maybe it’s your workshop, a home gym, or even a living space — then going with a higher R-value is a great idea. This offers the best temperature control, keeping your garage comfortable and helping you save the most on your energy bills.
The right insulation level can help keep your garage comfortable and save you energy all year long. However, keep in mind that while higher R-values offer better insulation, they usually cost more initially, so it’s worth thinking about what’s most important to you and balancing those benefits with what fits your budget best.
How to Choose Garage Door Springs
Garage door springs are the components that help lift and lower a heavy garage door smoothly and safely. Without the springs, it’d be much harder to manually lift the entire weight of the door, which can be hundreds of pounds. The springs are specifically designed to counterbalance this weight, so the door feels much lighter, and your garage door opener can easily move it. There are two main types of garage door springs.

- Torsion Springs (above the door): These springs are wound up super tight and store power by twisting. They provide a smoother and more controlled movement. Because of their strength, torsion springs are usually used for heavier garage doors. They generally last longer and offer a better balance.
- Extension Springs (along the sides): These springs stretch out and then pull back to counteract the door’s weight. They’re more common for lighter garage doors and a bit more budget-friendly upfront. However, they tend to wear out a little faster than torsion springs and need more maintenance to keep them in good shape.
Whether you need torsion springs or extension springs, accurate measuring is important to get the right replacements so your garage door will work smoothly and safely.
How to Measure Garage Door Torsion Springs
If you have torsion springs, you’ll need to gather a few important measurements.
- The Inside Diameter: This is simply the measurement across the hole in the middle of the spring. Grab a ruler or measuring tape and measure from one inside edge of the coil to the opposite inside edge. Getting ID correct is very important since every inch makes a huge difference in the engineering pool and will help the spring live longer.
- The Wire Thickness or the Gage: This tells you how strong the spring is. One common way to estimate this is by counting the number of coils in one relaxed inch of the spring. Then, check an online garage door spring wire gauge chart to find the matching thickness. For a more accurate measurement, use a caliper or measuring tape. If all you have is a measuring tape, measure 20 coils and divide the total length by 20 to get an approximate size.
- The Length When Fully Unwound: This is the total length of the spring when it’s not twisted or stretched. Just lay the spring on a flat surface and measure from the start of the coil to the end of the coil.
- The Wind Direction (Left- or Right-Wound): Usually, torsion springs come in pairs, one wound in each direction. Look at the end of the spring. If the end coil points upwards and to the right, it’s likely a right-wound spring. If it points upwards and to the left, it’s probably a left-wound spring. The springs often have color-coded ends (red for the right, black for the left).
How to Measure Garage Door Extension Springs
Measuring extension springs is slightly different. First of all, you need to know the weight of your garage door. That’s because the correct extension springs are rated for how much weight they can lift — using the wrong spring can cause balance and safety problems. If you don’t know the weight, you can check the manufacturer’s label (usually on the door itself) or weigh it yourself by disconnecting the opener and lifting it manually.
Once you have that figured out, here’s how to take proper measurements:
- Measure the Length: You’ll need to measure the spring in two states. When they’re fully extended — carefully measure the length of the spring while the garage door is closed and the springs are stretched. Also, if possible and safe, measure the spring’s length when it’s not stretched.
- Determine the Coil Diameter: Measure across the outside of one of the coils.
- Measure the Wire Gauge (Thickness): Just like with torsion springs, you’ll need to determine the thickness of the wire. You can use a caliper for the most accurate measurement or a wire gauge tool specifically designed for this purpose.
- Identify the End Fittings: Take a close look at the ends of the spring. The hook or loop type — open or closed loop, pigtail ends — matters for proper installation.
How to Choose Garage Door Track Radius
That curved part of the track where your garage door smoothly transitions from vertical to horizontal is called the track radius. Track radii come in different sizes, so the right choice depends on how much overhead space is available in your garage. When measuring for a radius, keep in mind that you’ll also need extra clearance for the opener and horizontal rails.

- Low-Headroom: This is an ideal choice if your garage has limited space. It’s designed to allow the door to open and close properly even when there isn’t much room overhead.
- 12R (12-inch radius): This is a common and dependable choice for many homeowners because of its balance. It provides a nice, smooth curve for the door to follow without needing a ton of extra headroom. It’s a solid, all-around option for many standard garages.
- 15R (15-inch radius): If you’re after an even smoother curve as your door moves, the 15-inch radius might be the way to go. However, it does require a little more space above the door compared to the 12-inch radius.
- Hi-Lift: If you have high ceilings in your garage, look at this type. It allows the door to travel much higher up the wall before it curves towards the horizontal position to maximize storage in a garage.
How to Measure Garage Door Track Radius
If you’re curious about your current track radius or trying to figure out what you need, here’s how to measure it:
- Identify where the vertical track (the one going up the wall) meets the horizontal track (the one running along the ceiling). That curved section is your track radius.
- Carefully measure the distance from the curve’s beginning (where vertical meets horizontal) and measure straight across to the center point of the curve’s arc. Remember to measure a straight line across a curve, not along it.
If you have a standard system, this measurement will likely be around 12 or 15 inches. If it’s less than 12 inches, your garage may use a low-headroom setup. For garages with high ceilings, a hi-lift system might be in place.
How to Measure for a New Garage Door
When you decide to get a new garage door, you need not only to choose the right components but also to know accurate measurements of the door itself. If you are curious about how to measure for a new garage door, there is nothing difficult. However, you’ll need to take your time and pay a little bit of attention to the process so it’ll perfectly fit your opening.
How to Measure a Garage Door Height
- Measure from the floor to the top of the opening. Extend your measuring tape from the garage floor to the highest point of the door opening. Make sure your measurement is straight and accurate.
- Watch Out for Obstructions. Double-check for anything that might get in the way of the new door, for example, pipes, beams, or wiring running across the top of the opening.
- Consider insulation thickness. If you’re adding insulation, remember that this extra layer will add to the overall thickness of the door. When considering your height measurement, think about how much lower the bottom edge of the insulated door might sit when closed. While the opening height is your primary measurement, being aware of potential insulation thickness is important for clearance.
How to Measure a Garage Door Width
- Measure across the opening from side to side. Make sure you measure at the widest point, as openings can sometimes be slightly uneven.
- Check for uneven framing. If one side is slightly higher or lower, take note of both measurements — you might need to consider this when ordering.
- Consider trim and seals. If your door has any weather stripping or trim along the sides, include them in the measurement.
Additional Measurements to Take
While height and width are the main dimensions, additional measurements are also important for a smooth installation.

- Side Room — Measure the distance from each side of the door opening to the nearest wall or obstruction inside your garage. You’ll need enough side room for the vertical tracks of the new door.
- Headroom — Measure the space from the top of the door opening to your garage ceiling or any obstruction above. This measurement determines the type of track system you can use (standard, low headroom, etc.).
- Backroom (or depth) — Measure the distance from the garage door opening back into your garage. This ensures you have enough space for the horizontal tracks when the door is open.
Common Mistakes to Avoid When Measuring a Garage Door
Incorrect garage door measurements can lead to costly mistakes. However, you can avoid the most common ones if you pay attention to details.
- Not measuring multiple times: Always double-check your numbers, and even better, measure a couple of times in different spots.
- Ignoring the space around the opening: It can be easy to forget to measure the side room (space to the left and right of the opening) and the headroom (above the opening). However, these areas are important for installing the tracks and other hardware.
- Measuring the existing door instead of the opening: Always measure the actual rough opening where the new door will go, not the dimensions of your existing garage door. Your old door might not be the exact size of the opening due to settling or previous installations.
- Forgetting to consider insulation thickness: The insulation adds to the total depth of the door. This extra thickness can affect the headroom or how the door sits when closed.
Summing Up
A successful garage door installation lies in accurate measurements. If you have the right information, you can be sure of a perfect fit, whether you choose from standard options or explore the possibilities of custom garage door sizes. Take your time to double-check all the measurements to get the right numbers so you’ll save time and money in the future.
If you’re unsure about the process or not confident in your measuring skills, contact Up & Down Garage Doors today for expert assistance to get a top-quality garage door.
You may also like