Our company logo

State

When to Perform a Full Garage Door Opener Memory Erase


Published: Jun 8, 2026

You wouldn't hand out keys to your front door and forget who has one. Yet, many of us do exactly that with the largest door to our home: the garage. Over the years, countless digital "keys"—remotes, keypad codes, and vehicle links—get programmed and forgotten.

Whether you've just moved into a new home, had a remote go missing, or are dealing with a garage door that seems to have a mind of its own, the solution is often simpler and more powerful than you think. Performing a full memory erase on your garage door opener is the ultimate security and troubleshooting tool, giving you a clean slate and total control. This guide explains the three critical times when hitting the reset button is not just a good idea, but an essential step.

The 'Aha' Moment: Understanding Your Opener's Brain vs. Its Keys


Before we dive into the "when," it's crucial to understand a core concept that many people miss. Think of it this way:
Understanding What Happens During a Garage Door Reset
  • Your Garage Door Opener Unit (the motor on the ceiling) is the "Brain" or the lock on your front door. It holds the master list of all accepted digital keys.
  • Your Remotes, Keypads, and Car's HomeLink System are just the "Keys." They are simple transmitters that send a signal to the brain.

This is the "aha moment": when you lose a remote, you don't need to "deactivate the key." You need to "change the lock." Erasing the opener's memory is the digital equivalent of rekeying your front door. It wipes the master list clean, so only the new keys you program afterward will work.
A common myth is that simply unplugging the unit will clear its memory. This is incorrect. Modern openers use non-volatile memory, which means the list of paired devices is saved even when the power is out.
Understanding What Happens During a Garage Door Reset

The 3 Critical Times You Must Erase Your Garage Door Opener's Memory


Knowing how to erase the memory is one thing, but knowing why and when is what transforms this simple task into a powerful security measure. Here are the three non-negotiable scenarios.

Scenario 1: You've Just Moved into a New Home

This should be at the top of your new home security checklist, right alongside changing the front door locks. You have no idea who still has a remote programmed to your garage: the previous owners, their relatives, real estate agents, or contractors.
Performing a full memory erase ensures that no old, forgotten remotes can open your garage door. It’s a simple action that provides immediate peace of mind and secures the largest entry point to your new home.

Scenario 2: You've Had a Security Breach (Lost or Stolen Remote)

A lost, stolen, or misplaced remote is more than an inconvenience—it's a compromised key to your home. The same goes for a car that was broken into, especially if a remote was clipped to the visor.
In this situation, speed is critical. Erasing the opener’s memory instantly renders the missing remote useless. Once erased, you'll need to know how to reset garage door remote controls you still have, but that’s a small price to pay for securing your home against potential intrusion.

Scenario 3: The "Ghost in the Machine" Troubleshooting Fix

Is your garage door opening or closing on its own? Do your remotes only work intermittently? This "phantom operation" can sometimes be caused by a neighbor's remote signal interfering with yours or, in some cases, a glitch in the opener's logic board.
Before calling for a major repair, a full memory erase is the ultimate "fresh start." By wiping the slate clean and re-pairing only your devices, you eliminate the possibility of signal interference or corrupted code. If simpler garage door opener troubleshooting hasn't solved the problem, this is your next powerful step.

Your Step-by-Step Guide to Wiping Your Opener's Memory


While the exact location of the button can vary, the process is surprisingly universal for most modern garage door openers.
Safety First: Before you begin, make sure your garage door is closed and clear of any people, pets, or objects.
Understanding Learn Button Colors and Brands

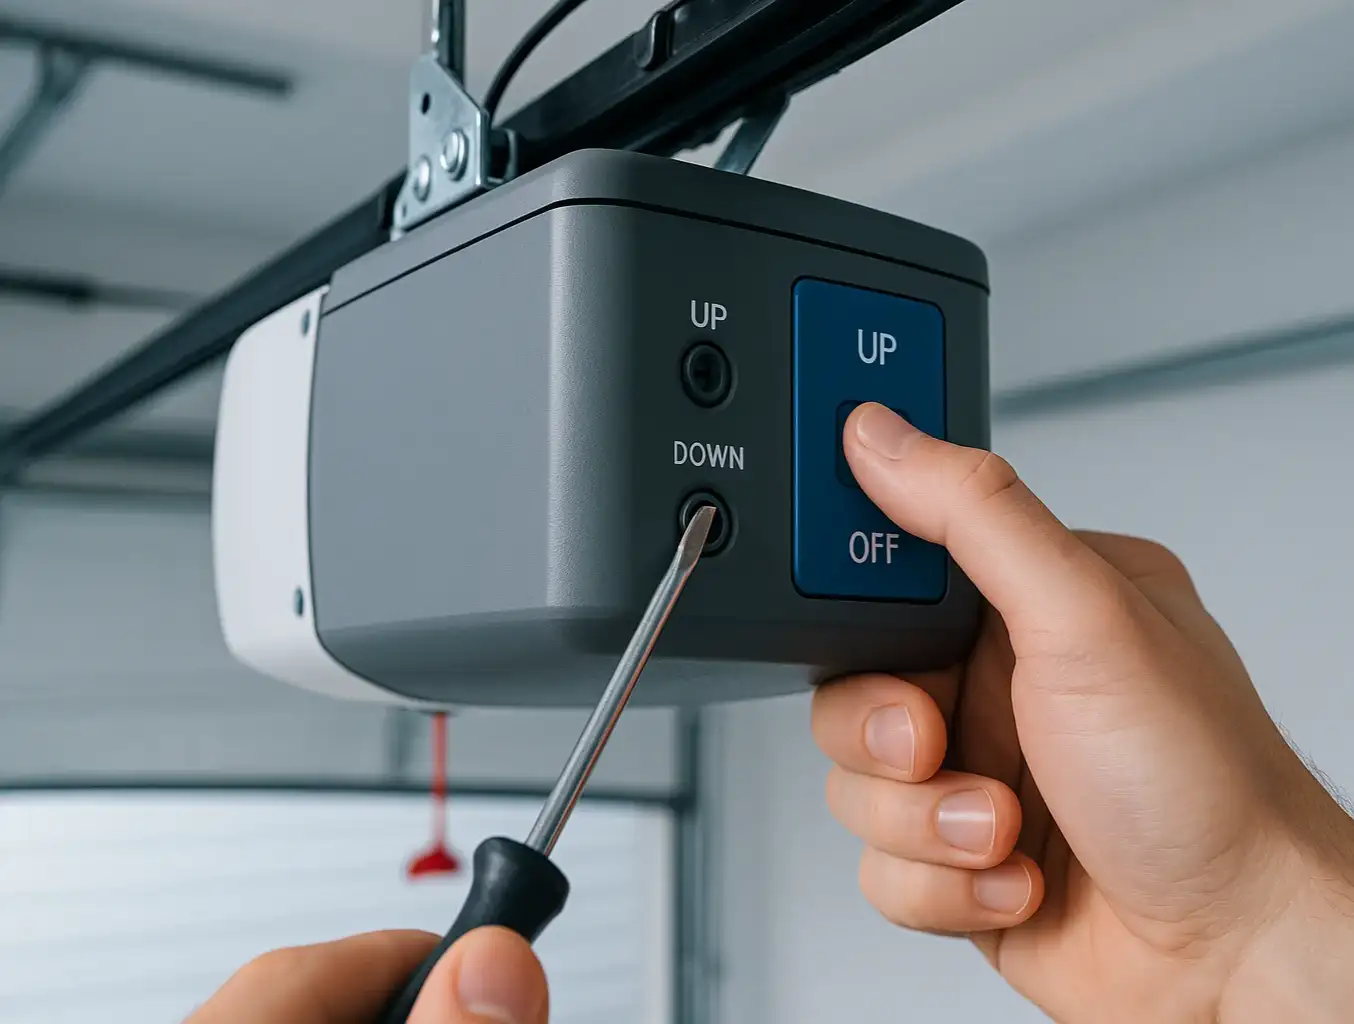
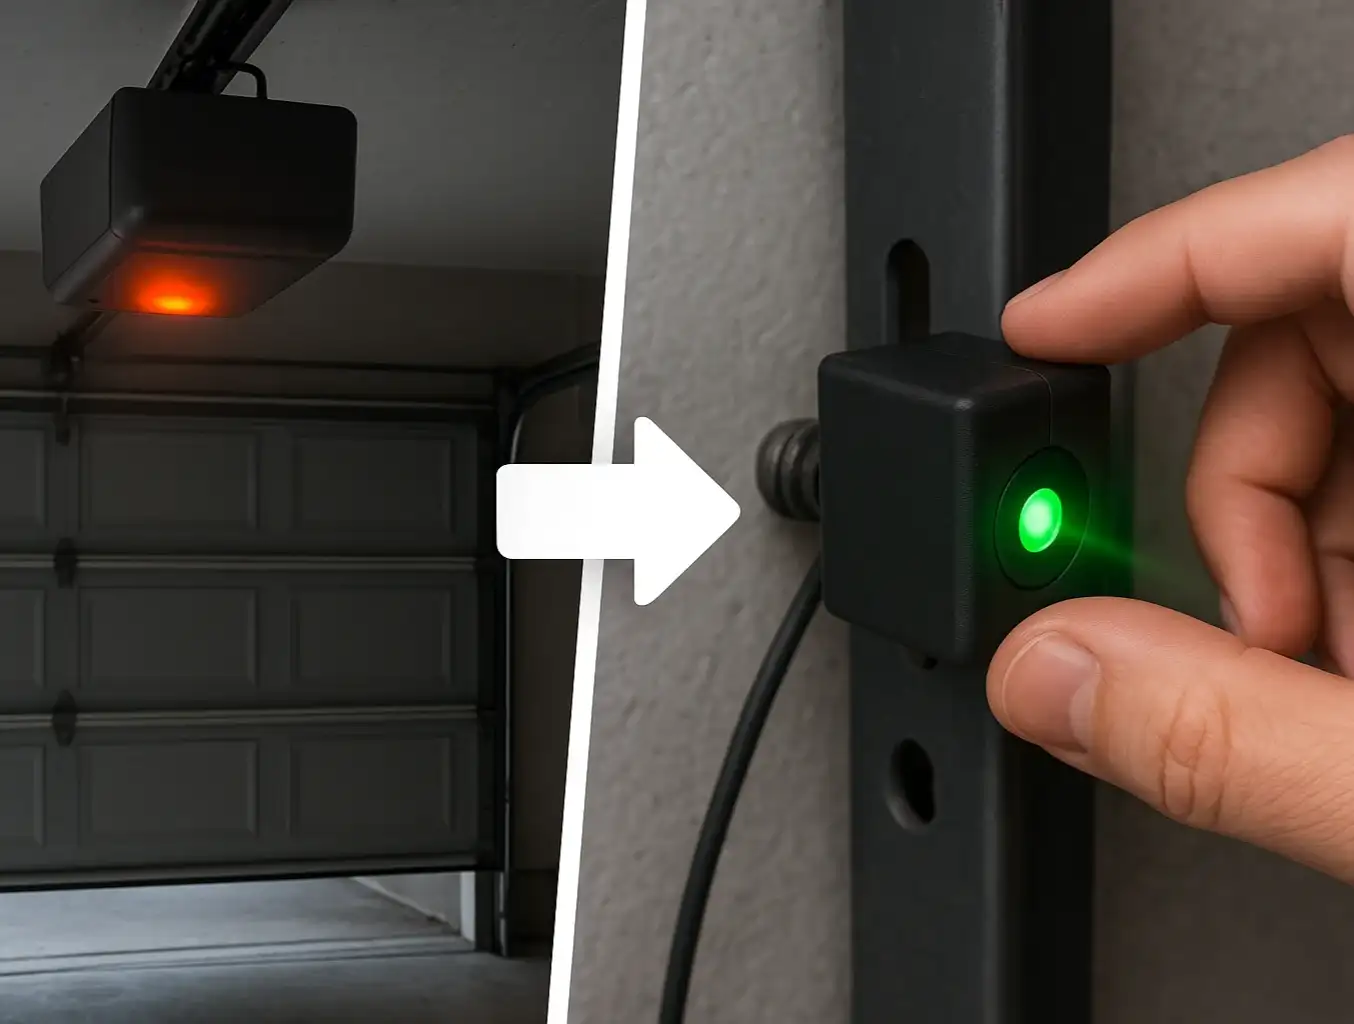
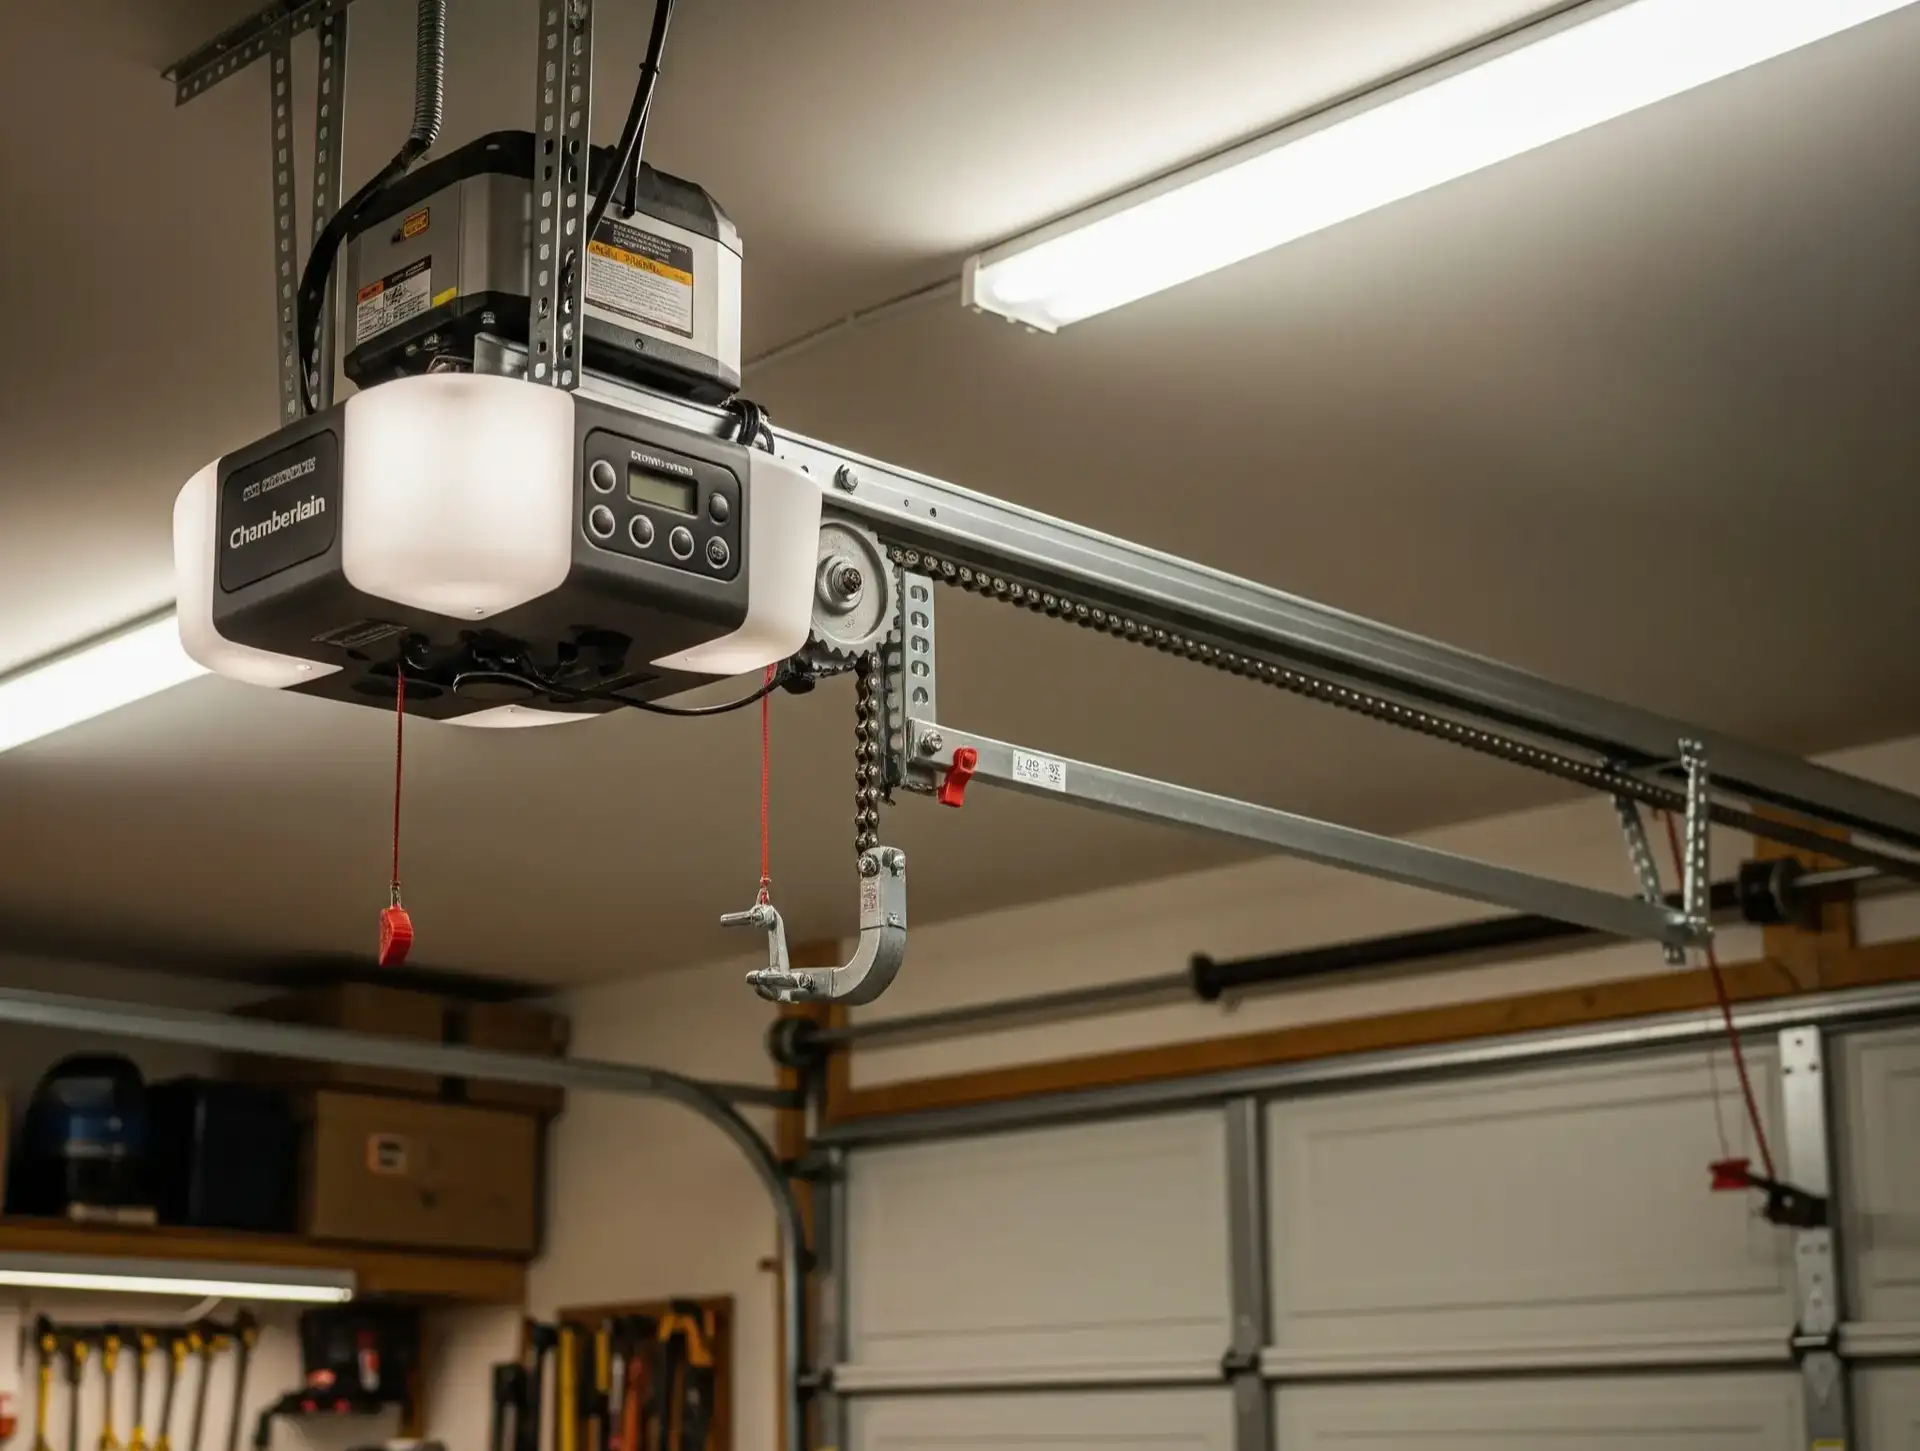
  1. Locate the "Learn" Button: You will need a stepladder to access the opener motor unit. The key to this process is finding the "learn" button on your garage door opener. It's typically a small, square button located on the back or side of the unit, often near a small LED light.
  2. Press and Hold: Press and hold the "Learn" button firmly. Do not just click it. You will need to hold it for about 6-10 seconds.
  3. Watch for Confirmation: Continue holding the button until the small LED light next to it goes out. This is the signal that the memory has been successfully erased.
  4. Release the Button: Once the light turns off, release the button.
That's it. The opener's memory is now completely clear. All previously programmed remotes, keypads, and vehicle links will no longer work.

The "Learn Button" Gallery: Find Yours in Seconds

Not sure what you're looking for? Most major brands use a color-coded system for their learn buttons.

A Note on Older DIP Switch Models

If you have a much older opener (typically from the early 1990s or before), you may not have a "Learn" button. These models use a series of small physical switches called DIP switches to set the code. If this is the case, changing the code is a manual process, and it may be best to consult a professional to ensure it's done correctly.
Understanding Learn Button Colors and Brands

You've Erased the Memory. Now What? Your Post-Erase Action Plan


Erasing the memory is only half the job. Now you need to rebuild your "approved key" list. Follow this security checklist to get back up and running securely.
Reprogramming Remotes and Keypads After a Reset

  1. Reprogram Your Remotes: Gather all the remotes you want to use. Follow our step-by-step guide for programming your garage door remotes one by one.
  2. Reset Your Wireless Keypad: Your old keypad code will no longer work. You'll need to reset a garage door keypad with a new, secure PIN.
  3. Clear and Reprogram Your Car's HomeLink System: This is the step most people forget. You'll need to know how to clear garage door opener in car systems and then reprogram them to the newly secured opener.
  4. Test Everything: Once everything is reprogrammed, test each device—remotes, keypad, and vehicles—to ensure they operate the door correctly.
  5. Secure Old Remotes: Discard any old, unaccounted-for remotes you find later, or remove their batteries to ensure they can't be used.
Reprogramming Remotes and Keypads After a Reset

Need more information?

Frequently Asked Questions (FAQ)


Will unplugging my garage door opener erase its memory?

No. Modern openers use non-volatile memory that retains settings even without power. The only way to clear it is by using the "Learn" button method.

How do I know for sure the memory is erased?

You'll get a visual confirmation when the LED light on the motor unit turns off after holding the learn button. The ultimate test is trying an old remote—it should no longer operate the door.

What's the difference between resetting a remote and erasing the opener's memory?

Resetting a single remote might clear its own settings, but it doesn't affect the opener's master list. Erasing the opener's memory (the "brain") is the only way to de-authorize all paired devices at once. It's the difference between throwing away one key versus changing the lock entirely.

My garage door still opens on its own after an erase. What's wrong?

If a full memory wipe and reprogram didn't solve the "phantom operation" issue, the problem is likely not signal interference. It could be a short in the wiring to your wall-mounted button or a more serious issue with the opener's logic board. At this point, it may be time to reset your garage door opener with professional guidance.

Securing Your Home Starts at the Garage


Taking a few minutes to perform a garage door opener memory erase is one of the highest-impact security actions you can take as a homeowner. It gives you a confirmed, clean slate and ensures you are the only one with access to your home. By understanding when and why to do it, you can take full control of your home's largest and most frequently used entry point.
For more on keeping your system secure, explore our guide to smart garage door security features.

You may also like


blog photo

Safety Protocols for Malfunctioning Garage Door Opener Photo-Eye Sensors

You’re heading out, you press the button, and… nothing. The garage door starts to close, then suddenly reverses. You look at the opener, and a light is blinking insistently. It’s a frustrating moment we’ve all faced, but that blinking light isn’t a sign of failure—it’s a diagnostic code. Your garage door’s safety system is trying to tell you exactly what’s wrong. More often than not, the culprit is the pair of small "photo-eye" sensors located a few inches off the floor on either side of your garage door opening. These sensors are the most critical safety feature of your entire system. Understanding how they work and what to do when they malfunction is essential for keeping your home and family safe. This guide will turn that frustration into a quick fix. We’ll decode the messages your sensors are sending and walk you through the immediate steps to restore safety and function to your garage door.