





Force Settings After Garage Door Opener Installation
Published: Apr 2, 2026
Ever had that moment? You hit the button, watch your garage door lower all the way to the ground, and just as it kisses the concrete… it immediately reverses and opens back up. It’s frustrating, confusing, and might make you think your opener is broken.
Here’s the surprising insight: in most cases, your garage door isn’t broken—it’s actually doing its job. That auto-reversal is a critical safety feature, and it’s telling you something important: its settings need a simple tune-up. Welcome to the world of travel limits and force settings, the two most important calibrations for a safe and smoothly operating garage door.
This guide will walk you through everything you need to know, transforming you from a puzzled homeowner into an informed one. We’ll help you diagnose the problem, understand the “why” behind it, and learn how to make these crucial adjustments yourself.
Is Your Garage Door Acting Strange? A Symptom Checker
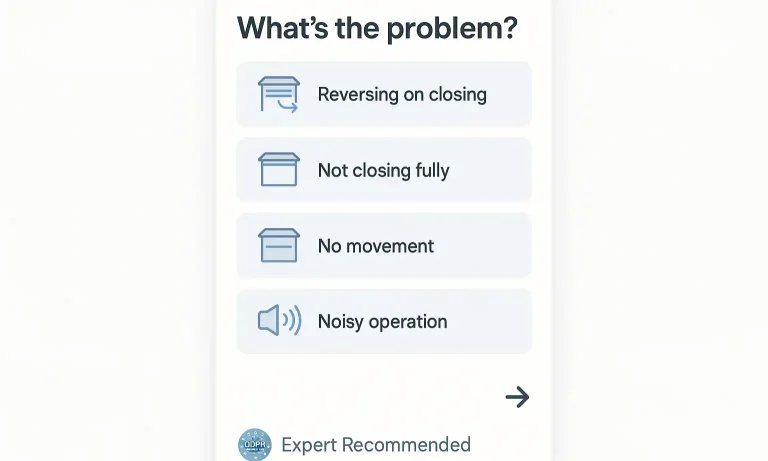
Before you grab a ladder, let’s pinpoint exactly what your door is doing. Miscalibrated settings manifest in a few common ways. See if any of these sound familiar.
- The Classic Reversal: The door closes completely, touches the floor, and then immediately opens again. This is the most common sign that your “down” travel limit is set too low or the force setting is too sensitive.
- The Hovering Door: The door stops a few inches short of the floor, leaving a gap. This usually means the “down” travel limit isn’t set low enough.
- The Slam and Stop: The door seems to slam into the ground with excessive force before stopping. This indicates the “down” travel limit is set too far.
- The Incomplete Open: The door doesn’t open high enough for your vehicle to clear. This is a clear sign the “up” travel limit needs adjustment.
If you’re nodding along to any of these, don’t worry. These are all solvable problems related to calibration. For a broader look at other potential issues, our guide on common garage door problems can offer additional insight.
The "Why": Understanding Travel Limits and Force Settings
So, what are these settings? Think of them as your opener’s brain, giving it two fundamental instructions.
Travel Limits: These settings tell the motor exactly where to stop the door’s journey.
- The “Up” Limit defines the fully open position.
- The “Down” Limit defines the fully closed position.
Force Settings (or Sensitivity): This setting tells the motor how much pressure it should apply before it encounters an obstruction and stops. It’s the core safety feature that prevents the door from closing on a person, pet, or object. If the force required to close the door exceeds this preset limit—even by just hitting the floor too hard because the travel limit is off—the motor assumes it hit an obstruction and automatically reverses.
This is the “aha moment”: your reversing door isn’t faulty; it thinks it’s protecting something because its force setting is being triggered by an incorrect travel limit.
The "How-To": Your Step-by-Step Calibration Guide
Ready to make some adjustments? Before you begin, find your garage door opener’s user manual if possible. While our guide is universal, your manual will have model-specific details.
Before You Begin: The Essential Safety Test
First, let’s confirm the safety reversal system is working.
- Open the garage door fully.
- Place a 2×4 board flat on the ground directly in the door’s path.
- Press the button to close the door.
- The door should touch the 2×4 and immediately reverse to the open position.
If it doesn’t reverse, stop immediately. Do not proceed with adjustments. Your opener has a serious safety issue that needs professional attention. If you find yourself in this situation, it’s time for some professional garage door opener troubleshooting.
Step 1: Identify Your Opener Type
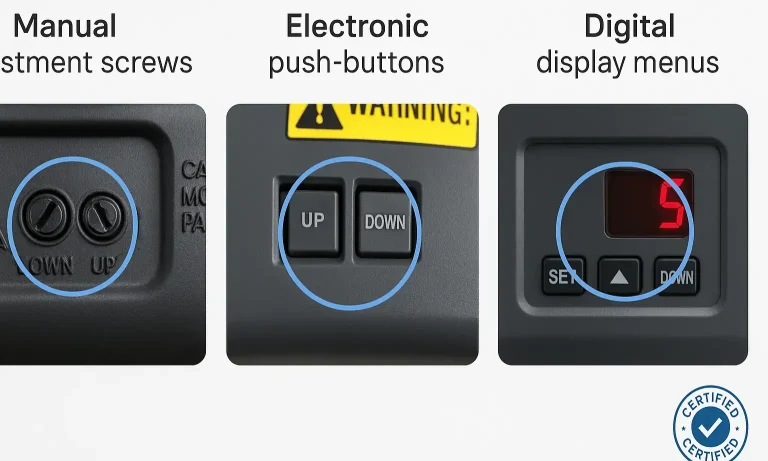
The biggest hurdle for most people is figuring out how to adjust their specific model. Almost all modern openers fall into one of three categories. Look at the motor unit on your ceiling to identify which type you have.
1. Manual Adjustment Screws: Common on older models (like many Craftsman and some LiftMaster openers). You’ll see two small, plastic screw heads, often labeled for “Up” and “Down” travel or marked with arrows.
2. Electronic Push-Buttons: Found on many modern Chamberlain, LiftMaster, and Genie models. These usually involve a set of three buttons: a black square button and two purple, yellow, or gray arrow buttons.
3. Digital Display Menu: The newest models (like some Genie and LiftMaster Elite Series) have an LCD screen and menu buttons that guide you through programming the limits electronically.
Step 2 & 3: Adjusting the Travel Limits and Force Settings
Here, we’ll cover the general process for each opener type. Always make small adjustments—a quarter turn of a screw or a few button presses—and then test the door’s operation.
For Openers with Manual Screws:
- Travel Limits: Use a flathead screwdriver. To increase travel (make the door go farther down or up), turn the corresponding screw in the direction of its arrow. To decrease travel, turn it against the arrow. One full turn typically equals about two inches of door travel. The process of adjusting garage door opener screws is often about small, incremental changes.
- Force Settings: There will be separate screws for “Up” and “Down” force. Be very careful here. Only adjust the force if the door reverses mid-travel for no reason. Turn the “Down” force screw slightly clockwise (no more than 1/8th of a turn) to increase the force just enough to allow a full close.
- Travel Limits: This process usually involves pressing and holding the black square button until a light comes on, then using the up/down arrows to move the door to the desired open or closed position. Pressing the black button again saves the setting. Because this can vary, consulting a brand-specific guide is helpful. For example, a proper LiftMaster door adjustment often follows this button sequence.
- Force Settings: Most of these models learn the force automatically during the travel limit setup. After you set the up and down limits, the opener will run a full cycle to measure and set the optimal force on its own.
For Openers with Electronic Push-Buttons:
For Openers with Digital Displays:
These are the most user-friendly. Use the menu buttons to navigate to “Travel Limits” or “Setup” and follow the on-screen prompts. The opener will guide you through setting the open and closed positions, and it will set the force automatically. For specific models like Genie, understanding how to adjust Genie garage door opener force adjustment settings via the menu is key to a successful calibration.
Mastery: Fine-Tuning and Troubleshooting After Adjustment
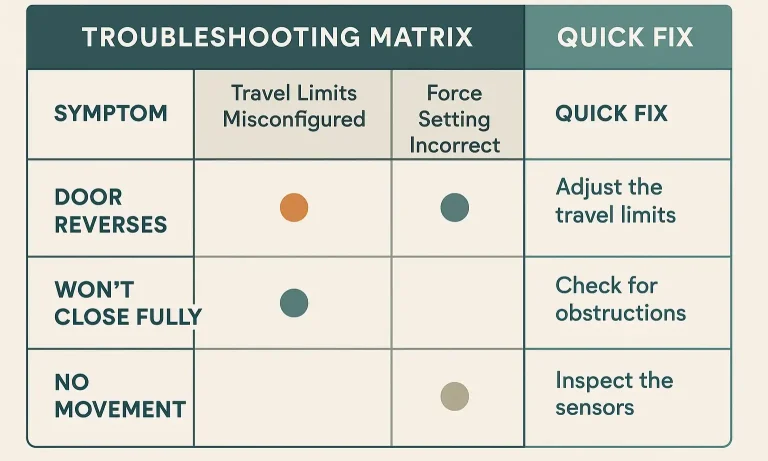
After you’ve adjusted the settings, run the door through two or three full open-and-close cycles. Then, perform the 2×4 safety test again to ensure your changes haven’t compromised this critical feature.
What if it’s still not working right? Use this quick diagnostic chart.
FAQ: Your Common Questions Answered
How do I know if the problem is my sensors or my force settings?
This is a great question. If the door reverses before it touches the ground, the problem is likely your safety sensors. Check for obstructions, misalignment (are the little LED lights on both sensors solid, not blinking?), or dirty lenses. If the door reverses after touching the ground, the problem is almost always your travel and force settings.
Can I set the “down” force too high? What’s the risk?
Yes, you can, and it is extremely dangerous. The force setting is what protects people and property. Setting it too high can disable the auto-reversal safety feature, turning the door into a significant hazard. Only increase the force in tiny increments as a last resort, and always re-test with a 2×4 board afterward. Never set it to maximum.
What do the blinking lights on my opener mean?
The flashing LED light on the motor unit is a diagnostic code. The number of flashes corresponds to a specific issue. For example, on many Chamberlain/LiftMaster models, one flash indicates a sensor issue, while five flashes can indicate a motor overheat or RPM sensor error. Consult your owner’s manual for your specific model’s error codes.
When to Call a Professional
You’ve learned the concepts, identified your opener, and tried the adjustments. If the door still refuses to cooperate, or if you’re uncomfortable making these adjustments yourself, it’s time to call in a professional. A trained technician can quickly diagnose underlying issues—like worn-out gears, balance problems with the door itself, or a faulty logic board—that calibration alone can’t fix. They can ensure your door is not only convenient but, most importantly, perfectly safe.
You May Also Like
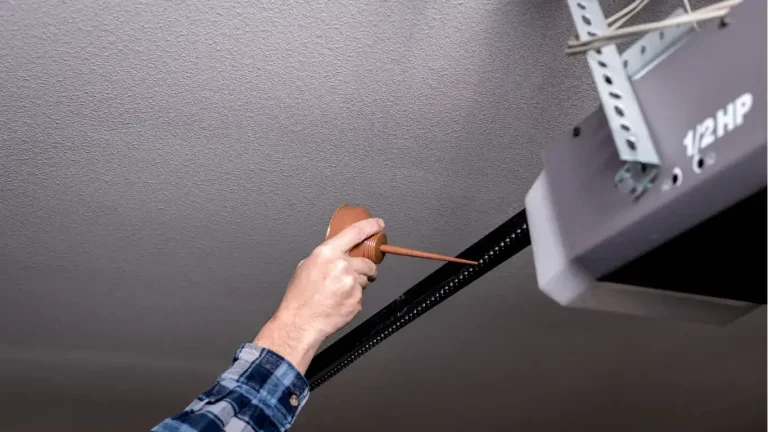
Explore Different Garage Door Opener Options
Upgrading your garage door opener can significantly enhance your home's convenience and security. As technology advances, homeowners have more options than ever when it comes to choosing the right opener for their…
Published Date: Oct 4, 2024
Installing a Garage Door Opener on an Unbalanced or Older Door System
You’ve got it. The brand-new, Wi-Fi-enabled, whisper-quiet garage door opener you’ve been wanting. You’ve set aside your weekend, unboxed the parts, and laid out the instructions. But before you mount that new motor,…
Published Date: Apr 1, 2026
Guide to Garage Door Openers for Low Headroom Spaces
Stared at that low ceiling in your garage and sighed, giving up on the dream of an automatic opener? You’re not alone. Many homeowners see the tight space between the top of their open garage door and the…
Published Date: Mar 31, 2026