





Installing a Garage Door Keypad on Uneven Surfaces
Published: Jul 6, 2026
You’ve got the new garage door keypad in hand, ready for the convenience of keyless entry. You head outside, find the perfect spot, and then… you stop. Your beautiful brick facade, textured stucco, or rugged stone wall suddenly looks less like a home and more like an impossible challenge.
If you’ve found yourself staring at an uneven surface, wondering how you’ll ever get a flat keypad to sit securely, you’re not alone. This is one of the most common hurdles in what should be a simple DIY project. Most installation guides assume you’re working with smooth wood or vinyl siding. But what about the rest of us?
Don’t worry. Mounting your keypad on a challenging surface isn’t just possible—it can be done securely and professionally. This guide will walk you through the specific tools, techniques, and insider tips to get the job done right, the first time.
The Golden Rule of Uneven Surfaces
Before we grab any tools, let’s start with the single most important principle: You must create a stable, flat mounting point for the keypad.
A keypad mounted directly onto a bumpy, uneven surface will wobble, allow water to seep in behind it, and eventually fail. The entire goal of the preparation work we’re about to cover is to honor this golden rule. Everything from your choice of fasteners to your weatherproofing technique stems from this one core concept.
For those with standard siding, the process is more straightforward. You can find a complete guide to a basic garage door keypad installation on our blog. But for brick, stucco, and stone, we need a more robust approach.
Tools & Materials: Your Masonry Mounting Toolkit
Working with masonry requires a different set of tools than a simple wood project. Using the wrong gear will lead to frustration, a damaged wall, or a broken keypad.
Essential Tools:
- Hammer Drill: This is non-negotiable. A standard drill won’t have the power to drill into brick or stone efficiently. A hammer drill combines rotation with a rapid hammering action to pulverize masonry as it drills.
- Masonry Drill Bits: You’ll need a set of carbide-tipped masonry bits sized to match the fasteners you choose.
- Level: To ensure your keypad isn’t crooked.
- Caulking Gun & Exterior-Grade Silicone Sealant: For weatherproofing. Choose a color that matches your wall or the keypad.
- Safety Glasses & Gloves: Protect yourself from dust and debris.
Fasteners & Anchors (The Most Important Choice):
For Brick/Stone:
- Tapcon Screws: These are specialty screws designed to tap their own threads into concrete, brick, and block. They are a popular and reliable choice.
- Lead or Plastic Anchors (Shields): You drill a hole, insert the anchor, and then drive a screw into it, causing the anchor to expand and grip the inside of the hole.
- Long Screws: You’ll need screws long enough to pass through the stucco and securely bite into the wood sheeting or studs behind it.
- Hollow Wall Anchors (Toggle Bolts/Molly Bolts): If you can’t hit a stud, these provide a secure hold in the hollow space behind the stucco and lath.
For Stucco:
Surface-Specific Sections: How to Mount on Brick, Stucco, and Stone
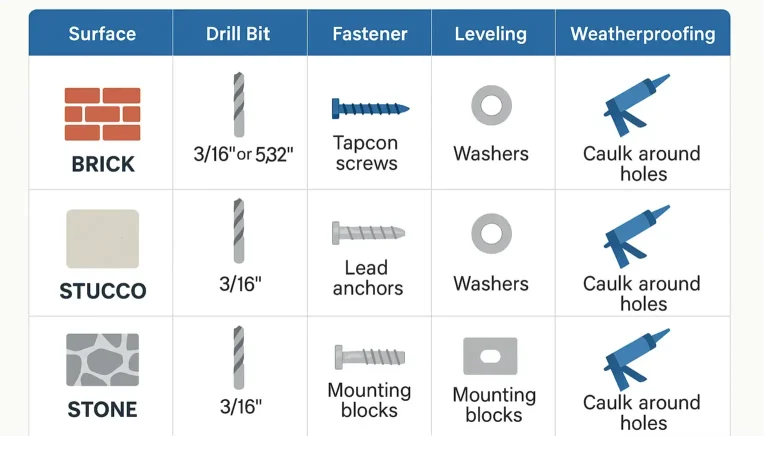
Every surface has its own personality and requires a slightly different approach. Here’s a breakdown of the game plan for each.
Mounting on a Brick Wall
Brick offers a strong foundation, but it’s brittle. The key is to drill correctly and choose the right location.
1. Drill into the Mortar, Not the Brick: Whenever possible, aim for the mortar joints between the bricks. Mortar is softer, easier to drill, and less likely to crack than the brick face. If you must drill into a brick, do it at least an inch from any edge.
2. Mark and Level: Hold the keypad where you want it and use a pencil to mark your drill holes. Use a level to ensure the marks are perfectly aligned.
3. Drill the Pilot Holes: Put on your safety glasses. Using your hammer drill and a masonry bit slightly smaller than your anchor or screw, drill your pilot holes to the required depth. Start slow to prevent the bit from “walking.”
4. Install Anchors: If using anchors, gently tap them into the holes until they are flush with the mortar.
5. Create a Flat Surface: This is a pro-level tip often shared in DIY forums. If the mortar joint is recessed, you can use washers or plastic spacers over the screw holes behind the keypad. This will bridge the gap and allow the keypad to sit flat against the brick faces, preventing it from rocking.
6. Mount the Keypad: Screw the keypad into place, alternating between screws to tighten it down evenly. Don’t overtighten, as this can crack the keypad housing.
7. Weatherproof: Apply a thin bead of silicone sealant around the top and sides of the keypad. Leave the bottom open to allow any moisture that does get in to drain out.
Mounting on a Stucco Wall
Stucco is a layered material, typically consisting of a finish coat, a base coat, and a metal lath over a weather barrier. The trick is getting through it cleanly and finding something solid to anchor into.
1. Find a Stud: Use a stud finder if possible. Anchoring directly into a wood stud behind the stucco is the most secure method.
2. Mark and Level: Position the keypad and mark your holes.
3. Drill Carefully: Start with a regular drill bit to get through the top layers of stucco to avoid cracking. Once you hit the solid base or wood sheathing, you can switch to a standard wood bit. If you’re using a hammer drill, keep it on the “drill only” setting until you’re sure you need the hammering action.
4. Choose Your Fastener: If you hit a stud, use long wood screws. If you are in a hollow spot, use a high-quality hollow wall anchor designed for thicker walls.
5. Mount and Seal: Secure the keypad, making sure it pulls snug against the wall without cracking the stucco. Apply your bead of silicone sealant around the top and sides.
Mounting on a Stone Wall
Natural stone is the most challenging surface due to its irregular shape and varying density. The golden rule of creating a flat surface is paramount here.
Create a Mounting Block (Best Method): For highly irregular stone, your best bet is to create a small, flat mounting surface.
- Cut a small block of exterior-grade wood (like cedar or a composite material) that is slightly larger than the keypad.
- Find the flattest possible stone and mortar area to attach this block. You may need to chisel away small high spots on the mortar.
- Use Tapcon screws and a generous amount of construction adhesive to secure the block to the wall.
- Mount the keypad to this flat block.
- Find Your Spot: Hold the keypad against the wall and find a position where it rocks the least.
- Drill with Patience: Use a high-quality masonry bit and a hammer drill. Stone can be very hard, so let the tool do the work and take breaks to prevent overheating the bit.
- Use Spacers: As with brick, you will likely need washers or spacers to stabilize the keypad. You may even need to stack several to fill a larger gap.
- Seal Thoroughly: This is critical on stone. Apply a careful bead of silicone around the entire perimeter of the keypad, paying close attention to any large gaps.
Direct Mount (If Possible): If you can find a relatively flat stone:
Mastery: Advanced Weatherproofing and Pro Tips
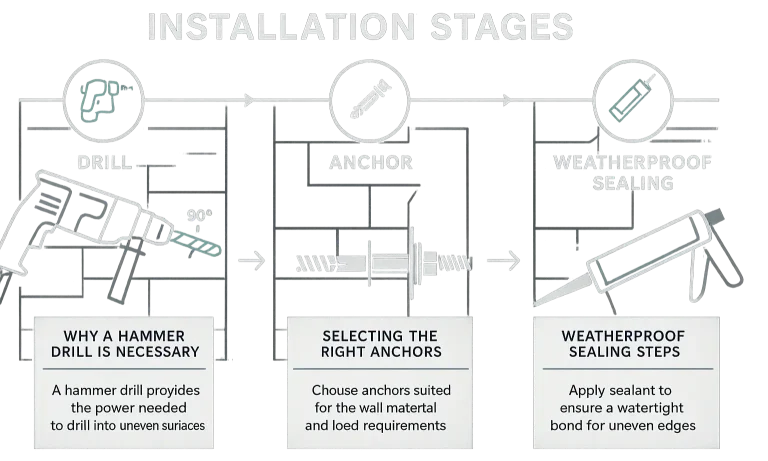
A good installation lasts. A great installation lasts and protects your home. Going the extra mile on weatherproofing prevents water from getting behind the keypad and into your wall, which can cause significant damage over time. Proper garage door seal installation for the door itself follows the same principle of keeping the elements out.
- “Back Butter” the Keypad: For a truly waterproof seal, apply a thin layer of silicone to the back perimeter of the keypad itself before pressing it against the wall. When you tighten the screws, it will create a perfect gasket.
- Seal Screw Holes: Before inserting a screw, put a small dab of silicone into the pilot hole or anchor. This seals the threads and prevents water from wicking in along the fastener.
- Check Your Work: After the first rain, check around the keypad to ensure your seal is holding and there are no signs of water intrusion.
Your Final Pre-Flight Checklist
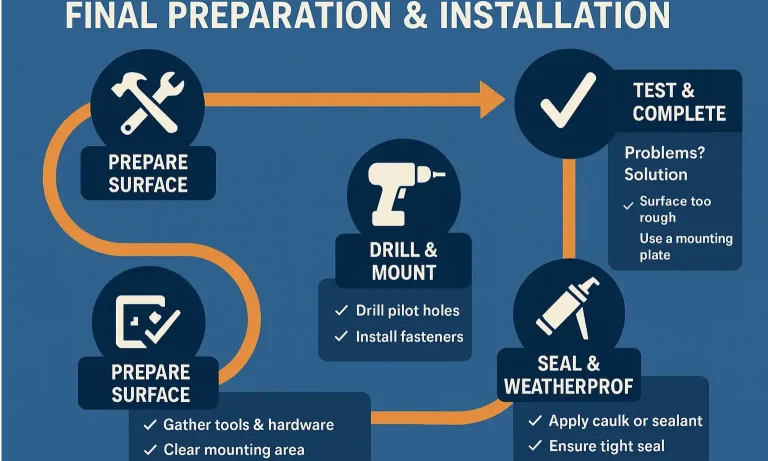
Before you start drilling, run through this final checklist. A little preparation can prevent major headaches.
Once installed, the final step is programming. Every brand is different, so refer to your manual or our guide on garage door keypad programming for detailed instructions.
- Battery Check: Does the keypad have fresh batteries installed?
- Location Check: Is the keypad at a comfortable height (typically 4-5 feet) and not exposed to the absolute worst of the weather?
- Tool Check: Do you have a hammer drill, the correct masonry bit, and all your fasteners?
- Safety Check: Are your safety glasses ready?
Once installed, the final step is programming.
Frequently Asked Questions (FAQ)
What is a garage door keypad and how does it work?
A garage door keypad is a small, weatherproof device mounted on the exterior of your garage. It allows you to open and close your garage door by entering a numeric PIN, eliminating the need for a key or remote. It works by sending a wireless signal to the motor unit, just like your car’s remote.
Where is the best place to put a garage door keypad?
Mount it on the door jamb or an adjacent wall, at a height that is comfortable for all users (around 4-5 feet from the ground). Choose a spot that’s convenient to access from your car or walkway, but try to avoid locations that are constantly blasted by direct rain or sun if possible.
Are garage door keypads safe?
Yes, they are very safe. Modern keypads use rolling code technology, which changes the access code every time you use it, preventing code theft. You can learn more about garage door keypad security vulnerabilities and best practices to keep your home secure.
My keypad isn’t working after I installed it. What should I do?
First, double-check the batteries. If the batteries are good, the keypad may need to be reprogrammed to sync with your opener. Sometimes a garage door keypad not working is a simple reprogramming issue. Also, ensure it’s within the recommended range of your garage door opener’s motor unit.
Can I do this myself, or should I call a pro?
If you’re comfortable using a hammer drill and the techniques described above, this is a very manageable DIY project. However, if you’re hesitant about drilling into your home’s exterior or if your garage door itself is having issues, like being a garage door off track and crooked, it’s always wise to call a professional. They can handle the installation quickly and ensure your entire system is working flawlessly. Related projects like garage door track installation also require a high degree of precision best left to experts.
You May Also Like
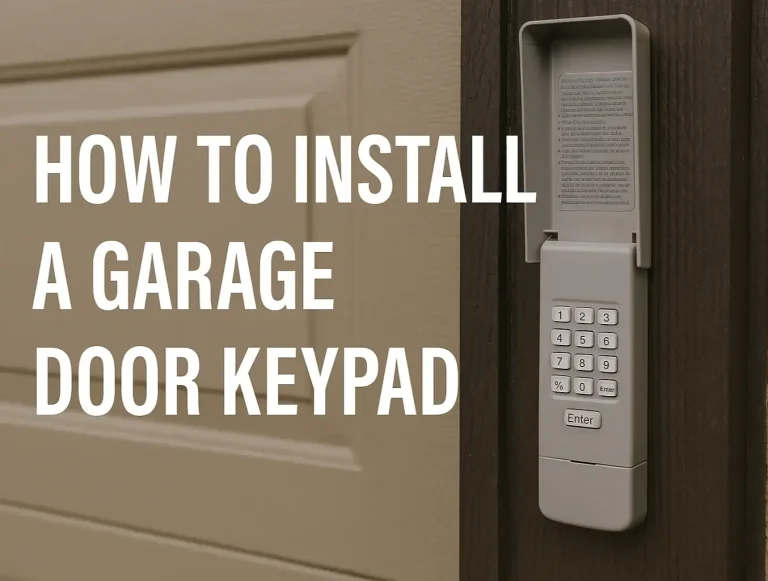
How to Install a Garage Door Keypad: Quick DIY Setup
Remotes keep vanishing between car seats and couch cushions. If that sounds familiar, it’s time to go remote-free. A wireless keypad with a simple 4-digit PIN lets everyone in without hunting for clickers or handing…
Published Date: Oct 22, 2025
A Simple Guide: How to Reset and Program a Garage Door Keypad
You just got the keys to a new place and the keypad code didn’t come with the house, so you’re googling “how to reset my garage door keypad.” The process is simple, but it starts in an unexpected place: the “Learn”…
Published Date: Nov 10, 2025
How to Replace Garage Door Keypad: A Complete Guide for Easy Installation
Garage door keypads offer convenience and security — no more fumbling for remotes or keys. But like any piece of tech, they wear out over time. If the buttons stop responding, access becomes spotty, or the unit quits…
Published Date: Jun 26, 2025