





Replacing an Opener: What Gets Reused and What Gets Replaced
Published: Oct 21, 2026
When evaluating a new motor unit, homeowners usually encounter two extremes: service contractors claiming every single bolt must be torn out, or DIY forums advocating risky “motor-head swaps” onto incompatible legacy rails. Deciding whether you should repair garage door opener components or invest in a full replacement comes down to safety compliance and mechanical compatibility.
By understanding component granularity, you can avoid unnecessary drywall removal while protecting your home from mechanical failures and voided warranties.
The Hero Decision Framework: Reusability at a Glance
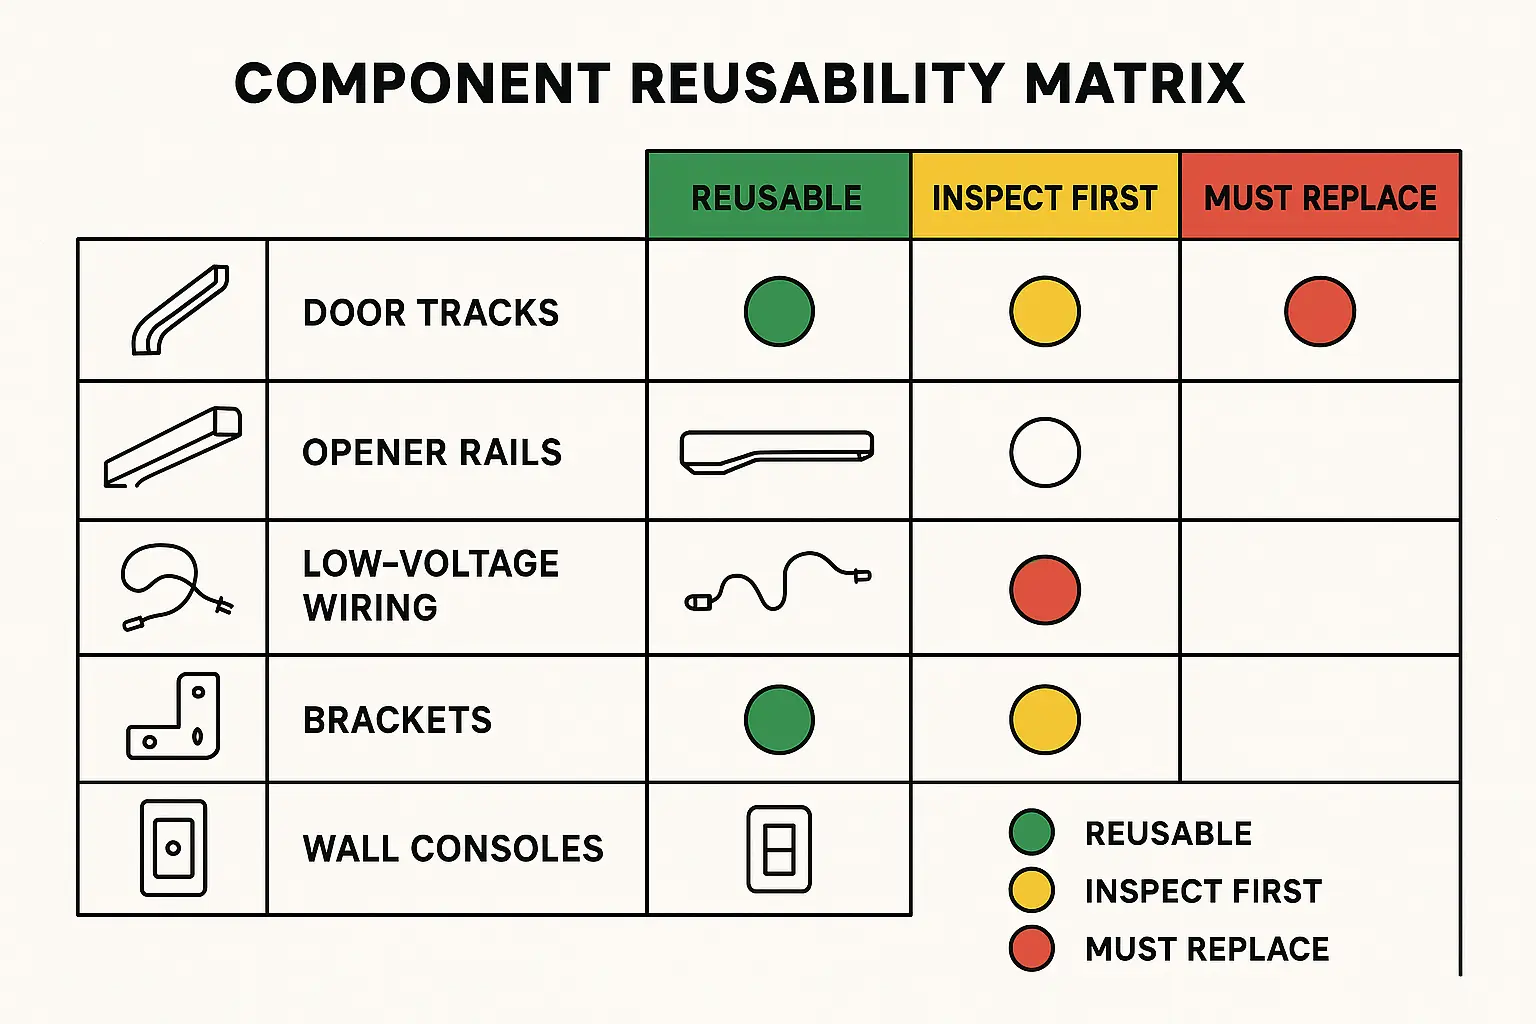
Knowing what hardware stays and what goes helps prevent wasted labor—especially when dealing with finished garage ceilings.
| Component | Status | Criteria & Technical Rationale |
|---|---|---|
| Door Tracks, Rollers & Springs | Keep | Reusable if the door passes a mechanical balance test and cables are fray-free. |
| Ceiling Angle Iron & Brackets | Keep | Reusable if structural lag bolts remain firmly anchored into solid timber ceiling joists. |
| Low-Voltage Bell Wiring | Inspect | 18–22 AWG wire is reusable if insulation is intact and free of staple pinches or oxidation. |
| Central Drive Rail & Belt/Chain | Replace | Mandatory replacement. Gear pitch mismatches strip internal drive gears. |
| Safety Infrared Photo-Eyes | Replace | Mandatory under UL 325 standards; old sensors lack modern logic protocols. |
| Wall Control Consoles | Replace | Modern post-2011 units use encrypted digital bus signals (e.g., Security+ 2.0). |
Demystifying Garage Door Anatomy: Door Tracks vs. Opener Rails
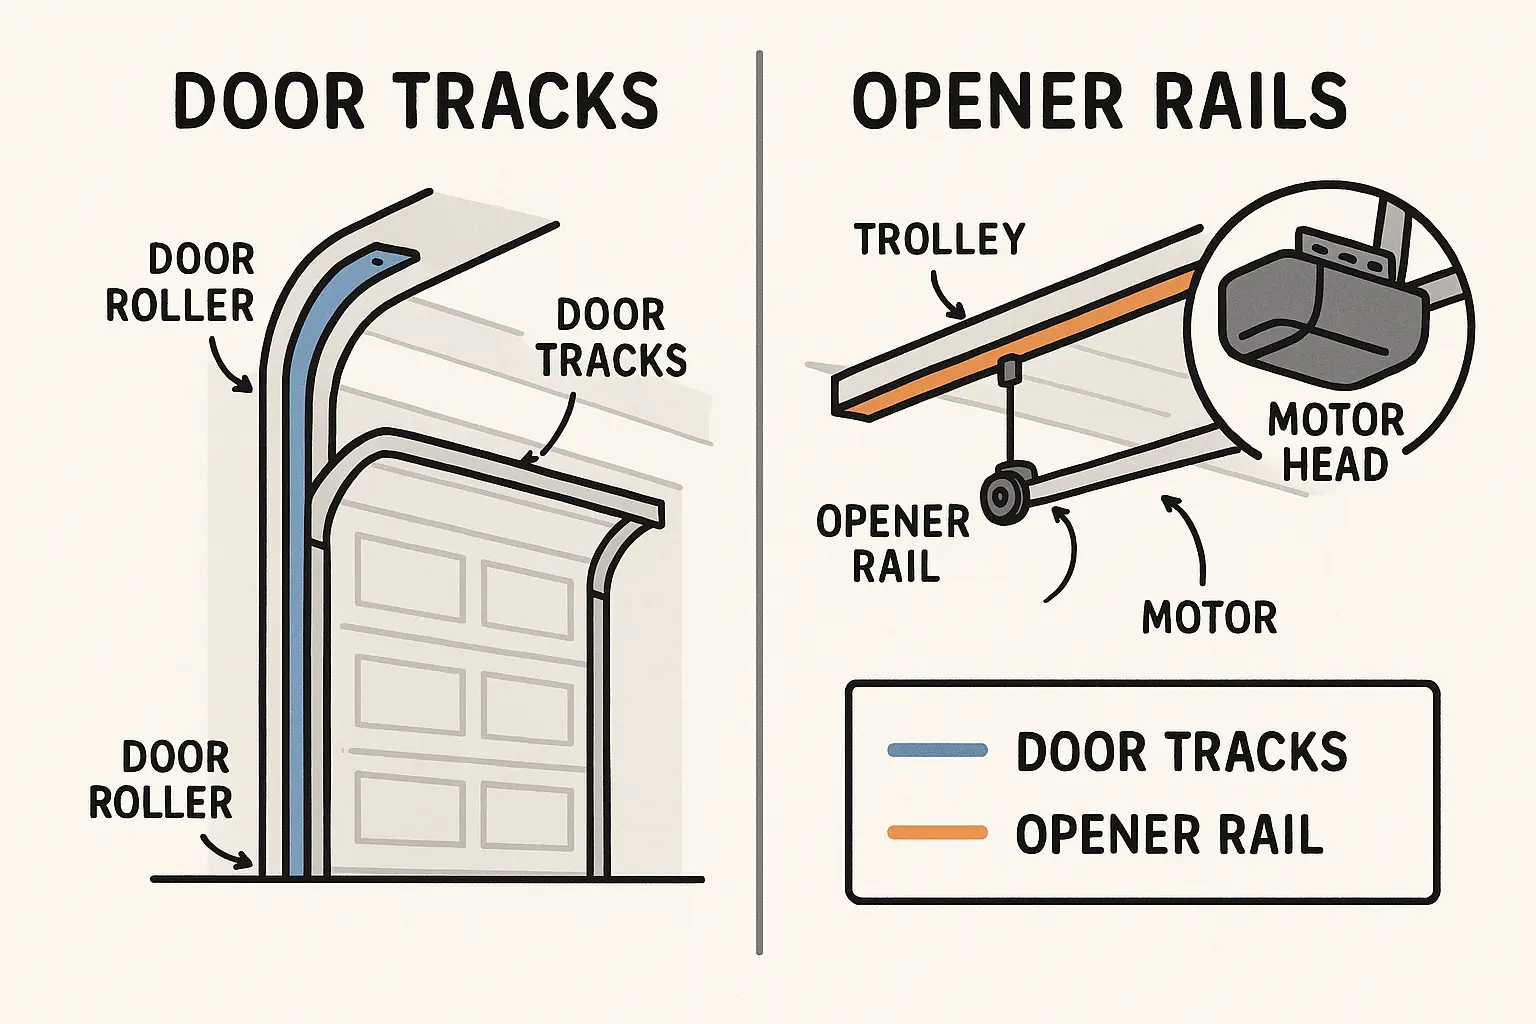
A common point of confusion during an upgrade garage door opener project is confusing door hardware with opener hardware:
- Door Tracks: These are the vertical and horizontal curved tracks mounted to your door frame and ceiling that guide the rollers. They belong to the physical door assembly and remain untouched during an opener replacement.
- Opener Rail: This central T-rail, C-channel, or tube beam runs down the middle of your garage ceiling. It houses the trolley, belt, or chain that pulls the door arm. The opener rail is specifically engineered for its matching motor head and must be replaced alongside it.
Component-by-Component Deep Dive
Understanding the mechanical and electrical realities of each part ensures you stay safe during a garage door motor replacement.
Ceiling Mounts & Support Brackets
Heavy-gauge perforated angle iron and header brackets can almost always be reused. As long as the lag bolts remain tightly anchored into structural timber ceiling joists without rust or metal fatigue, keeping your existing structural framework saves significant installation time.
Low-Voltage Signal Wiring
Safety sensors and wall buttons operate on standard 18 to 22 AWG 2-conductor bell wire. If your garage ceiling is finished with drywall, running new wire is tedious. As long as copper continuity tests clean and the jacket is free of staple punctures, existing pre-run wire is 100% electrically compatible with modern power heads.
Central Drive Rails & Trolley Assemblies
Never mount a new motor head onto an old drive rail. Modern DC motors produce up to 1.25 HP-equivalent torque. Coupling a high-torque motor head to a worn sprocket changes the gear pitch interface. This pitch misalignment causes trolley binding and strips internal nylon drive gears in under 30 days, instantly voiding the manufacturer warranty.
Safety Sensors & Wall Consoles
Federal UL 325 regulations enforce precise auto-reversal sensitivity and self-monitoring logic. Older photo-eyes cannot communicate properly with modern logic boards. Furthermore, systems built after 2011 replaced simple dry-contact wall buttons with encrypted digital bus architecture (such as Security+ 2.0). Legacy pushbuttons simply will not send the correct signal to operate a new motor.
Financial & Effort Comparison: DIY "Head-Swap" vs. Full Replacement Kit vs. Pro Install
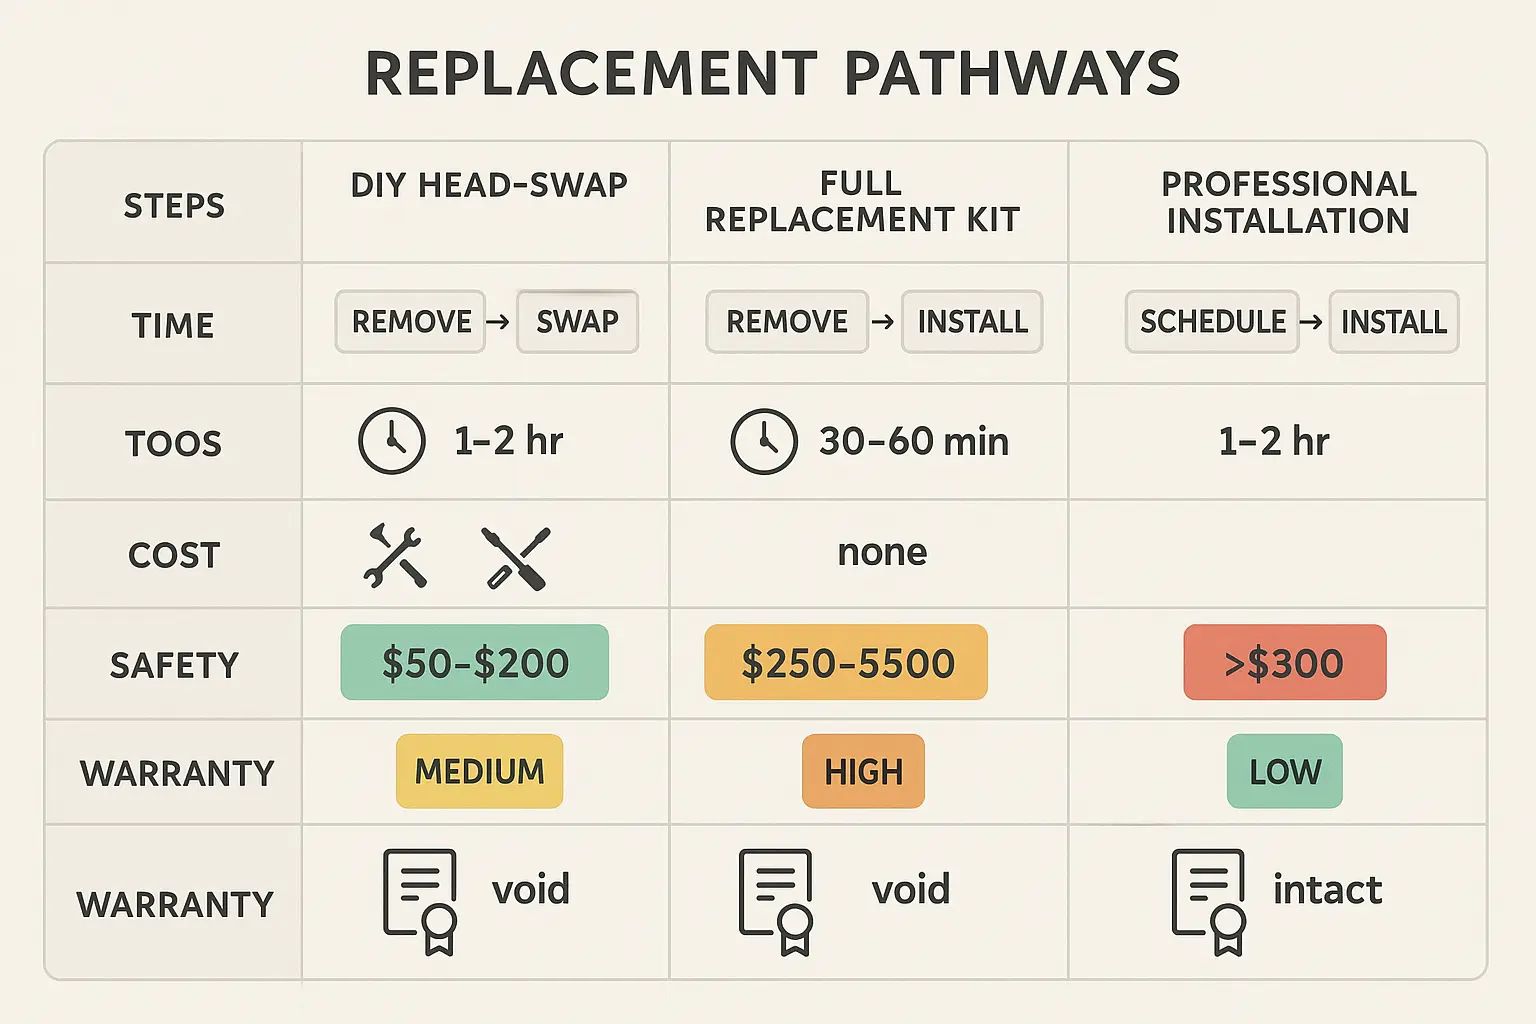
When evaluating when to replace garage door opener hardware, balance upfront savings against long-term risk:
- DIY “Head-Swap” (High Risk): Reusing old rails and sensors saves immediate labor but frequently causes nylon gear stripping, electrical errors, and uncalibrated safety reversals.
- Full DIY Replacement Kit (Moderate Risk): Takes 4 to 6 hours. Requires structural alignment, rail assembly, and tensioning without professional calibration tools.
- Certified Professional Installation (Zero Risk): Completed in under 2 hours. Ensures optimal torsion spring balance, exact travel limit setting, full UL 325 compliance, and complete warranty coverage for your garage door opener ecosystem.
Frequently Asked Questions
Can I reuse my existing garage door opener safety sensors?
No, safety sensors must be replaced when installing a new opener unit. Under UL 325 safety standards, photo-eye logic and voltage thresholds must match the specific circuit board of the new opener to guarantee reliable auto-reversal protection.
Do I need to replace the tracks on my garage wall when getting a new opener?
No, wall-mounted side tracks belong to the garage door assembly, not the opener unit. If your tracks are structural, aligned, and rust-free, they stay in place regardless of which motor unit you install.
Can I keep my old wall button with a new Chamberlain or LiftMaster opener?
No, modern openers manufactured post-2011 use encrypted digital bus controllers rather than traditional dry-contact closure buttons. Legacy wall buttons cannot transmit the encrypted digital signals required by modern power heads.
You May Also Like
Residential vs. Commercial Opener Duty Cycles: Matching the Operator to the Door
Published Date: Oct 20, 2026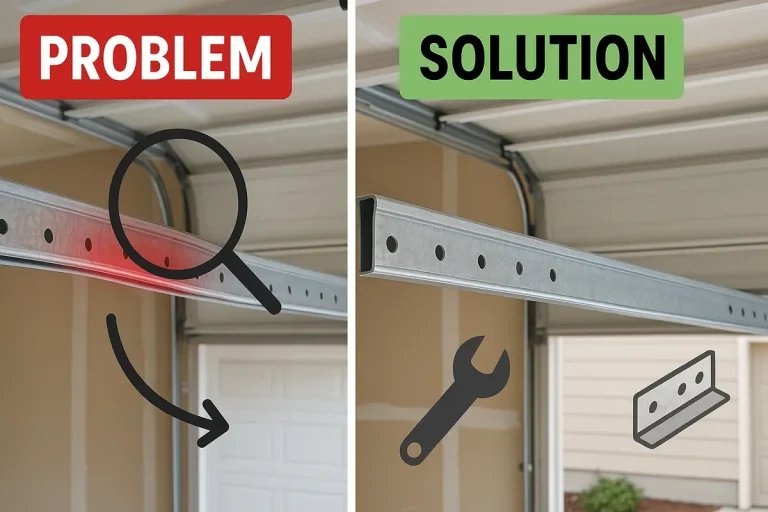
Opener Rail Bent or Sagging: Repair Options and Diagnostic Guide
Published Date: Oct 20, 2026
Smart Garage Security & Automation Hub: Evaluating Connected Entry Protection
Published Date: Oct 16, 2026