Our company logo

State

Precautions Before and After Resetting Your Garage Door Opener


Published: Jun 19, 2026

It’s a familiar frustration. You press the button on your remote, and… nothing. Or maybe the door closes part-way, then mysteriously reverses. Your first instinct, fueled by countless online forums, is probably to reset the garage door opener. It seems simple enough, right?

But here's a thought that might give you pause: the average garage door weighs between 150 and 400 pounds. It's the largest and heaviest moving object in most homes. Before you press a single button on that motor unit, it's critical to ensure the system supporting all that weight is sound. A simple reset on a mechanically compromised door can turn a minor inconvenience into a major accident.

This guide is different. We’re not just going to show you how to reset your opener; we’re going to show you how to do it safely. Think of this as a pre-flight checklist for your garage door—a few simple steps to ensure your quick fix doesn't create a bigger problem.

Before You Begin: Is a "Reset" Really What You Need?


The term "reset" gets thrown around a lot, but it can mean several different things. Performing the wrong procedure won't solve your problem and could even create new ones. Let's clear up the confusion. Think of it like this: there are three main types of resets, each for a different situation.
Garage Door Opener Reset Methods Explained

  • The Power Cycle (The "Soft Reset"): This is the classic "turn it off and on again." It's for clearing random electronic glitches, like when the opener is acting erratically for no apparent reason.
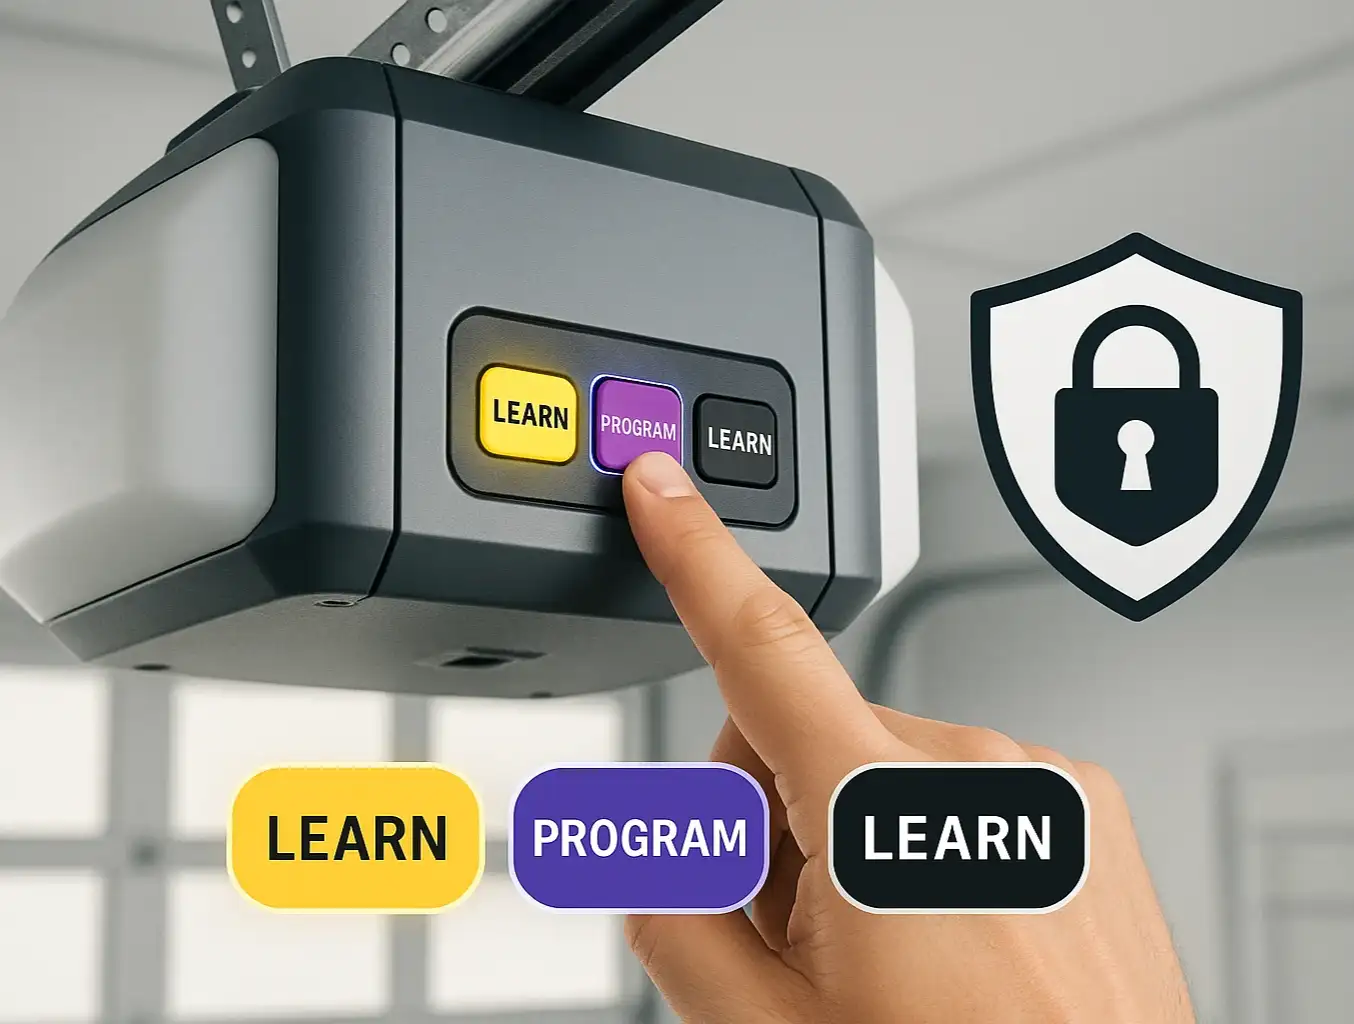
  • The Security Wipe (The "Hard Reset"): This erases the opener's memory of all remotes and keypads. It's the go-to solution if you've lost a remote or are moving into a new home and want to ensure old codes won't work.
  • The Re-Calibration (The "Limit & Force Reset"): This involves resetting and re-learning the door's travel limits (where it stops when open/closed) and the force needed to move it. This is your solution if the door isn't closing all the way or reverses unexpectedly.
Identifying the right procedure is the first step toward a successful fix. Trying to re-calibrate when all you needed was a power cycle is a waste of time. Trying a power cycle when you have a lost remote won't secure your home.
Garage Door Opener Reset Methods Explained

The Complete Reset Protocol: A 3-Part Safety-First Walkthrough


Ready to tackle the problem? Let's walk through the process together, putting safety at the center of every step.

Part 1: Your Pre-Reset Safety Inspection (The 2-Minute Check)

This is the most important step, and the one most guides skip. You must verify that the door is mechanically sound before you ask the opener to move it. An opener is designed to lift a balanced door, not a broken one.
First, disconnect the opener. Pull the red emergency release cord. This will allow you to move the door by hand. Now, walk through this quick visual inspection:
  • Garage Door Springs: Look at the springs above your door (torsion springs) or along the sides (extension springs). Do you see any gaps in the coils? A broken spring is a common reason for an opener to fail, and operating the opener with a broken spring is extremely dangerous.
  • Cables: Check the steel cables on either side of the door. Are they frayed, rusted, or hanging loose? These cables do the heavy lifting and must be in good condition.
  • Rollers & Track: Look at the rollers in the track. Are they worn, cracked, or out of the track completely? Ensure the track is free of debris or obstructions.
  • Manual Operation: Gently try to lift the door by hand. It should feel relatively light (around 10-15 pounds) and move smoothly. If it feels extremely heavy or gets stuck, you have a mechanical issue that a reset won't fix.
Garage Door Safety Checks Before Resetting the Opener
If you find any issues during this check, stop immediately. These problems require professional attention. For a more detailed breakdown of what to look for, check out this comprehensive garage door maintenance checklist.

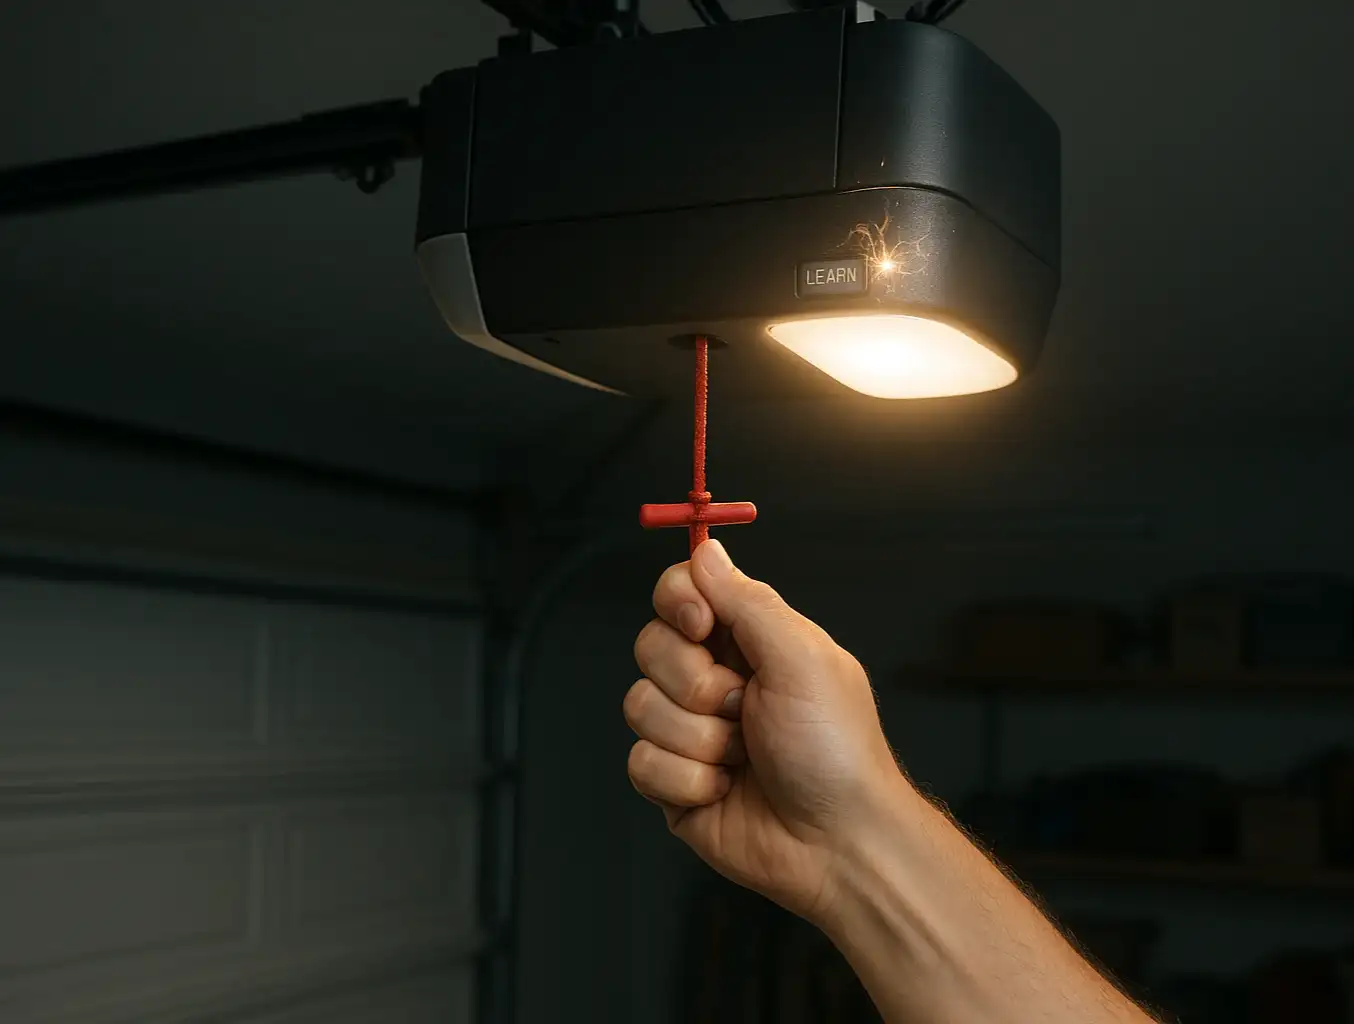
Part 2: Performing the Reset (The Right Way)

Once you've confirmed the door is mechanically sound, you can proceed. Re-engage the opener by pulling the emergency cord toward the door until the trolley clicks back into place.
Now, follow the procedure for the reset type you identified earlier:
For a Power Cycle:
Unplug the garage door opener from the electrical outlet.
Wait at least 60 seconds. This allows the internal circuits to fully discharge.
Plug the opener back in.
Test the door with your remote or wall control.
For a Security Wipe (and Reprogramming):
Locate the "Learn" button on your motor unit. It's often a square button, sometimes colored purple, red, orange, or green.
Press and hold the "Learn" button until the indicator light next to it goes out. This usually takes about 6-10 seconds. All previous codes are now erased.
To reprogram your remote, press and release the "Learn" button once. The light will turn on.
Within 30 seconds, press the button on your remote that you wish to use. The opener lights will likely flash to confirm the code has been learned.
Common Mistake: Many people press and release the "Learn" button, which puts it in programming mode but doesn't wipe the codes. You must press and hold it down to perform the security wipe. For a more detailed guide on how to reset garage door opener models, our full troubleshooting post can help.
For a Re-Calibration: This process varies significantly between brands (LiftMaster, Chamberlain, Genie, etc.). It typically involves using the "up" and "down" arrows and the "Learn" button to set the new open and close positions. Consult your owner's manual or look up instructions for your specific model to do this correctly.
If you find yourself in a power outage or a situation where the opener is completely unresponsive, you may need to rely on the garage door emergency release to operate the door manually.

Part 3: Post-Reset Safety Validation

You're not done yet! After any reset that affects the door's travel or codes, you must confirm that its built-in safety features are working. These are the most important overhead door safety devices you have.
The Photo-Eye Sensor Test:

  • Press the button to close the door.
  • As the door is descending, wave an object (like a broom handle) through the path of the invisible beam connecting the two sensors near the floor.
  • The door should immediately stop and reverse to the fully open position. If it doesn't, the sensors may be misaligned or faulty.
The Auto-Reverse Test (The 2x4 Test):
  • Lay a standard 2x4 piece of wood flat on the ground in the center of the door's path.
  • Press the button to close the door.
  • When the door makes contact with the wood, it should immediately reverse. If it continues to push down, the force setting is too high and needs to be adjusted.
Garage Door Safety Checks Before Resetting the Opener
If your door fails either of these tests, it is not safe to use. Disconnect the opener and operate the door manually until the safety systems can be professionally serviced.

Need more information?

Troubleshooting: Common Post-Reset Problems


"I reset my opener, but my remote still doesn't work."
Did you complete the reprogramming step after wiping the codes? Wiping the memory means you have to re-teach the opener to recognize your remote. Also, don't forget the simplest solution: check the remote's battery!
"Why is the opener light blinking?"
A blinking light is often a diagnostic code. The number of blinks can tell you the specific problem. A common cause is a misaligned or obstructed photo-eye sensor. Check to make sure the small LED lights on both sensors are solid (not flickering).
"The door closes part-way and then goes back up."
This is a classic symptom of a few issues. It could be that the closing force is set too low, or the travel limits need to be re-calibrated. It can also happen if the photo-eye sensors are obstructed or misaligned, so check them first.

Your Printable Guide to a Safer Reset


Garage Door Opener Reset Checklist for Homeowners
We've covered a lot of ground, and remembering it all in the moment can be tough. That's why we've condensed this entire process into a simple, one-page checklist. Download it, print it out, and keep it in your garage so you always have a safety-first guide at your fingertips.
Resetting a garage door opener can often be a quick and satisfying DIY fix. By taking a few extra minutes to prioritize safety, you ensure that you're not just fixing the problem, but also protecting your property and your family. If at any point you feel unsure, or if your door fails any of the critical safety checks, don't hesitate. A professional technician can diagnose and resolve the issue safely and efficiently.

Garage Door Opener Reset Checklist for Homeowners

You may also like


blog photo

Differentiating LiftMaster, Genie, and Chamberlain Opener Procedures

You’ve just moved into a new home. You have the keys to the front door, but what about the garage? Who else has a remote? The old homeowner? The realtor? It’s a nagging security question most people forget to ask. Or perhaps you’ve simply lost a remote, and the thought of a stranger having access to your home is keeping you up at night. Whatever your reason, you've landed here because you need to reset your garage door opener. But as you’ve probably discovered, it’s not as simple as finding one-size-fits-all instructions. The process is surprisingly different depending on the brand. You’re in the right place. Think of this as your definitive map. We’re going to walk through this together, translating the technical jargon and clarifying the subtle but critical differences between the big three: LiftMaster, Genie, and Chamberlain.