





The Definitive Guide On A Two-Seal System For Sloped Driveways
Published: Jul 9, 2026
That sinking feeling when you open the door to your garage and see it again: a dark, persistent puddle of water creeping in from under the door. You’ve probably tried everything. Maybe you even replaced the rubber strip on the bottom of the door, only to find the water still finding its way in during the next downpour.
If your driveway slopes down toward your garage, you’re not just dealing with a simple leak; you’re fighting gravity. The standard solutions often fail because they don’t address the core problem: water pooling against the door and exploiting the smallest gaps, especially at the sides where the slope creates an uneven seal.
But there is a definitive solution. It’s not about finding a bigger, thicker seal for your door. It’s about rethinking the seal itself and implementing a two-part system designed specifically for this frustrating challenge.
The Two-Seal System Explained
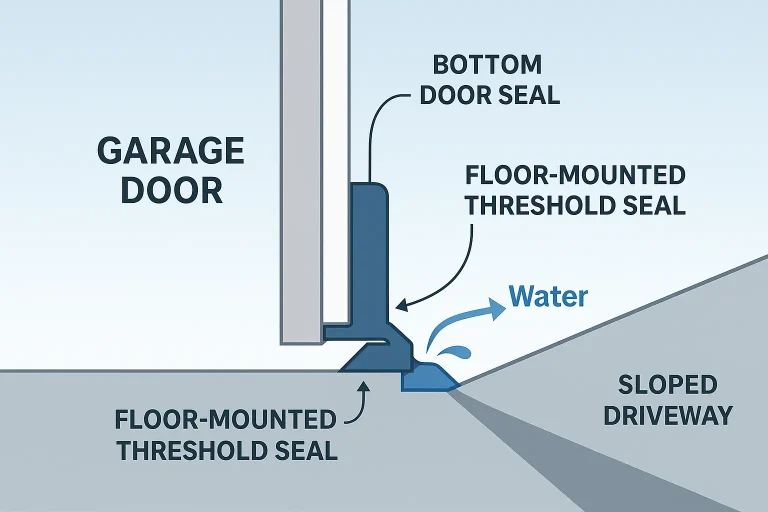
For most homeowners, the term “garage door seal” means one thing: the rubber gasket attached to the bottom of the door. While that’s a crucial component, it’s only half the story on a sloped or uneven surface. To truly waterproof your garage, you need to think of it as a system with two equally important parts working together: the Bottom Seal and the Threshold Seal.
- The Garage Door Bottom Seal: This is the flexible vinyl or rubber seal on the door itself. Its job is to compress against the floor when the door closes, creating the primary barrier. For a sloped driveway, you need a high-quality, pliable seal that can conform to minor imperfections. You can learn about the different material options, like EPDM and vinyl seals, to choose the best one for your climate.
- The Garage Door Threshold Seal: This is the game-changer. It’s a sturdy strip of rubber or vinyl that you adhere directly to the garage floor. It sits just behind the garage door, creating a raised barrier—a mini dam—that stops water from ever reaching the door gap in the first place. The bottom seal of the door then presses down on top of this threshold, creating a nearly impenetrable, layered defense.
When combined, these two seals form a comprehensive barrier that a simple bottom seal could never achieve on its own.
Your Step-by-Step Waterproofing Plan
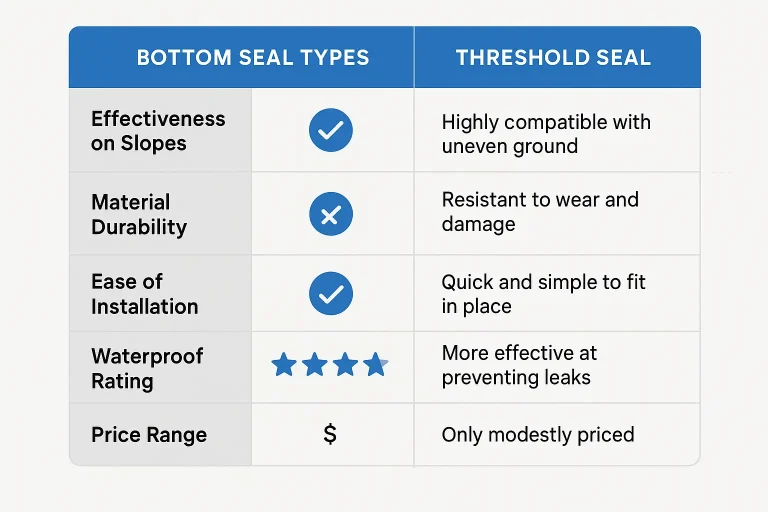
Tackling this project is about being methodical. We’ll first ensure you have a fresh, effective bottom seal on the door, and then we’ll install the threshold seal to complete the system.
Choosing the Right Materials
Not all seals are created equal. The effectiveness of your two-part system depends on selecting the right materials for your specific situation. Consider the height of the threshold you’ll need to block water and the type of bottom seal that fits your door’s track. If you notice persistent issues, it’s good to understand the common garage door seal failure signs.
How to Replace Your Garage Door Bottom Seal
Before installing the threshold, start with a fresh bottom seal. An old, cracked, or flattened seal won’t create enough pressure to seal properly against the new threshold.
- Open the Door: Raise the garage door enough to work on it comfortably. Unplug the garage door opener for safety.
- Remove the Old Seal: The seal is held in a track (retainer) on the bottom of the door. You should be able to slide it out from one end. If it’s stuck, a flathead screwdriver can help pry it out.
- Clean the Track: Use a cloth and a mild degreaser to clean out any dirt or debris from the retainer.
- Install the New Seal: Lubricate the track with a little dish soap and water. This makes sliding the new seal in much easier. Feed the new seal into the track, pulling it through from the other side.
- Trim the Excess: Once the seal is in place, use a utility knife to trim any excess material so it’s flush with the door edges.
For a more detailed walkthrough, check out our comprehensive guide on how to install a garage door bottom seal.
How to Install a Threshold Seal for a Perfect Waterproof Barrier
This is the most critical stage for fixing your sloped driveway problem. Proper preparation is everything here—don’t rush it.
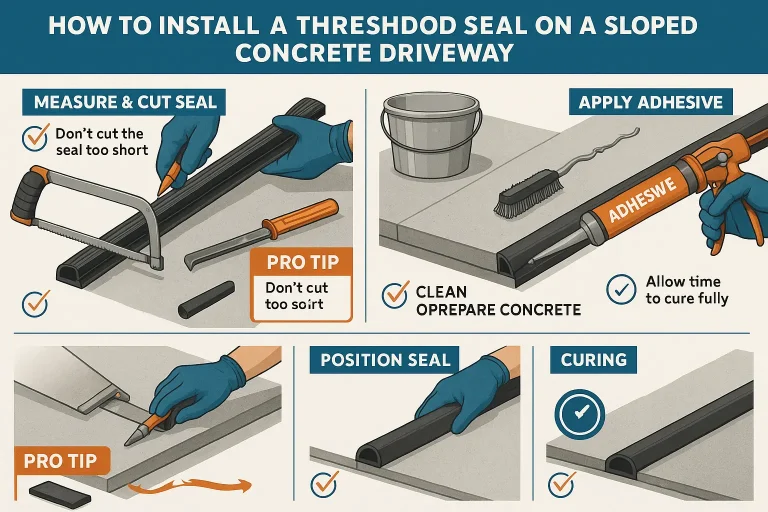
- Position and Mark: Close the garage door. Lay the threshold seal on the floor behind the door, ensuring the ridged side faces in. The back edge of the seal should be snug against the inside face of the door. Use a pencil to trace a line on the floor along the front and back of the seal.
- PREPARE THE CONCRETE: This is the step most people get wrong. Open the door and use the lines as your guide. The area where the adhesive will go must be impeccably clean. Use a wire brush to remove any loose debris, then sweep and vacuum the area. Finish with a concrete degreaser or denatured alcohol to remove any oils or residue that could prevent the adhesive from bonding. The floor must be completely dry before proceeding.
- Apply the Adhesive: Cut the tip of the liquid adhesive tube. Following the manufacturer’s instructions, apply the adhesive to the floor between your marked lines. A zigzag pattern is usually most effective.
- Set the Threshold: Carefully place the threshold seal onto the adhesive, aligning it with your pencil marks. Press down firmly along the entire length of the seal to ensure solid contact with the adhesive.
- Close the Door & Cure: Close the garage door onto the threshold seal. The weight of the door will help create a tight bond while the adhesive cures. It’s crucial to leave the door closed and not drive over the seal for at least 24 hours to allow the adhesive to fully set.
This complete approach offers a robust solution, especially for a garage door bottom seal on an uneven floor caused by a slope.
Frequently Asked Questions (FAQ)
What if I still see a gap at the bottom after installation?
If a small gap persists, first check your door’s close-limit settings on the opener—it may need to be adjusted to close more firmly. If the gap is due to a very uneven floor, you may need a larger-profile bottom seal. For persistent issues, our guide on how to fix a gap at the bottom of a door offers more advanced solutions.
My concrete is cracked or badly pitted. What should I do?
The threshold adhesive needs a smooth, stable surface to bond. Before installation, use a concrete patching compound to fill any significant cracks or pits in the area where the threshold will sit. Let it cure completely before proceeding.
What kind of adhesive should I use?
Most threshold seal kits come with a recommended construction-grade adhesive. If you need to buy it separately, look for a high-strength, waterproof polyurethane construction adhesive that is rated for bonding rubber/vinyl to concrete.
My driveway is extremely steep. Is a threshold seal enough?
For very steep driveways where a large volume of water flows toward the garage, a threshold seal might be overwhelmed. In these cases, consider installing a channel drain (also called a trench drain) in the concrete just in front of the garage door. This is a more involved project but is the most effective solution for severe water flow issues.
Your Path to a Dry Garage
By understanding and implementing the Two-Seal System, you can finally win the battle against water in your garage. It transforms the problem from a simple, ineffective fix to a complete, thought-out solution that addresses the root cause: the sloped driveway.
This project is a rewarding DIY task that protects your belongings, prevents mold and mildew, and preserves the foundation of your home. Taking the time to prepare the surface and install both the bottom and threshold seals correctly will give you peace of mind every time it rains.
If you’re ready to learn more about protecting your garage from the elements, explore the big benefits of garage door weatherstripping or our guide on how to seal other garage door gaps to fully insulate your space. And if you decide you’d rather leave it to the professionals, the experts at Up & Down Garage Doors are always here to help.
You May Also Like
How To Upgrade Garage Door Bottom Seal for Better Protection
You pull into the garage after a long day, and there it is—a small puddle of water near the door after a rainstorm. Or maybe you’ve noticed unsettling signs of tiny, unwelcome visitors: chewed-up cardboard or…
Published Date: Jul 1, 2026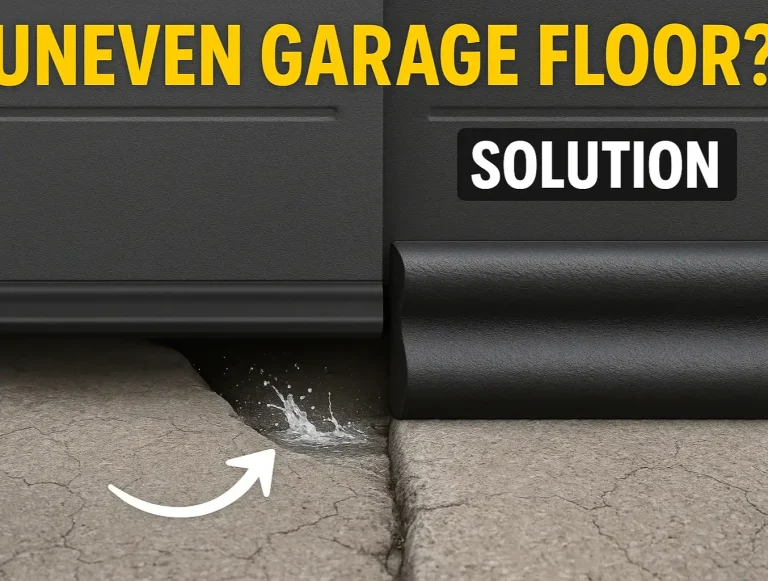
Best Garage Door Bottom Seal for Uneven Concrete Floors
That stubborn gap under your garage door is more than just an eyesore. It’s an open invitation for rainwater, chilly drafts, dust, and unwelcome pests. If your garage floor is sloped, cracked, or uneven, you know the…
Published Date: Jun 26, 2026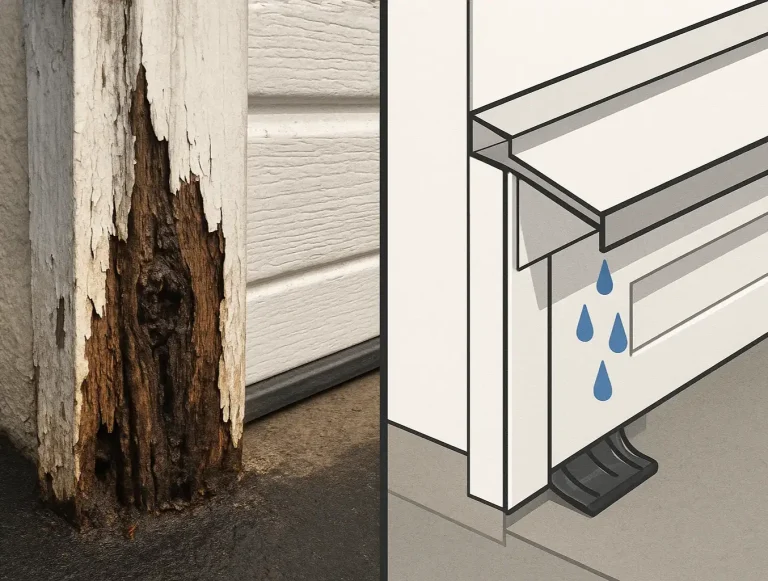
The Role of Proper Flashing and Sealant in Extending Garage Door Frame
You’ve seen it before. The paint on your garage door frame is bubbling. The wood near the bottom feels a little soft after it rains. You figure it’s time to replace the rubber weatherstripping—the black seal running…
Published Date: Apr 21, 2026