





Essential Blueprint: What to Clear From the Garage Before Installation Day
Published: Nov 17, 2026
Homeowners preparing for a garage upgrade often face fragmented instructions. Flooring companies ask for one thing, cabinet installers another, and garage door contractors something else entirely. Failing to prepare your workspace properly does not just cause minor inconvenience—it can lead to unexpected crew decluttering surcharges, day-of cancellation fees, or damaged home heating and cooling systems.
Navigating contract readiness requires knowing exact dimensional clearance zones, critical environmental safety protocols, and proper project sequencing.
Executive Checklist for Pre-Installation Readiness
Preparing your garage requires an organized approach starting 48 hours before crew arrival. Begin by sorting items into four distinct categories: retain on-site, stage temporarily, dispose of, or relocate off-site.
Make sure all soft items like blankets, cushions, and sports gear are completely removed. These items readily capture airborne concrete dust and metal filings. Similarly, store all unsealed liquid bottles, spray paint cans, and household chemicals in secure totes outside the active work zone, as vibration and dust can compromise opened containers.
Clearance Zone Matrix by Installation Type
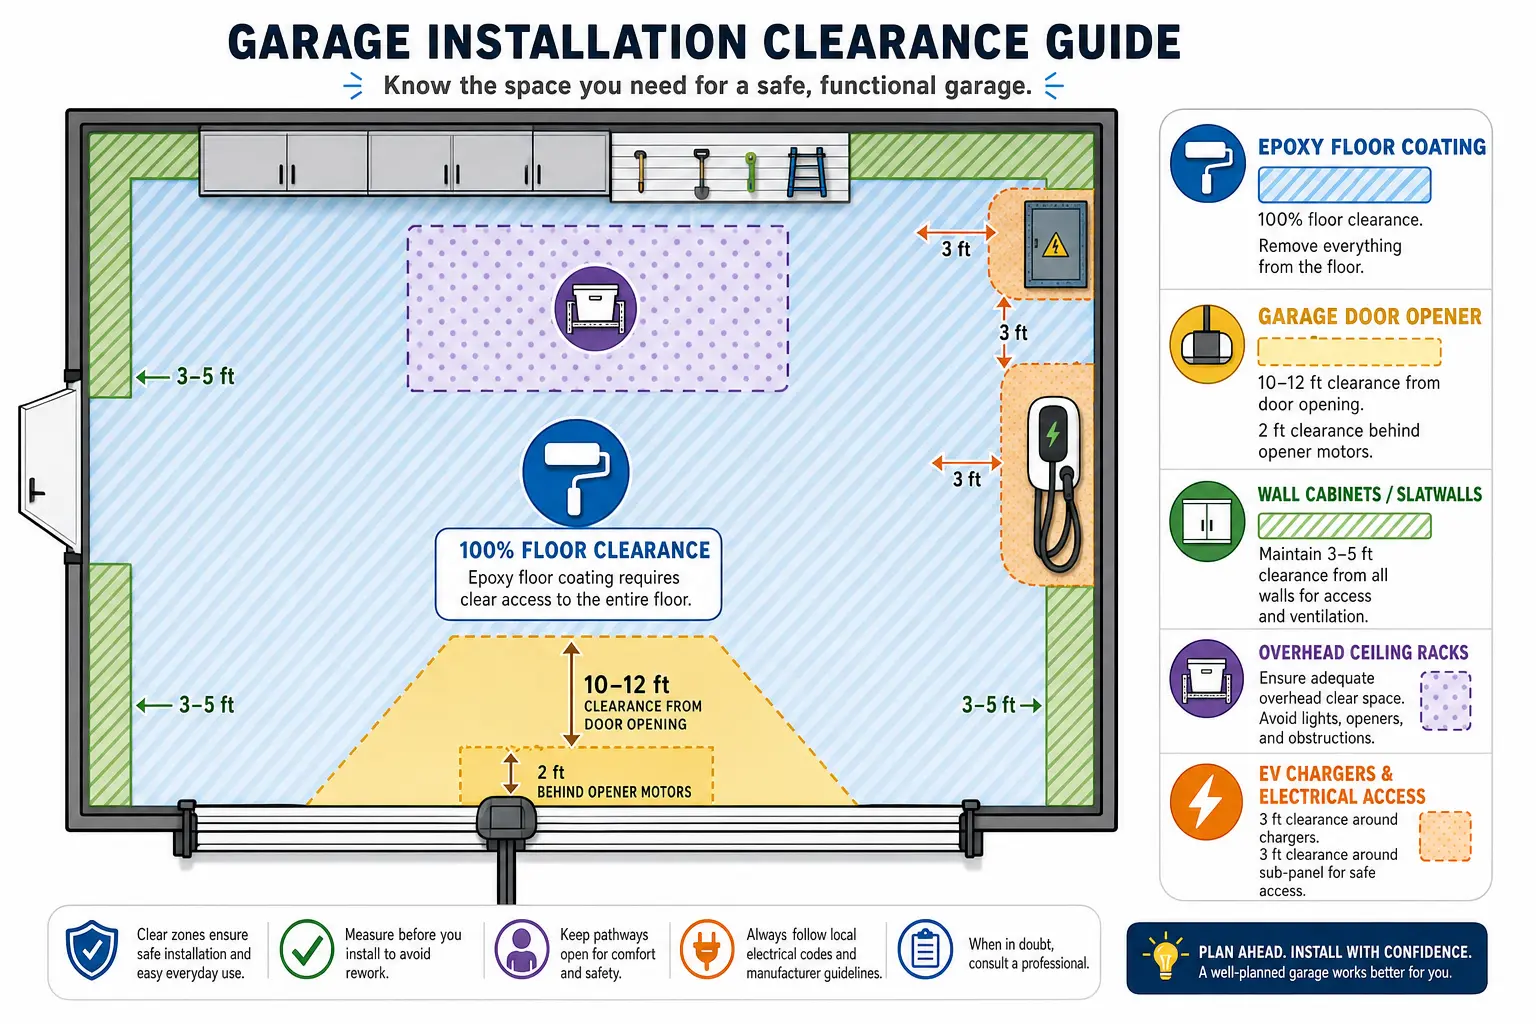
Every garage project requires specific buffer zones so technicians can maneuver heavy equipment safely.
- Floor Coatings (Epoxy / Polyaspartic): Requires 100% floor clearance. Additionally, all items mounted on walls below 36 inches (3 feet) must be removed to allow surface preparation tools access to the baseboards and wall joints.
- Garage Doors & Motor Openers: Installers require 10 to 12 feet of direct clearance from the door opening into the bay. You must also clear 2 feet of unobstructed space behind and around the opener motor head. Proper clearance ensures efficient automatic garage door installation without risking damage to nearby items.
- Wall Cabinets & Slatwalls: Installers need a 3 to 5-foot perimeter back from all target wall areas to assemble panels and secure heavy wall anchors.
- Overhead Storage Racks: Requires clear floor space directly beneath the drop zone, extending 3 feet outward in all directions for ladder stability and ceiling joist probing.
The Master Garage Renovation Sequence

When planning multi-stage projects, executing steps in the wrong order can cause costly rework or void warranties. Follow the proven sequence of operations:
- Decluttering & Demolition: Strip out old shelving, non-structural fixtures, and legacy items.
- Structural & Electrical Infrastructure: Complete electrical runs, high-bay lighting, EV chargers, and structural framing updates like a targeted garage door framing service.
- Wall & Ceiling Painting: Paint high surfaces before floor applications to avoid dripping paint onto fresh surfaces.
- Floor Coating Application: Apply coatings directly onto bare concrete. Respect cure windows before moving equipment back: 12–24 hours for foot traffic, 24 hours for light storage, and 48–72 hours for heavy vehicle parking.
- Fixed Storage Installation: Install cabinets, workbenches, and overhead racks over the fully cured floor coating.
Temporary Storage Solutions Matrix
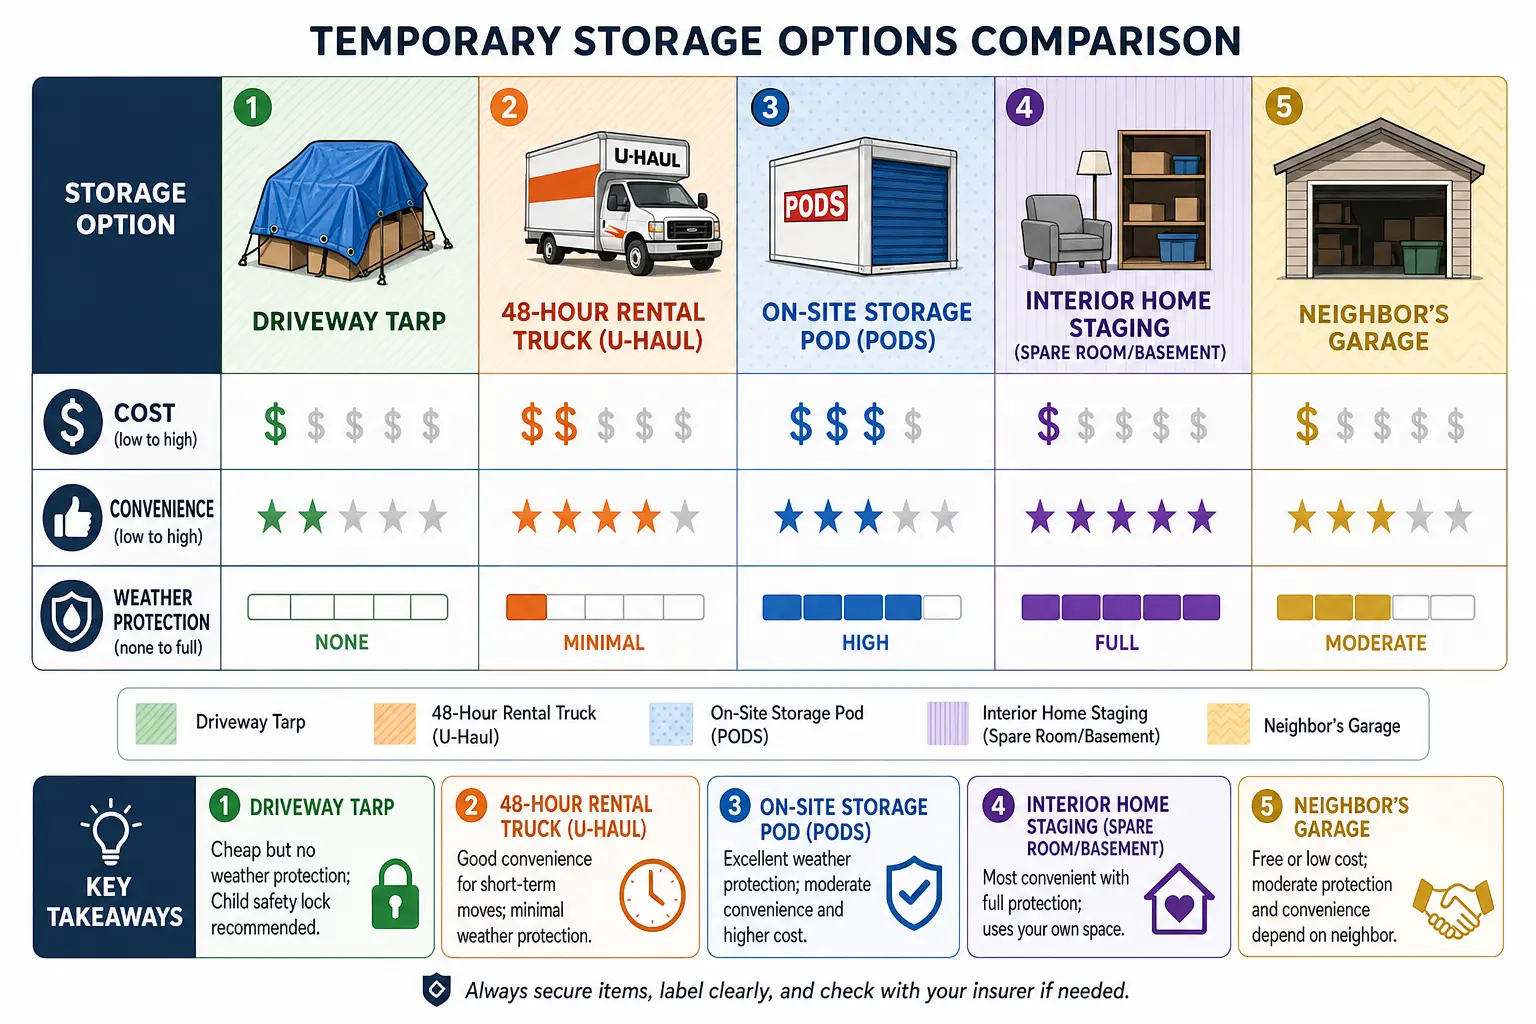
Selecting where to store items during installation involves balancing cost, security, and weather protection:
- Driveway Tarping: Lowest cost option, but leaves items vulnerable to rain and theft. Always add child safety locks to outdoor appliances like secondary refrigerators.
- 48-Hour Rental Truck: A 10-foot to 15-foot box truck costs roughly $50–$100 per day. It offers a lockable, mobile warehouse that protects tools and appliances from rain and dust.
- On-Site Storage Pods: Ideal for multi-day cure times (such as full polyaspartic systems), though it requires driveway space and potential HOA approvals.
- Interior Home Staging: Free and climate-controlled, but temporarily cluttering basements or spare rooms creates interior foot-traffic hazards.
Environmental Safety and Contract Risk Mitigation
Concrete preparation uses heavy diamond grinding, creating significant amounts of fine silica dust. If your garage connects to home HVAC ducting or mini-split systems, turn these units completely off and seal the return vents with plastic sheeting. Keeping interior doors to the home locked and sealed prevents toxic dust and chemical vapors from migrating into living spaces.
Working with an experienced provider like Up & Down Garage Doors guarantees clear communication upfront, helping you avoid unexpected contract fees or scheduling delays.
Frequently Asked Questions
What happens if I do not clear the garage before installers arrive?
If workspace clearance requirements are not met, installation crews may charge labor surcharges ranging from $75 to $150 per hour per worker to clear the area themselves. If items are too heavy or hazardous to move, the crew may reschedule the installation entirely, incurring day-of cancellation fees between $150 and $500.
Should I turn off my home HVAC system during a garage installation?
Yes. Concrete grinding produces fine respirable silica dust, and floor coatings emit volatile chemical fumes. Shut off any garage mini-splits or home HVAC units with ductwork linked to the garage, and seal all connecting interior doors to prevent airborne contaminants from circulating into your living areas.
How far back must I clear for a new garage door or opener installation?
Installers require 10 to 12 feet of clear space extending back from the garage door opening into the bay. You must also maintain at least 2 feet of clear space around the garage door opener motor head location to allow technicians to safely mount hardware and run electrical lines.
You May Also Like
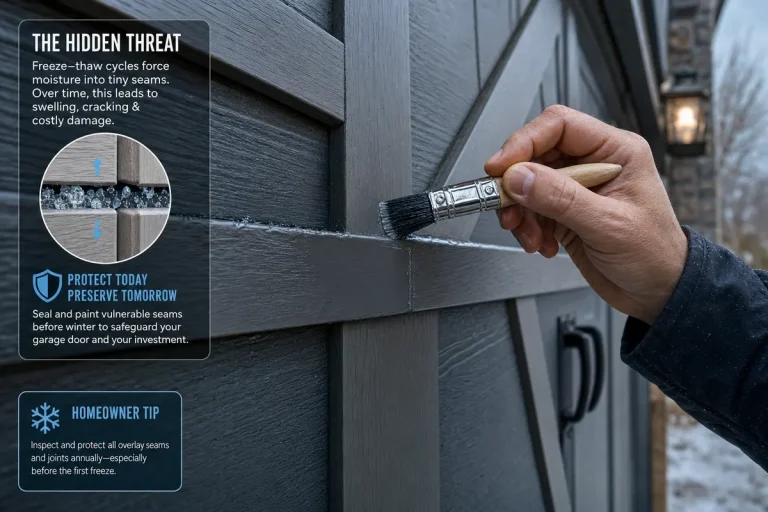
Sealing & Repainting Carriage Door Overlays Before Winter: The Complete Substrate & Freeze-Thaw Defense Guide
Published Date: Nov 16, 2026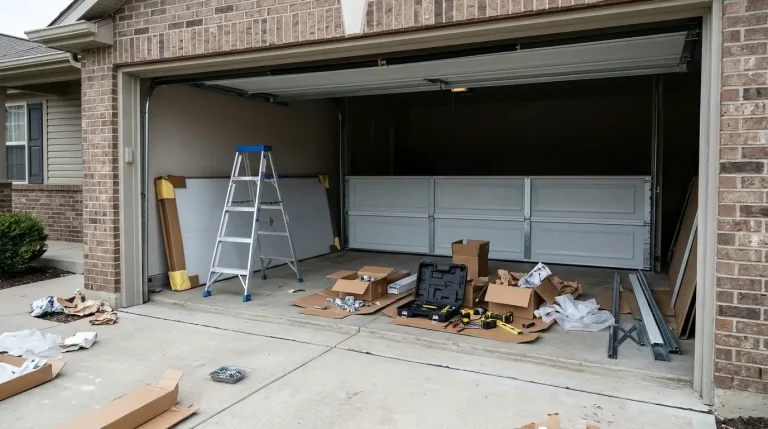
Garage Door Install-Day Sequence: Tear-Out to Final Balance Test
Published Date: Nov 10, 2026
Anodized vs. Powder-Coated Aluminum Garage Door Frames Compared
Published Date: Nov 5, 2026