




Correct Photo-Eye Mounting Height and Why Six Inches Matters
Published: Nov 5, 2026
When evaluating your garage door’s safety systems, the mounting height of your photo-eye sensors isn’t a loose recommendation—it is a critical safety threshold defined by federal law. Consumer Product Safety Commission (CPSC) data indicates that automatic garage doors account for 15,000 to 30,000 injuries annually. Under UL 325 standards and CPSC 16 CFR Part 1211 (mandated since January 1, 1993), residential automatic door openers must incorporate functional secondary entrapment protection.
Understanding why the six-inch height rule exists helps home buyers, sellers, and property owners maintain a safe, fully compliant garage environment that passes inspection and protects vulnerable family members.
The 6-Inch Rule: Quick Compliance Answer & Visual Measurement Guide
The mandatory height for safety photo-eye sensors is between 4 and 6 inches above the finished garage floor.
Crucially, this measurement must be taken from the finished concrete floor to the exact center point of the optical lens, not to the bottom of the mounting bracket or track clip.
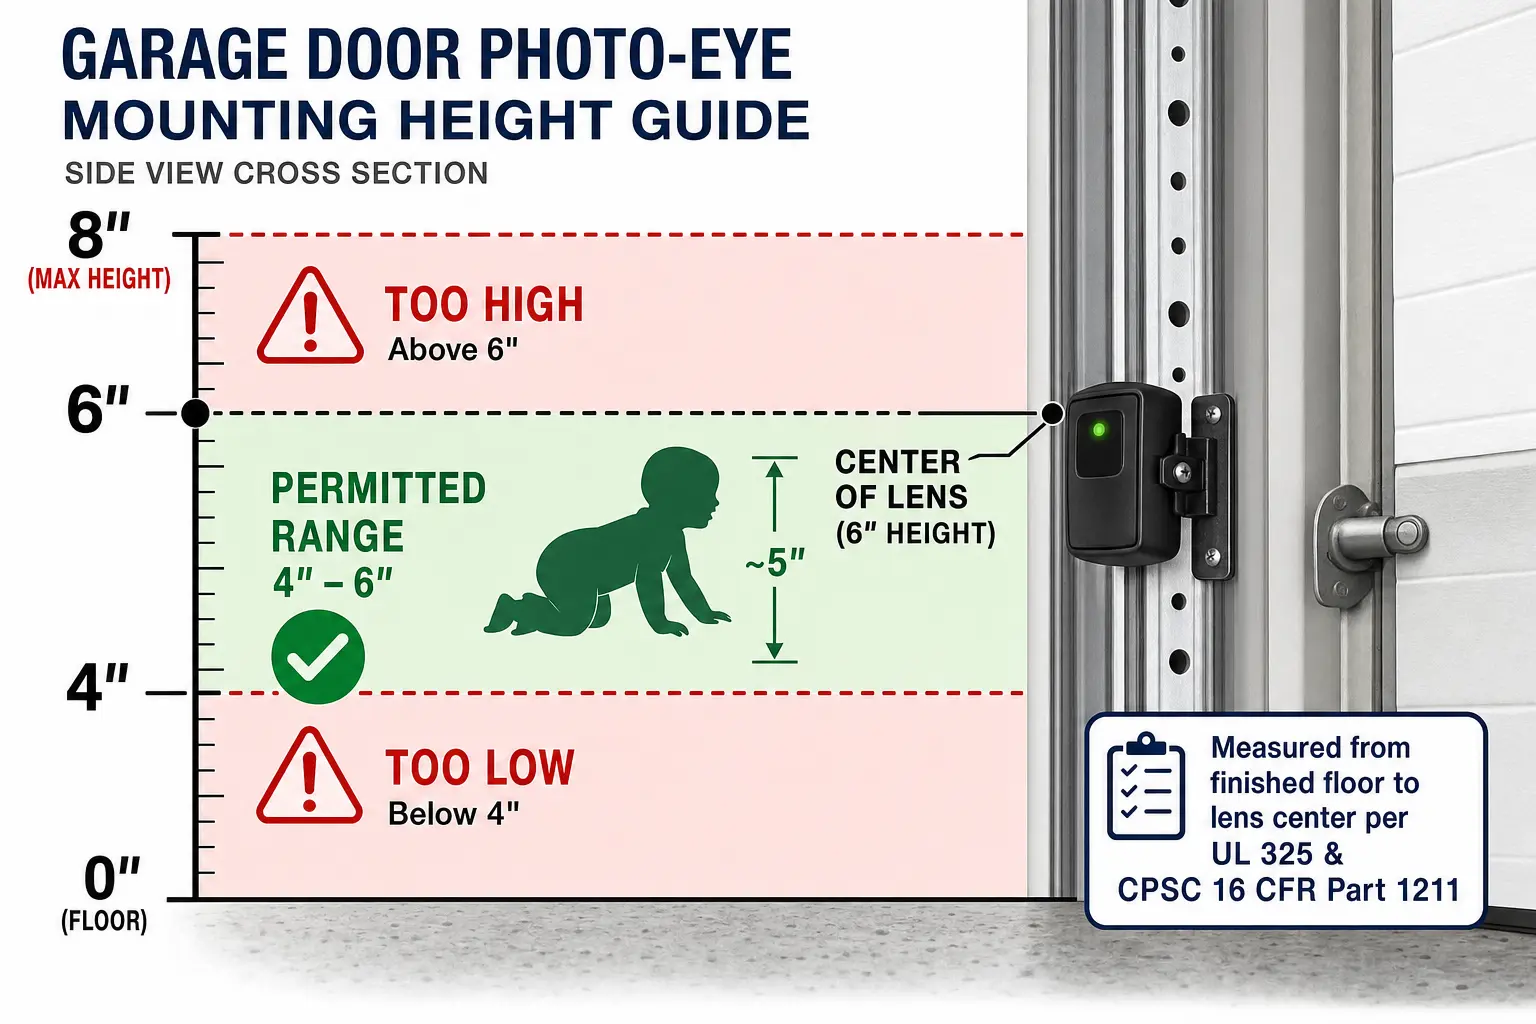
Mounting sensors higher than six inches creates a dangerous dead zone beneath the invisible light beam. Conversely, mounting them lower than four inches causes optical reflection failures that lead to erratic door behavior.
The Biomechanics of 6 Inches: Protecting Crawling Children and Pets
The six-inch upper ceiling is rooted in pediatric biomechanics. Ergonomic safety standards establish that a crawling infant’s prone torso and head clearance height ranges between 4.5 and 5.5 inches off the ground.
If sensors are mounted at 7 inches or higher—a common code violation flagged during home inspections—a crawling toddler or low-profile pet can pass beneath the beam without breaking it. In that scenario, the opener’s mechanical reverse force is the only protection remaining, subjecting the obstruction to significant crushing pressure. Proper sensor height guarantees an immediate auto-reversal before physical contact occurs.
The Physics of the 4-to-6 Inch "Sweet Spot" (Why Not 1 Inch Off the Ground?)
If lower is safer for small obstacles, why can’t sensors be mounted an inch off the floor? The answer lies in optical beam mechanics and environmental reflection.
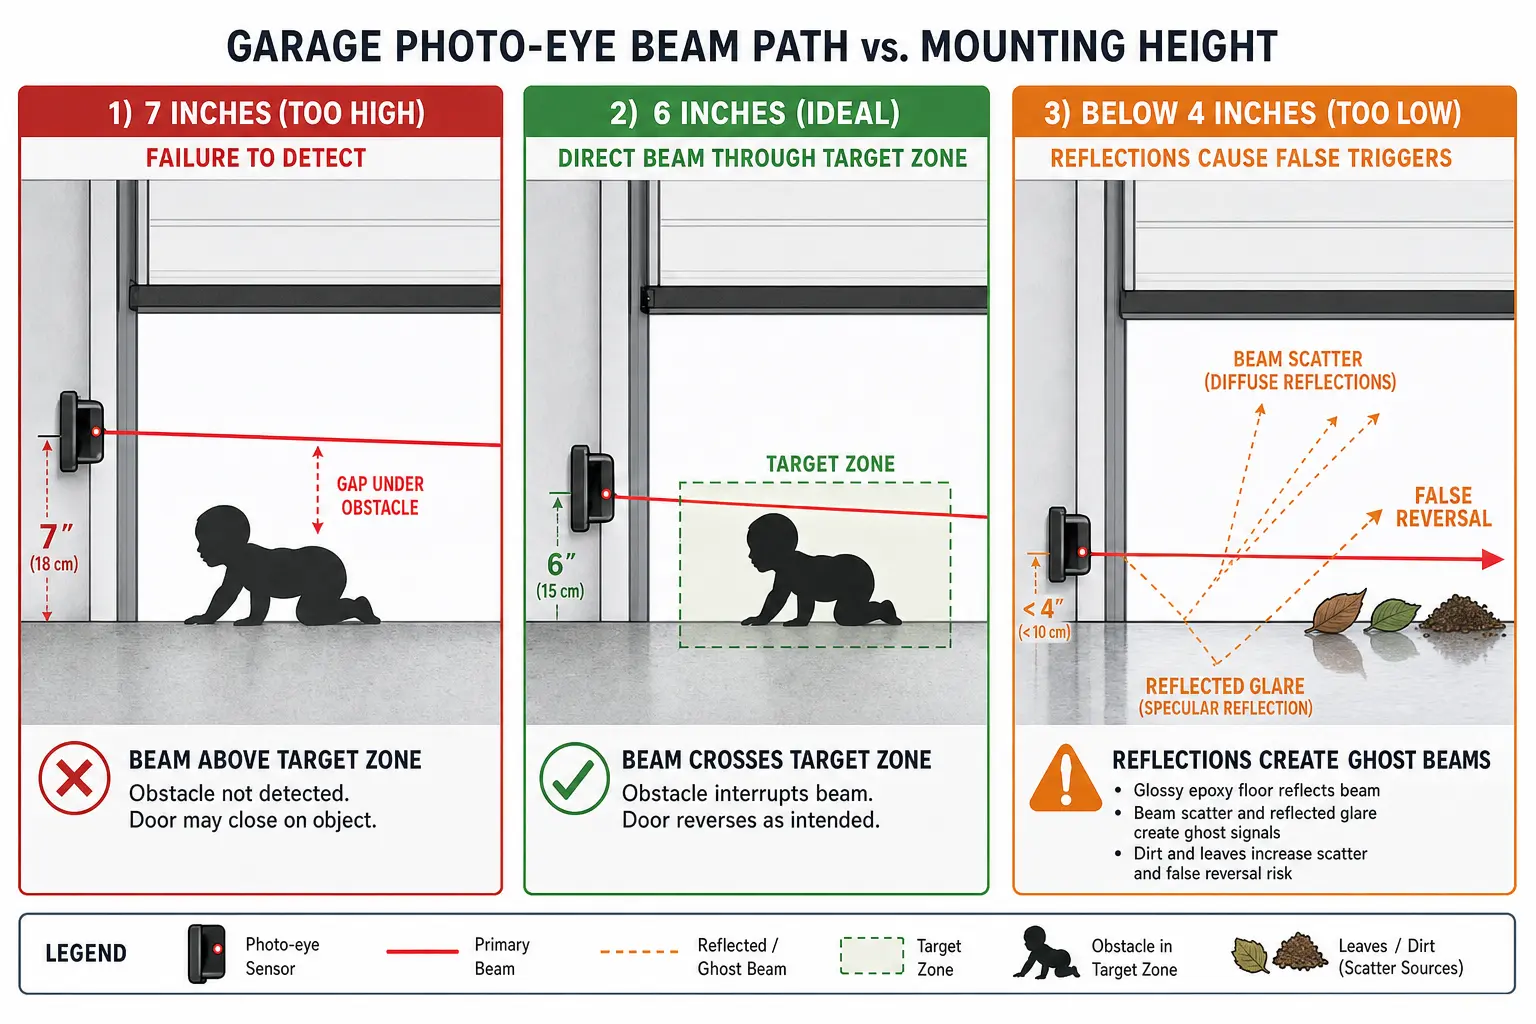
When mounted below 4 inches, infrared beams experience a false-reversal rate over 40% higher than correctly positioned units. Key factors include:
- Glossy Surface Glare: Smooth or epoxy-coated concrete reflects beam light, creating optical scattering that tricks the receiving sensor.
- Dust and Debris Accumulation: Floor-level air currents sweep dirt, leaves, and moisture directly onto lenses. Knowing how to clean garage door sensors helps maintain clarity, but proper elevation keeps lenses out of the primary dust layer.
- Threshold Irregularities: Minor concrete expansion or frost heave can directly block low-lying beams without an actual object present.
The "Bypassed Sensor" Trap and Code Enforcement
During real estate transactions, inspectors frequently cite bypassed safety sensors. A shortcut taken by unqualified installers involves mounting sensors on the upper tracks or ceiling near the motor head to avoid alignment steps.
Bypassing a garage door obstruction sensor violates federal UL 325 regulations, voids manufacturer warranties on residential garage door openers, and creates serious legal liability for home sellers. Residential Class I door systems require functional floor-level entrapment protection to operate legally.
Step-by-Step DIY Alignment & Mounting Height Correction Matrix
Correcting your photo-eye installation requires basic measurement and systematic verification.
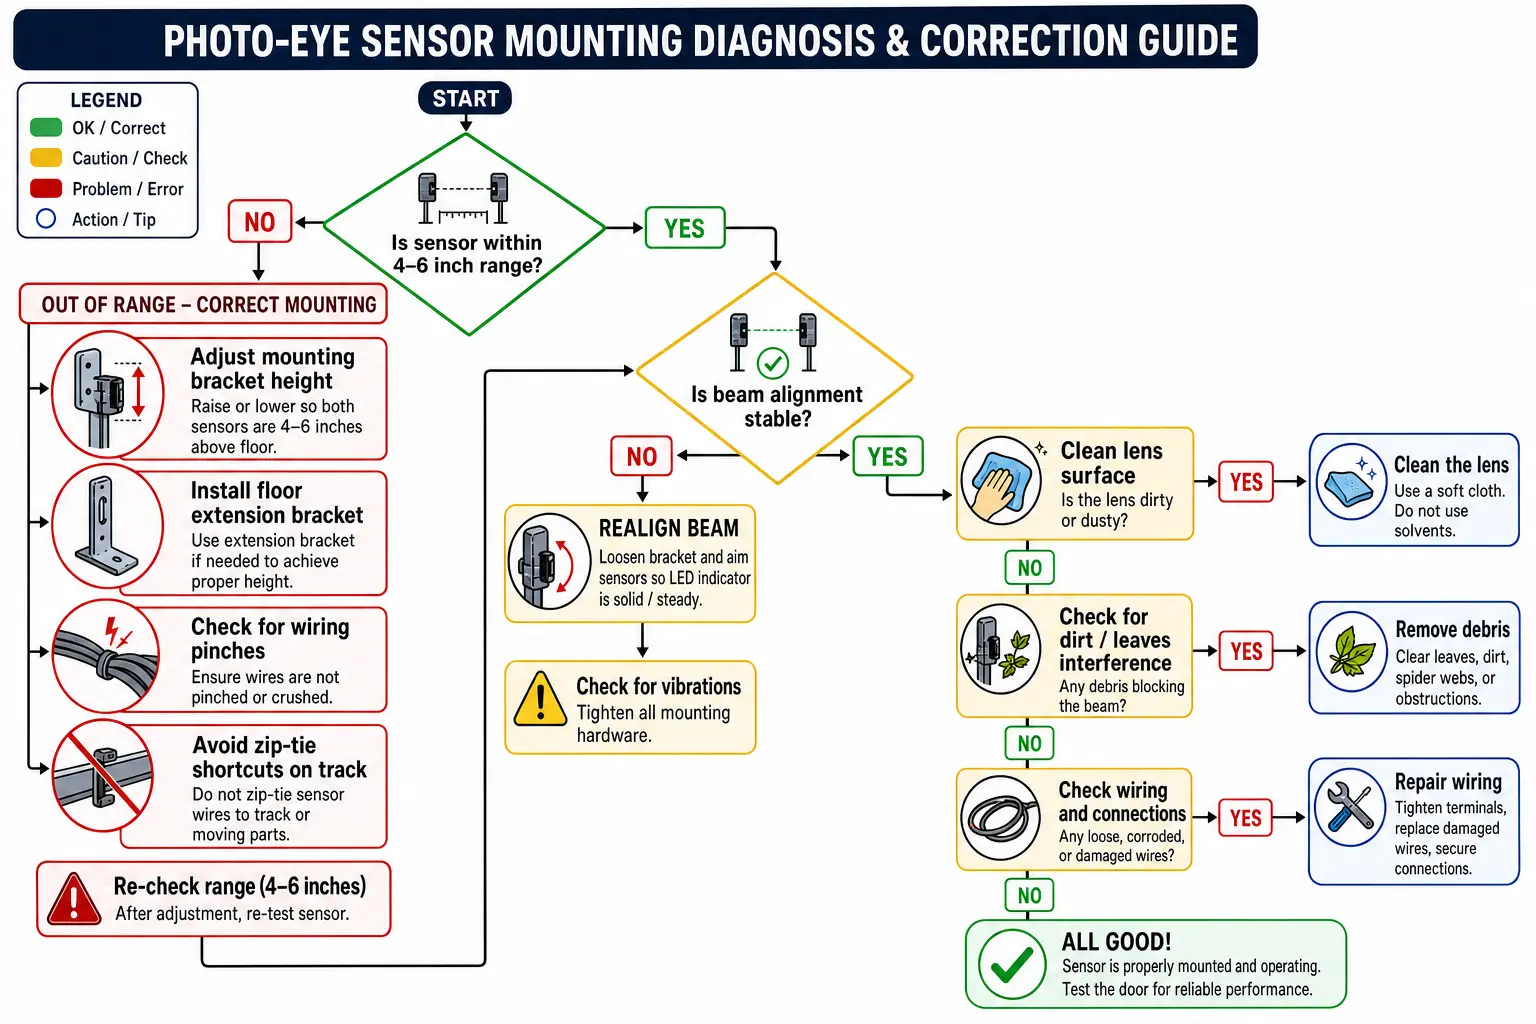
- Measure the Datum Point: Measure from the finished floor to the optical lens center. Adjust the bracket height so the lens sits between 4 and 6 inches.
- Check Indicator LEDs: Verify solid status lights on both sending and receiving units.
- Execute Precision Alignment: Follow standard procedures for garage door sensor alignment to resolve flickering indicators.
- Perform a Physical Block Test: Lay a 2×4 board flat under the door path. The door must reverse immediately upon breaking the beam or touching the block.
If your system displays persistent sensor fault codes or requires drive replacement, consulting professionals on garage door motor installation or scheduling a full garage door motor replacement guarantees long-term compliance and family safety.
Frequently Asked Questions
How do I know if my garage door sensors are at the correct height?
Measure from the finished concrete floor to the center of the optical lens on both sides of the door opening. The distance must fall strictly between 4 inches minimum and 6 inches maximum.
Should both garage door sensors be green during normal operation?
Indicator lights depend on your brand and model. Reading our guide on should both garage door sensors be green helps clarify whether your system uses solid green, amber, or red LED signals for proper alignment.
Can I mount safety sensors directly on the door track?
Yes, as long as manufacturer-approved track brackets hold the lens center point within the 4-to-6 inch window and isolate the photo-eyes from door vibration.
You May Also Like