





Resetting Garage Door Opener Travel Limits
Published: Jun 5, 2026
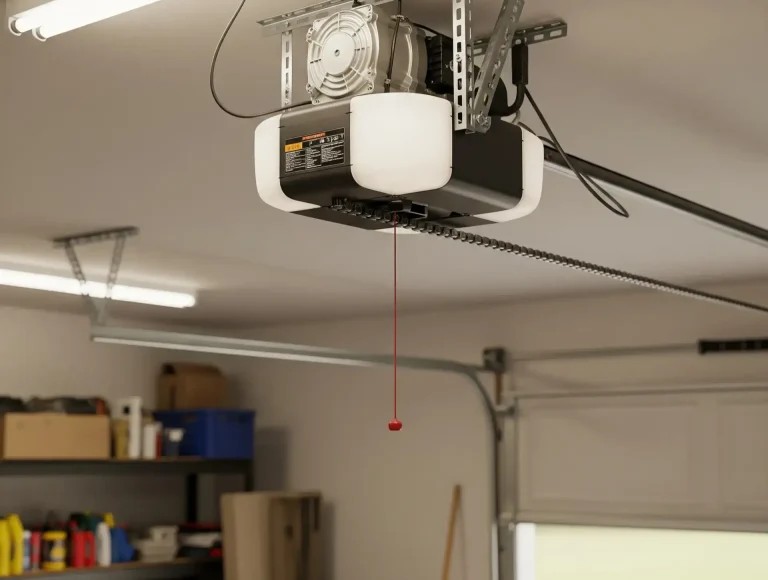
You pulled the red emergency release cord—maybe the power was out, or you needed to open the door manually. You got it done, re-engaged the trolley, and breathed a sigh of relief. But now, something’s wrong. The door stops a foot from the floor, reverses unexpectedly, or doesn’t open all the way.
It feels like the opener has a mind of its own.
Here’s the good news: it’s not broken, it’s just “lost.” When you manually operated the door, the opener lost its memory of where the fully open and fully closed positions are. This is a common and fixable issue. You just need to reteach it.
This guide will walk you through everything, from confirming the real problem to recalibrating your door like a pro.
Is This Your REAL Problem? A 1-Minute Diagnostic
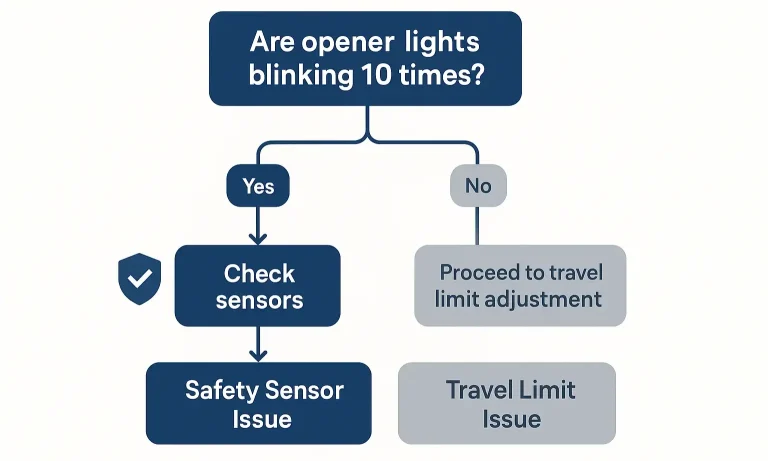
Before you touch any dials or buttons, let’s make sure you’re solving the right problem. The most common source of confusion is mistaking a travel limit issue for a safety sensor issue. They can look similar, but the fix is completely different.
Here’s the simple test: When the door fails to close, look at the main light on your garage door opener motor.
- If the light blinks 10 times and then pauses, your problem is the safety sensors near the bottom of the door tracks. They are likely blocked or misaligned. This guide isn’t for you. Instead, check that the sensors are clean and pointing directly at each other.
- If the light does not blink repeatedly, and the door simply stops in the wrong place or reverses without obstruction, you almost certainly have a travel limit problem. You’re in the right place.
Use this quick flowchart to be certain:
If you’re dealing with a situation where your garage door won`t close, correctly diagnosing the cause is the most important first step.
The "Aha" Moment: Why Your Opener Gets 'Lost'
So, why does using the garage door manual release cause this confusion?
Imagine your opener has an internal counter that tracks its position along the chain or belt. It knows “zero” is fully closed and “one hundred” is fully open. When you pull the red cord, you disconnect the door from this system. The opener’s brain stays put, but the door is now free to move anywhere.
When you later reconnect the door, it might be in a different spot than the opener thinks it is. You might reconnect it halfway up the track, but the opener’s brain still thinks it’s at the bottom. The next time you press the button, it moves the door based on its faulty memory, causing it to stop short or not close completely.
Resetting the travel limits is simply wiping the slate clean and telling the opener, “Okay, this new position is fully open, and this position is fully closed.”
Preparation: Find Your Adjustment Type
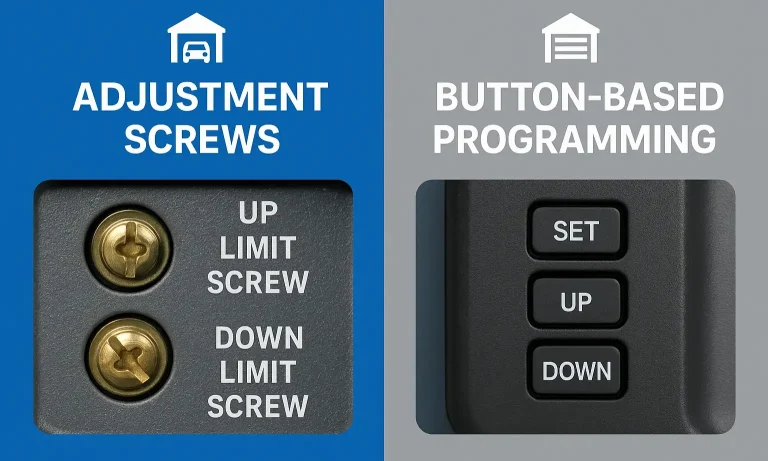
Before you can adjust the limits, you need to know what kind of opener you have. Most residential openers fall into two categories: older models with adjustment screws or modern models with programming buttons.
Take a look at the side or back of the motor unit hanging from your ceiling. Do you see two small screws, often next to arrow icons? Or do you see a set of colored buttons (usually square or round)?
Once you’ve identified your type, you can jump to the correct instructions below.
Action: The Step-by-Step Fix to Recalibrate Your Door
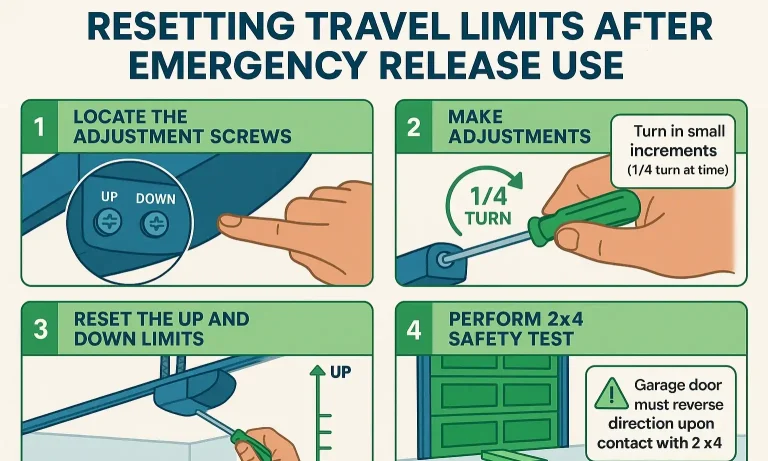
Whether you have screws or buttons, the process is straightforward. We’ll start by setting the “UP” (open) limit, then the “DOWN” (closed) limit.
Method A: Adjusting with Screws (Older Models)
You’ll need a flathead screwdriver for this. The screws are usually labeled “UP” and “DOWN” or have corresponding arrows.
1. Open the Door: Start with the garage door closed. Press your remote to open the door and let it stop where it currently thinks the “UP” limit is.
2. Adjust the UP Limit: Find the “UP” limit adjustment screw.
To make the door open higher, turn the screw in the direction of the “UP” arrow (usually clockwise).
To make the door open lower, turn it in the opposite direction.
Pro Tip: Make small, quarter-turn adjustments at a time. One full rotation can move the door’s stopping point by about 2 inches.
1. Test the UP Limit: Run the door down and up again to see where it stops. Repeat step 2 until the door opens to the desired height without straining.
2. Adjust the DOWN Limit: Now, press the remote to close the door.
3. Find the “DOWN” limit screw.
To make the door close further, turn the screw in the direction of the “DOWN” arrow.
To make the door stop sooner (if it’s hitting the floor too hard), turn it in the opposite direction.
1. Test the DOWN Limit: Run a full open/close cycle. The door should close firmly against the floor, creating a light seal, but it should not buckle or strain. Adjust until it’s perfect.
Method B: Programming with Buttons (Modern Models)
Modern openers use a sequence of button presses. These are often color-coded (e.g., a yellow, purple, or black square button).
- Enter Programming Mode: Press and hold the square adjustment button (often black or yellow) until the UP arrow button begins to flash or an LED light turns on.
- Set the UP Limit: Press and hold the UP arrow button until the door reaches your desired fully open position. If you go too far, you can use the DOWN arrow to adjust it.
- Confirm the UP Limit: Press and release the square adjustment button once. The opener light will flash, and the DOWN arrow button should now be flashing.
- Set the DOWN Limit: Press and hold the DOWN arrow button until the door is fully closed on the floor. It should create a good seal without straining the door. Use the UP arrow for fine-tuning if needed.
- Confirm the DOWN Limit: Press and release the square adjustment button once more. The opener light will flash, indicating the limits are now saved. The programming mode is now exited.
- Test the System: Run the opener through a full cycle to confirm the new travel limits are working correctly.
For more detailed model-specific instructions, a comprehensive Chamberlain garage door opener troubleshooting guide can be an invaluable resource.
Mastery: Don't Skip This! Test Your Safety Reversal System
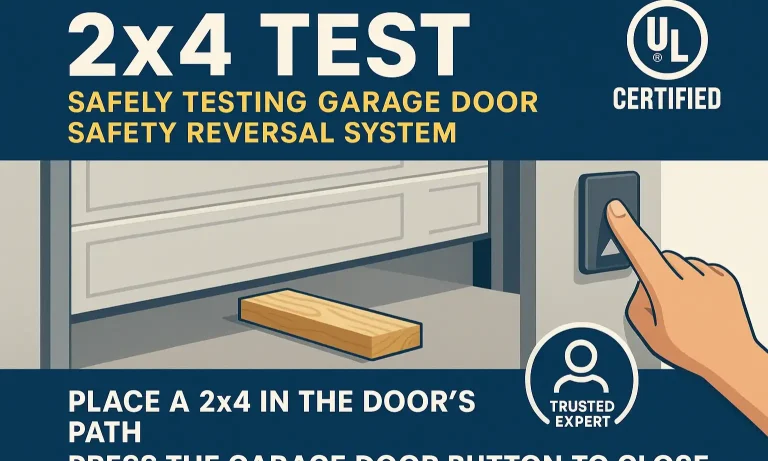
You’ve successfully reset your limits, but there’s one final, crucial step: ensuring the safety features are working correctly. The force settings and the travel limits are related, so it’s essential to test them after any adjustment.
This is often called the “2×4 test.”
- Place an Obstacle: Lay a 2×4 piece of wood flat on the ground in the center of the door’s path.
- Close the Door: From a fully open position, press your remote to close the door.
- Observe: When the bottom of the door makes contact with the 2×4, it should immediately and automatically reverse and travel back to the fully open position.
If it doesn’t reverse, your “down force” is set too high and needs adjustment. This is a critical safety feature that protects people, pets, and property. A proper garage door force adjustment is key to a safe system.
Frequently Asked Questions
How much should I turn the adjustment screw?
Start with small, quarter-turn adjustments. A little goes a long way. After each adjustment, run the door through a full cycle to see the effect before adjusting again.
What happens if the travel limits are set incorrectly?
If the “UP” limit is too high, the motor can strain, and the trolley can hit the stop bolt, causing damage over time. If the “DOWN” limit is too low (too much pressure on the floor), it can damage the top panel of your door, wear out the motor, and potentially disable the safety reversal feature.
Do I need to do this every time I use the emergency release?
Not necessarily. If you how to reconnect garage door opener when the door is in the fully closed position, the opener’s memory often remains accurate. The problem usually occurs when you reconnect it in a random position along the track.
The door closes but then goes back up. Is this a travel limit issue?
It could be, but it’s more often a sign that the close force is set too sensitively, or the safety sensors are being tripped. If the door reverses after touching the floor, your “DOWN” limit is likely set too low, making the opener think it’s hitting an obstacle.
Your Next Steps
You’ve just tackled one of the most common garage door opener issues yourself. By understanding why the problem happens and how to diagnose it properly, you’ve moved from being a frustrated homeowner to an empowered one.
Running a full open-and-close cycle and performing the 2×4 safety test are the best ways to confirm you’ve done the job right. If your door is now running smoothly and safely, congratulations!
If you’ve followed these steps and are still facing issues, or if you’re just not comfortable making these adjustments, don’t hesitate to reach out. Sometimes a professional eye can spot an underlying issue. At Up & Down Garage Doors, we’re here to help, whether it’s through educational guides like this or our 24/7 expert service.
You May Also Like
How to Reset a Garage Door Opener After Pulling the Red Cord
When your garage door opener stops working, pulling the red emergency cord is often the fastest way to take manual control. Maybe the power went out, the opener jammed, or you just needed to get your car out.…
Published Date: Aug 15, 2025
Emergency Release Cord: What It Is and How to Use It
When your garage door suddenly stops working, especially during a power outage or mechanical failure, knowing how to operate the emergency release cord garage door can be crucial. This vital safety feature, found in…
Published Date: Nov 20, 2024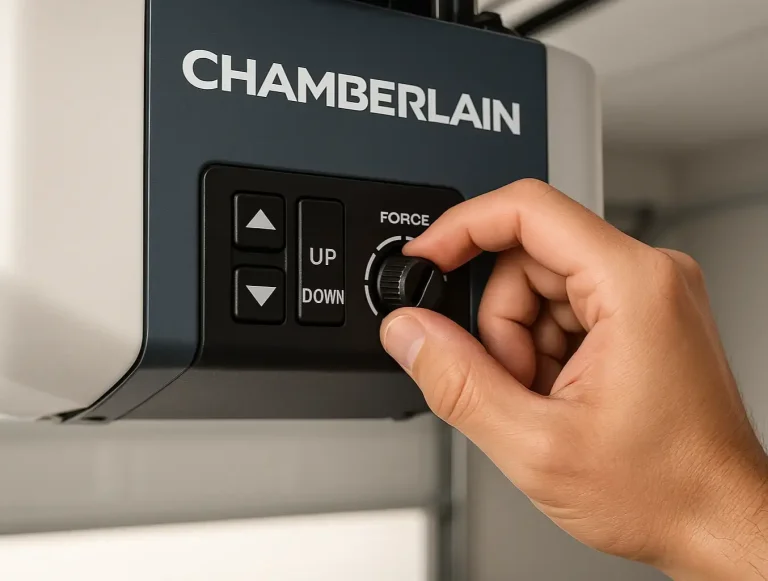
Resetting Chamberlain Garage Door Opener Travel Limits
Is your garage door acting possessed? It starts to close, then suddenly reverses for no reason. Or maybe it stops six inches from the floor, leaving a frustrating gap. You might think you need a full "reset," a term…
Published Date: May 20, 2026