




Garage Door Install-Day Sequence: Tear-Out to Final Balance Test
Published: Nov 10, 2026
Evaluating a garage door replacement involves far more than selecting panel designs. It requires understanding the mechanical sequence that ensures long-term safety, smooth operation, and structural reliability. While professional installation of a standard residential door takes 4 to 6 hours—with 1 to 1.5 hours dedicated to tear-out—DIY projects often exceed 8 to 12 hours while exposing homeowners to extreme mechanical risks. Knowing what happens on installation day allows you to evaluate contractor scope and audit final workmanship with complete confidence.
Safe Tear-Out & Job-Site Preparation
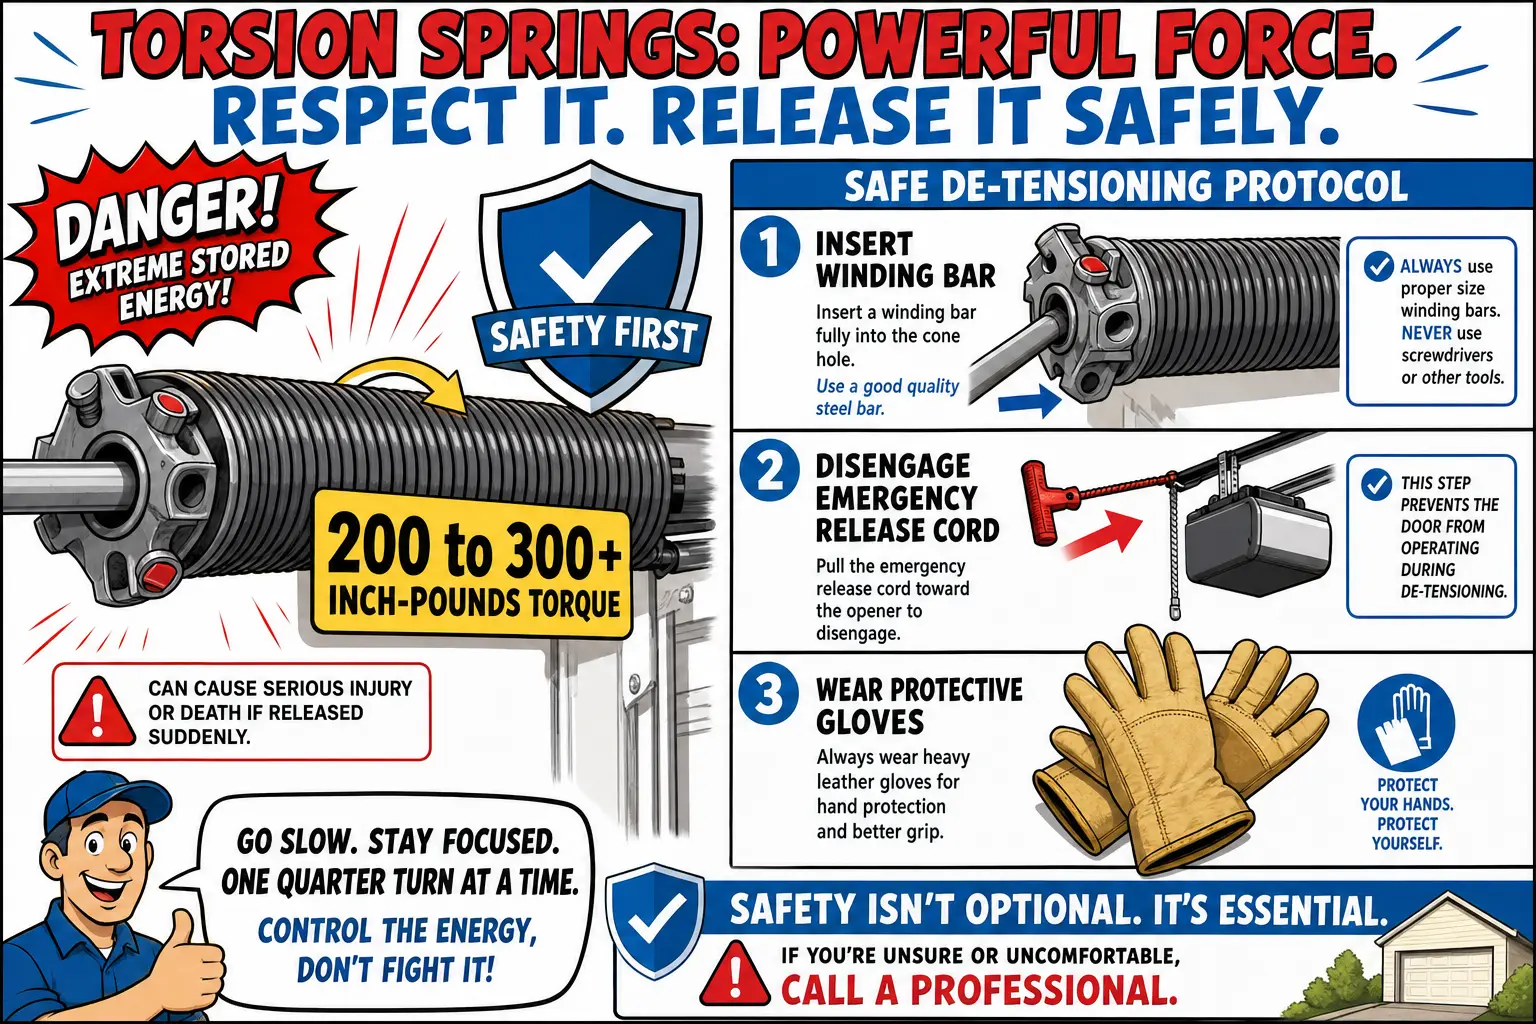
Phase 1: Safe Tear-Out & Job-Site Preparation begins by addressing stored kinetic energy. Garage door torsion springs operate under 200 to 300+ inch-pounds of torque per turn. According to Consumer Product Safety Commission data, improper spring de-tensioning accounts for over 35% of DIY garage injuries.
Professional crews follow ANSI/DASMA 103 safety standards, using paired steel winding bars to safely unwind springs before unbolting track hardware. Panels are stripped from top to bottom to prevent structural collapse. Once cleared, technicians inspect header timber and side jambs for rot. If structural adjustments are needed, a certified garage door framing service ensures the opening is square and secure before weatherstripping is installed.
Base Leveling, Track Alignment, and Section Assembly
Precision performance depends on absolute vertical alignment. Because garage floors often slope, technicians measure concrete pitch and shim the bottom panel to achieve perfect level. Vertical tracks are set plumb within a strict tolerance of 1/16 inch per 8 feet of height.
Panels are stacked sequentially from bottom to top, securing end and center hinges according to ANSI/DASMA 116 joint safety standards. Precise garage door framing prevents binding along the track radius and extends roller lifespan.
Counterbalance Shaft Assembly & Spring Calibration
The counterbalance system carries the door’s actual weight. Technicians install the torsion shaft, center bearing plate, and cable drums, tightening drum set-screws 1/4 to 1/2 turn past finger-tight to avoid shaft deformation.
Springs are wound to exact mechanical specs—typically 7.5 full turns (30 quarter-turns) for a standard 7-foot door. Incorrect tensioning causes premature wear or dangerous cable derailment. When existing systems fail, specialized services like replace garage door spring near me or dedicated garage door drum repair restore proper counterbalancing.
The Definitive 3-Point Manual Balance Test (DASMA TDS-167)
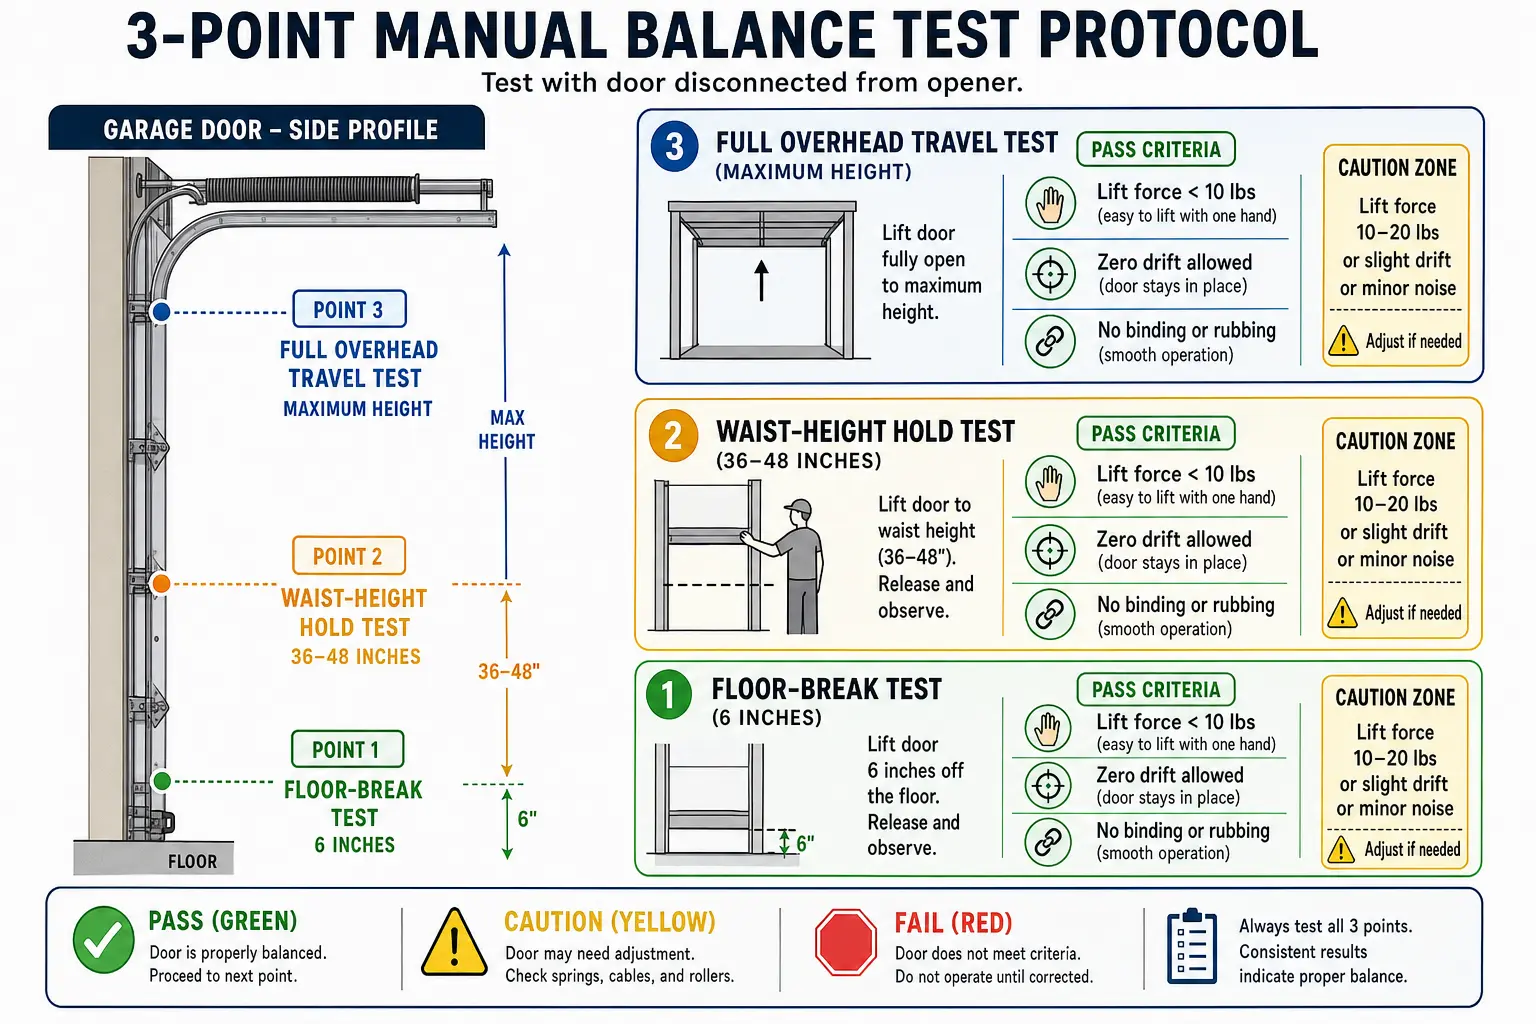
Phase 5: The Definitive 3-Point Manual Balance Test (DASMA TDS-167) must be performed BEFORE attaching an electric opener. According to DASMA TDS-167, connecting an opener to an unbalanced door increases gear operational load by up to 300%, causing nylon drive gears to strip within 12 to 18 months.
Technicians execute three mandatory manual checks:
- Floor-Break Test (6 Inches): Lift the door slightly to ensure it breaks floor contact without dragging or floor suction.
- Waist-Height Equilibrium Test (36–48 Inches): Per ANSI/DASMA 103, a balanced door must remain stationary at midpoint, drifting no more than 2 inches in either direction while requiring under 10 lbs of manual force to move.
- Full Overhead Travel Test: Raise the door fully to verify smooth travel without binding in the horizontal tracks.
Opener Integration & Safety Reversal Calibration
Once manual balance is verified, the automatic opener connects to the top panel bracket. If you encounter a garage door motor running but door not opening, it frequently points to improper trolley engagement or stripped gears from door drag. Technicians adjust limit switches, align photo-eyes exactly 6 inches above the floor, and complete the ANSI/UL 325 contact reversal test using a 2×4 block placed flat on the floor.
Buyer Evaluation & Contractor Audit Matrix
Buyer Evaluation & Contractor Audit Matrix (MOFU Conversion Hook): Reviewing these critical steps ensures your installation meets safety and performance standards. Whether investing in a new garage door or establishing routine garage door maintenance, a professional sign-off protects your home. If your door shows signs of imbalance, contacting certified garage door repair professionals prevents secondary motor failure.

Frequently Asked Questions
How long does a standard garage door installation take?
A professional crew completes replacement in 4 to 6 hours, including 1 to 1.5 hours for safe tear-out. DIY execution averages 8 to 12 hours and carries severe safety risks.
Why must the manual balance test be performed before connecting the opener?
Connecting an opener to an unbalanced door forces the motor to lift unassisted weight, increasing operational strain by up to 300% and causing nylon gears to fail within 12 to 18 months.
What is the acceptable drift tolerance during a balance test?
Under ANSI/DASMA 103, when disconnected from the opener at waist height (36–48 inches), a properly counterbalanced door must remain stationary and drift no more than 2 inches in either direction.
You May Also Like