Opener Header Bracket Torn From the Wall: Repair and Reinforcement Guide
Published: Oct 7, 2026
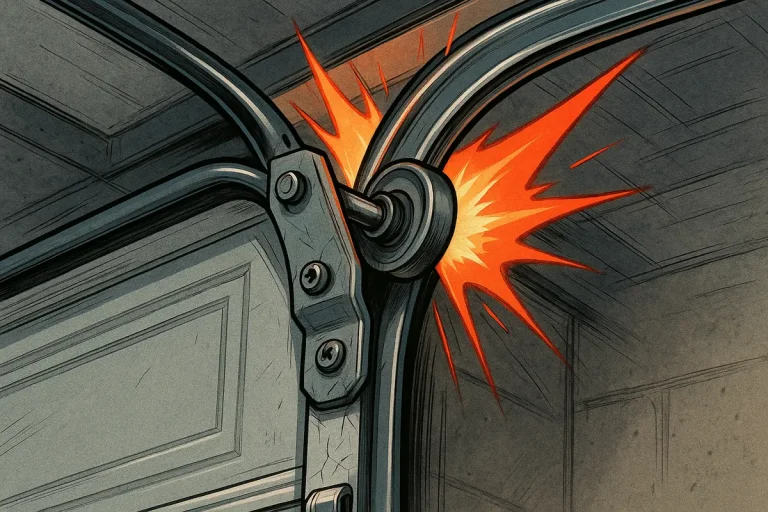
A sudden, metallic bang in your garage followed by a grinding sound is usually the first sign of a major mechanical failure: your garage door opener’s header bracket has ripped entirely out of the wall. Suddenly, the motorized arm is dangling, your garage door is immobilized, and you are left wondering if this is a straightforward DIY fix or a costly structural hazard.
Before attempting any physical repair, you must secure the area. Pull the red emergency release cord to disengage the opener trolley, allowing you to manually lower the door. If the door is stuck halfway, do not force it. A standard double-car garage door weighs between 150 and 280 pounds (and custom wood doors can exceed 400 pounds). Without the counterbalancing assistance of your torsion springs, attempting to lift or move this deadweight is incredibly dangerous. Under no circumstances should you adjust, touch, or attempt to repair the bottom brackets, tension cables, or springs, as they operate under extreme mechanical tension. If you suspect your counterbalance system is compromised, refer to our broken garage door spring safety guide or consult our expert team for a safe resolution.
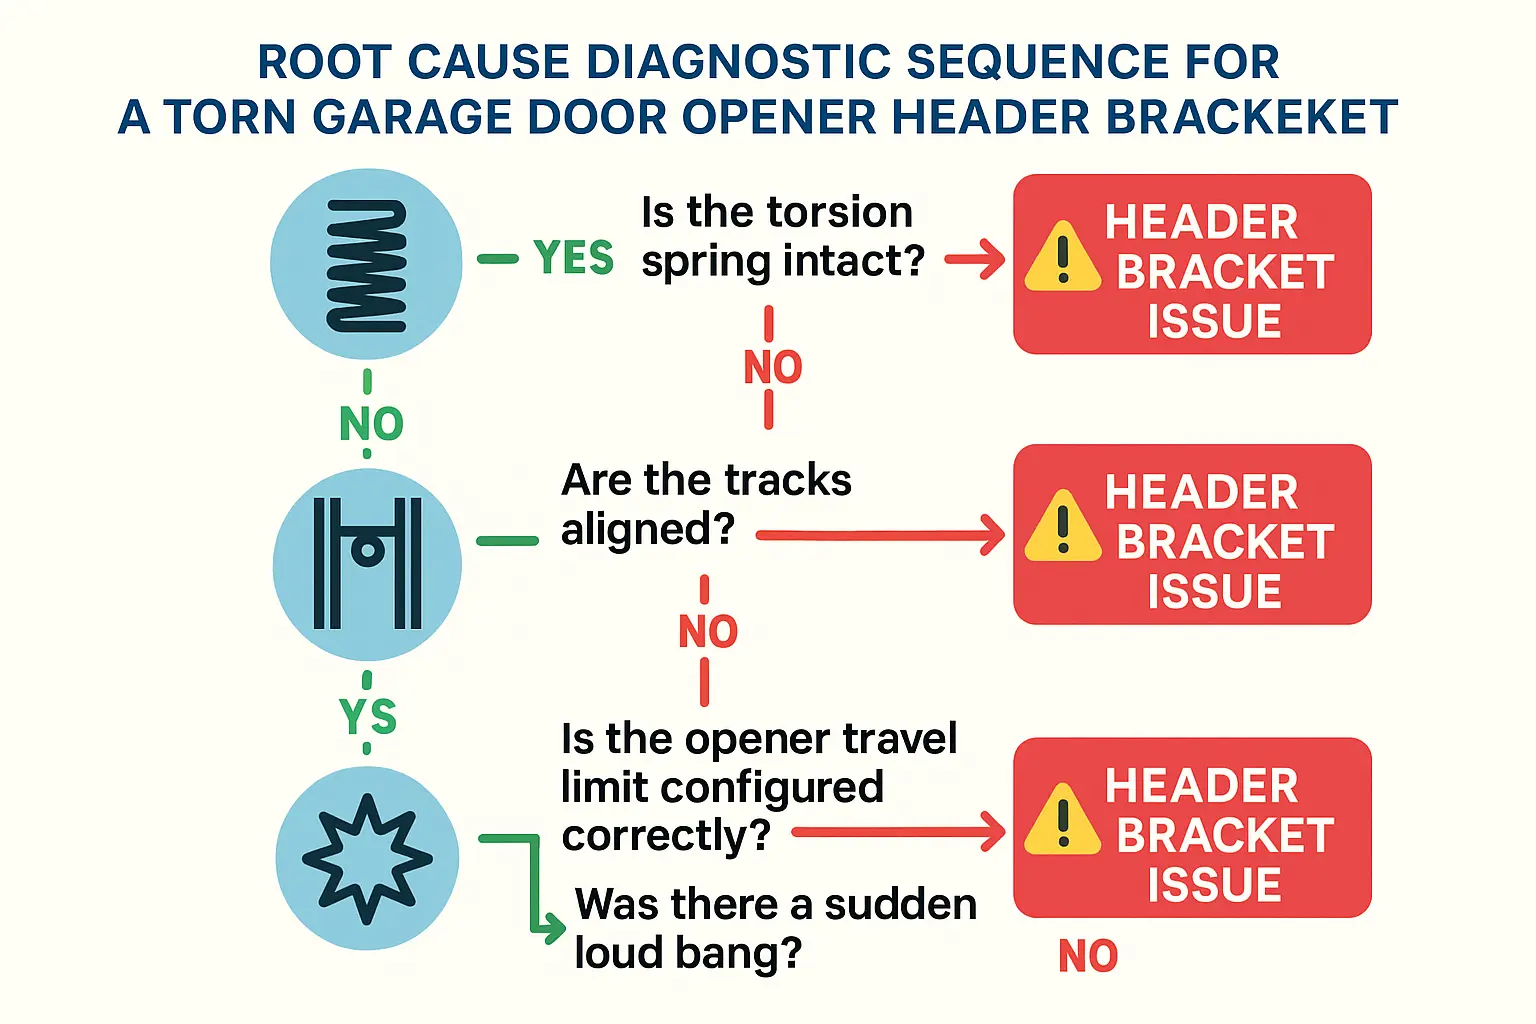
Root Cause Diagnostic Flowchart
Fixing a torn header bracket without identifying the underlying catalyst is a recipe for repeat failure. According to the Door & Access Systems Manufacturers Association (DASMA) standard 106-2022, residential garage door openers transmit up to 200+ lbs of peak dynamic force directly to the header bracket during the critical transition from vertical to horizontal travel. If there is any binding or mechanical resistance elsewhere in the system, this force spikes exponentially, causing the fasteners to shear or tear out completely.
To prevent this from happening again, diagnose the structural and mechanical health of your door. Check if your torsion spring has a visible gap, indicating a break. Test the physical alignment of your tracks and rollers. Finally, verify that your opener’s travel limit settings aren’t forcing the door too hard against the garage floor, which prys the bracket outward during the end of the closing cycle.
Material-Specific Reinforcement Options
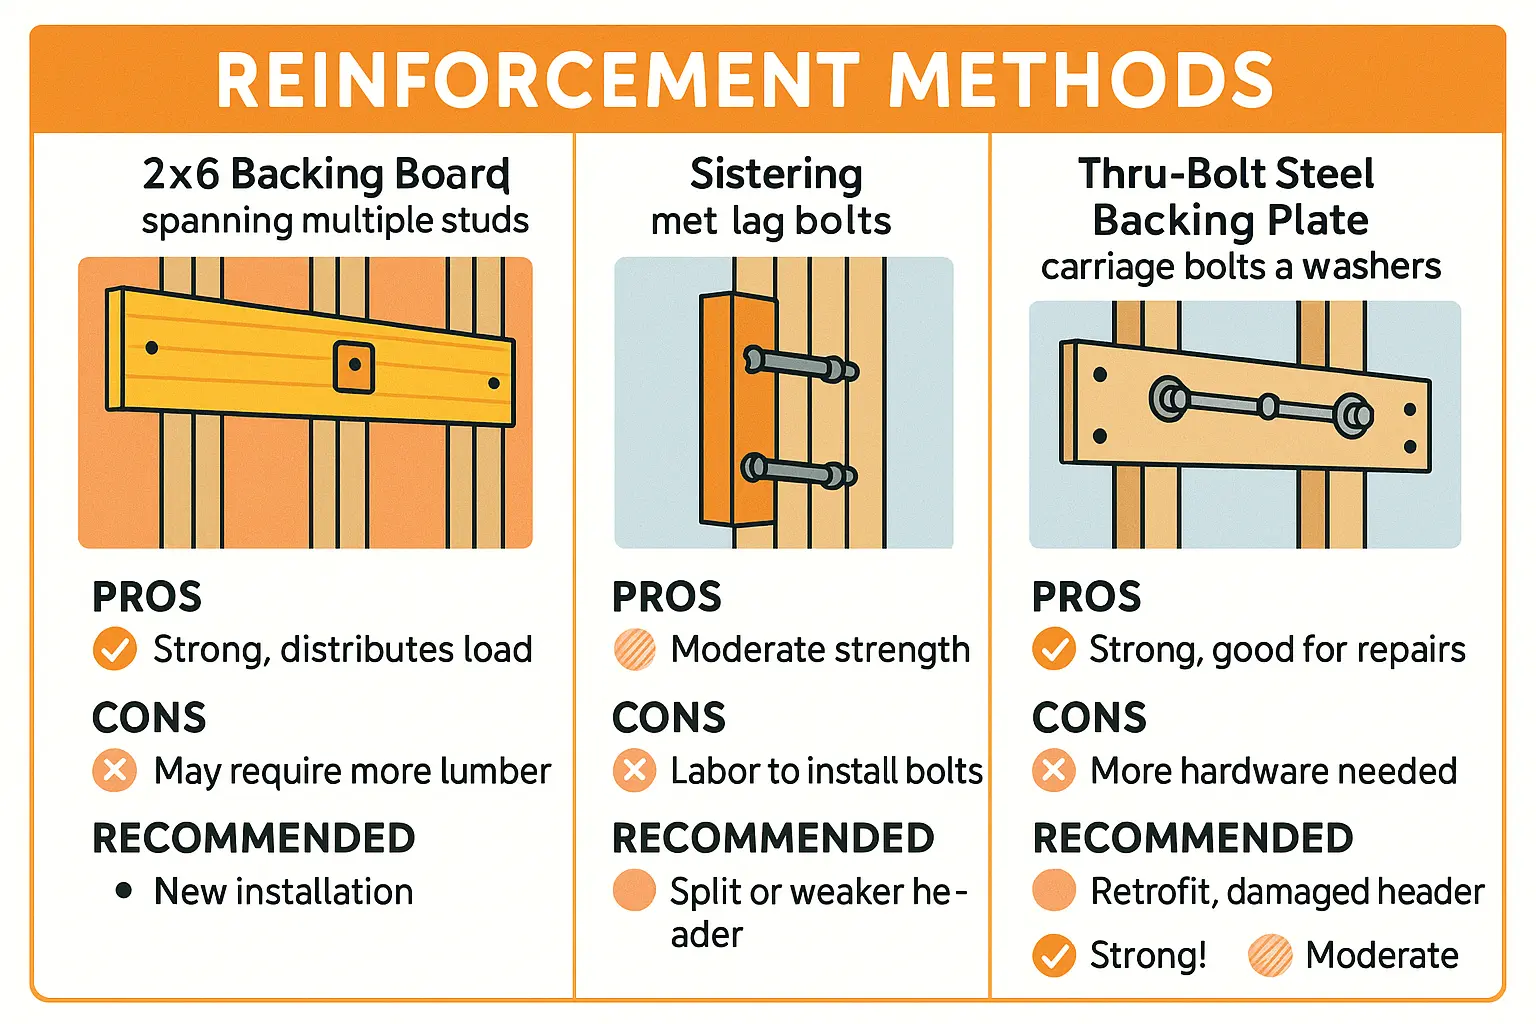
Re-mounting a bracket directly into damaged drywall or split wood is guaranteed to fail. You need a structural anchor that can safely distribute the dynamic force of the opener across multiple framing studs.
The primary method for uninsulated or drywalled garages is the 2×6 Backing Board Method. By spanning a structural wood board across 2 to 3 wall studs, you create a solid anchor point. If the original structural wood header itself is split, you can perform Sistering, which involves lag-bolting a new 2×8 structural piece alongside the damaged lumber. For absolute, zero-fail security, the Thru-Bolt Plate Method uses steel backing plates and carriage bolts driven completely through the wall framing.
According to the APA (The Engineered Wood Association) lumber standards, unheated garages experience intense seasonal temperature swings. These thermal cycles cause framing lumber to shrink and expand, drying out the wood over time. This drying effect, combined with a historic lack of pre-drilled pilot holes, accounts for over 65% of split wood header failures in homes over 10 years old.
Step-by-Step Reconstruction Guide
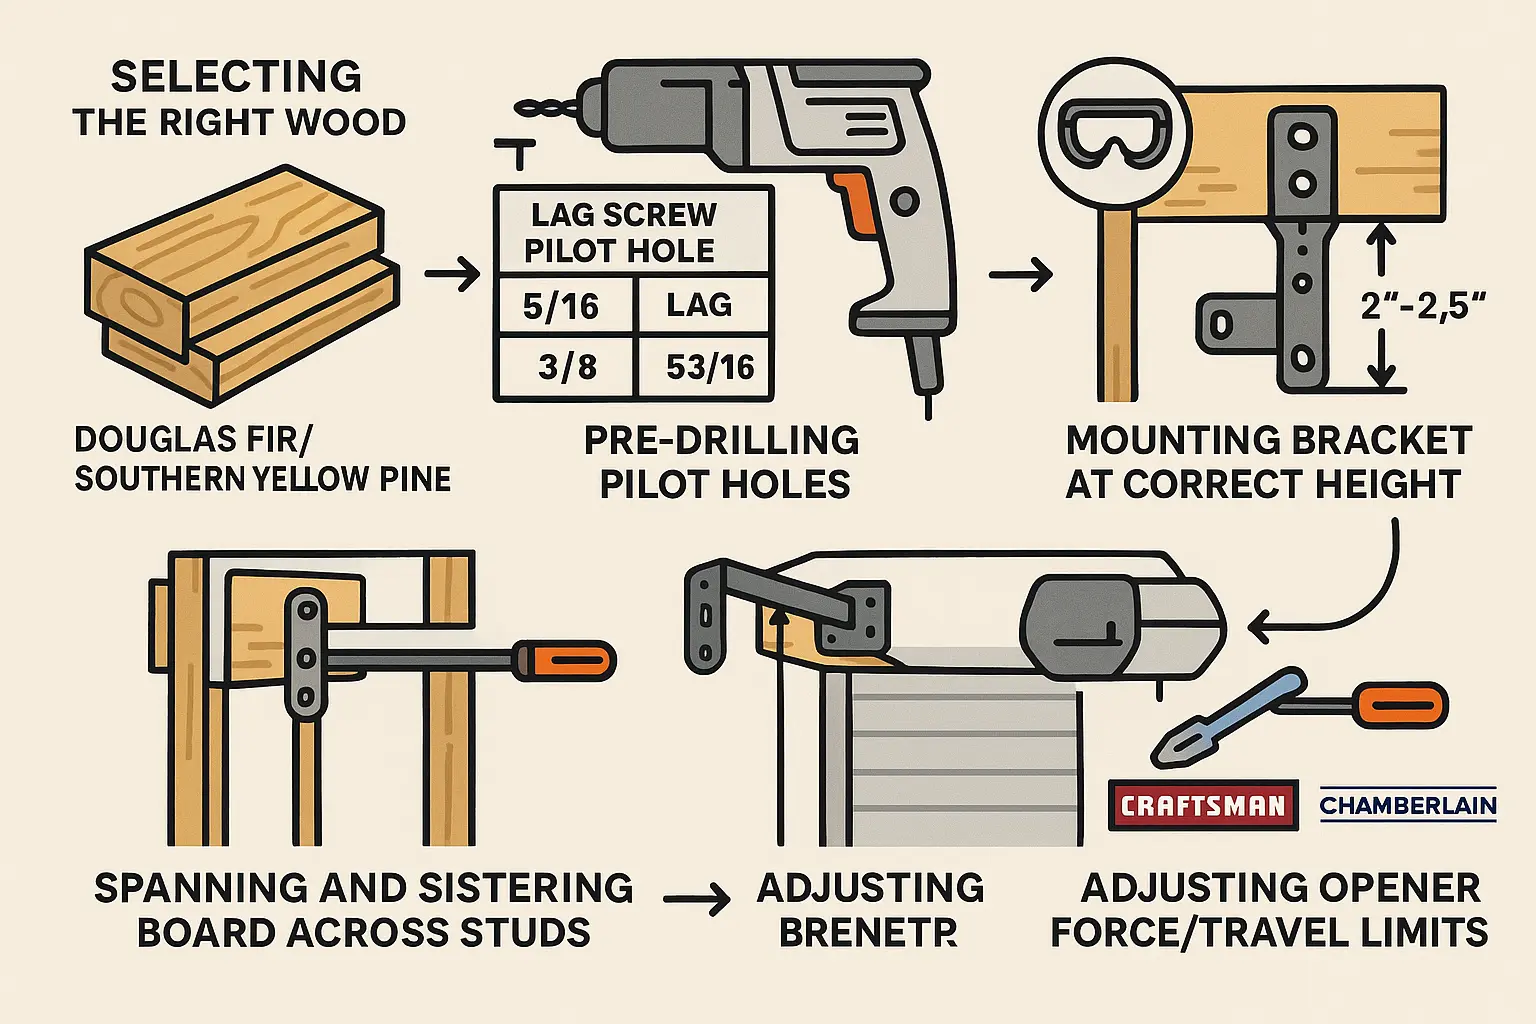
To successfully repair your header bracket, select high-quality framing lumber such as Southern Yellow Pine or Douglas Fir. Avoid cheap materials like OSB or standard SPF (Spruce-Pine-Fir), which lack the necessary grain density to resist dynamic pullout forces.
Clean and Prep the Damage
Begin by removing the old, damaged bracket. If there is torn drywall or split wood, clear away the loose debris. Mark the locations of your wall studs using a high-quality stud finder.
Pre-Drill Pilot Holes
To prevent splitting your new backing board, pre-drilling pilot holes is mandatory. Refer to the APA specifications: for a standard 5/16″ lag screw, drill a precise 5/32″ pilot hole. Pre-drilling preserves the structural integrity of the wood fibers, maximizing the fastener’s ultimate holding capacity.
Mount the Reinforcement Board
Cut your 2×6 backing board to a length that spans at least two framing studs (typically 18 to 32 inches). Secure the backing board to the studs using 3-inch structural lag screws.
Position and Install the Bracket
Position the new header bracket on your reinforced backing board. According to standard manufacturer guidelines, the bracket must be mounted exactly 2 to 2-1/2 inches above the highest point of the garage door’s travel arc. Secure the bracket using heavy-duty 5/16″ lag bolts.
Adjust Force and Travel Limits
Once physical reconstruction is complete, you must recalibrate your opener’s force and travel limit settings. Skipping this step is the primary cause of repeat failures. Limiting the downward force prevents the motor from slamming the door and prying the bracket back off the wall. This calibration also protects your system from needing a costly garage door opener gear repair down the line. Following a rigorous garage door maintenance checklist can prevent these issues before they start.
Evaluating Your Repair Options
While a minor bracket detachment can be resolved via diy garage door maintenance, structural failures are highly complex. Performing a DIY repair typically costs $20 to $50 in basic lumber and structural hardware but requires moderate technical skill, structural tools, and several hours of labor.
However, there are critical “red lines” where DIY attempts become hazardous. If the main load-bearing header of your garage is sagging, showing signs of severe wood rot, or if the failure was caused by snapped torsion springs or cables, you must seek professional assistance. Managing heavy doors with failed springs or attempting a complex garage door cable repair without the proper physical tension tools is a leading cause of severe residential accidents. Up & Down Garage Doors offers fully licensed, expert support backed by a personal approach and robust service warranties.
Frequently Asked Questions
Can I screw my garage door opener bracket directly back into the drywall?
No. Drywall possesses virtually zero structural holding capacity. Standard garage door openers exert over 200 pounds of dynamic pullout force, meaning any fastener screwed directly into drywall will immediately rip out. You must secure the bracket to a solid wood framing member or install a 2×6 backing board spanned across multiple wall studs.
Why did my header bracket pull out of the wall in the first place?
While natural thermal expansion and aging wood play a small part, the root cause is almost always mechanical resistance. This is typically caused by a broken counterbalance spring, binding tracks, frayed cables, or incorrectly set opener travel limits that force the door into the ground, causing the motor to pry its own bracket off the wall.
How do I know if my garage door header wood is rotted?
Inspect the lumber for discoloration, a soft texture that easily splinters when poked with a screwdriver, or structural sagging. If structural rot is present, the compromised wood must be completely replaced before any opener bracket can be safely anchored.
You May Also Like