





Spring Anchor Bracket Pulling From the Wall: Why It’s Urgent
Published: Oct 5, 2026
If you notice a tiny gap forming behind the steel plate holding your garage door springs, your home is facing an active structural hazard. This steel plate—known as the spring center anchor bracket—is not a simple mounting bracket. It is the central anchor point holding back immense mechanical force.
While many homeowners attempt a quick diy garage door repair to save time, treating a pulling bracket as a simple cosmetic fix can lead to sudden, catastrophic injury or property damage. Understanding the physics at play will help you make a safe, informed decision for your home.
🛑 URGENT SAFETY ALERT
If your spring anchor bracket is visibly pulling away from the wall, do not attempt to open or close the garage door. When your garage door is fully closed, the torsion springs are at their maximum wind and highest energy state. Unplug your automatic opener immediately to prevent anyone from operating the door, and do not touch any of the hardware. The bracket is under immense tension and can fail without warning.
Anatomy of a Silent Failure
To understand why this issue is so critical, it helps to understand how does a garage door spring work. Standard double-car garage doors weigh between 150 to over 250 pounds. To lift this weight, torsion springs are tightly wound onto a steel torsion shaft.
At the center of this shaft is the stationary cone, which is bolted directly to the steel center anchor bracket. This bracket is fastened to a wooden spring pad mounted on your wall.
When fully wound, a residential torsion spring holds approximately 100 to 240 foot-pounds of torque. The spring doesn’t simply pull downward on the bracket; it exerts rotational force. This creates a mechanical “couple”: the top lag screws are subjected to a massive withdrawal (tension) load pulling them straight out of the wood, while the bottom of the bracket is compressed hard into the wooden pad.
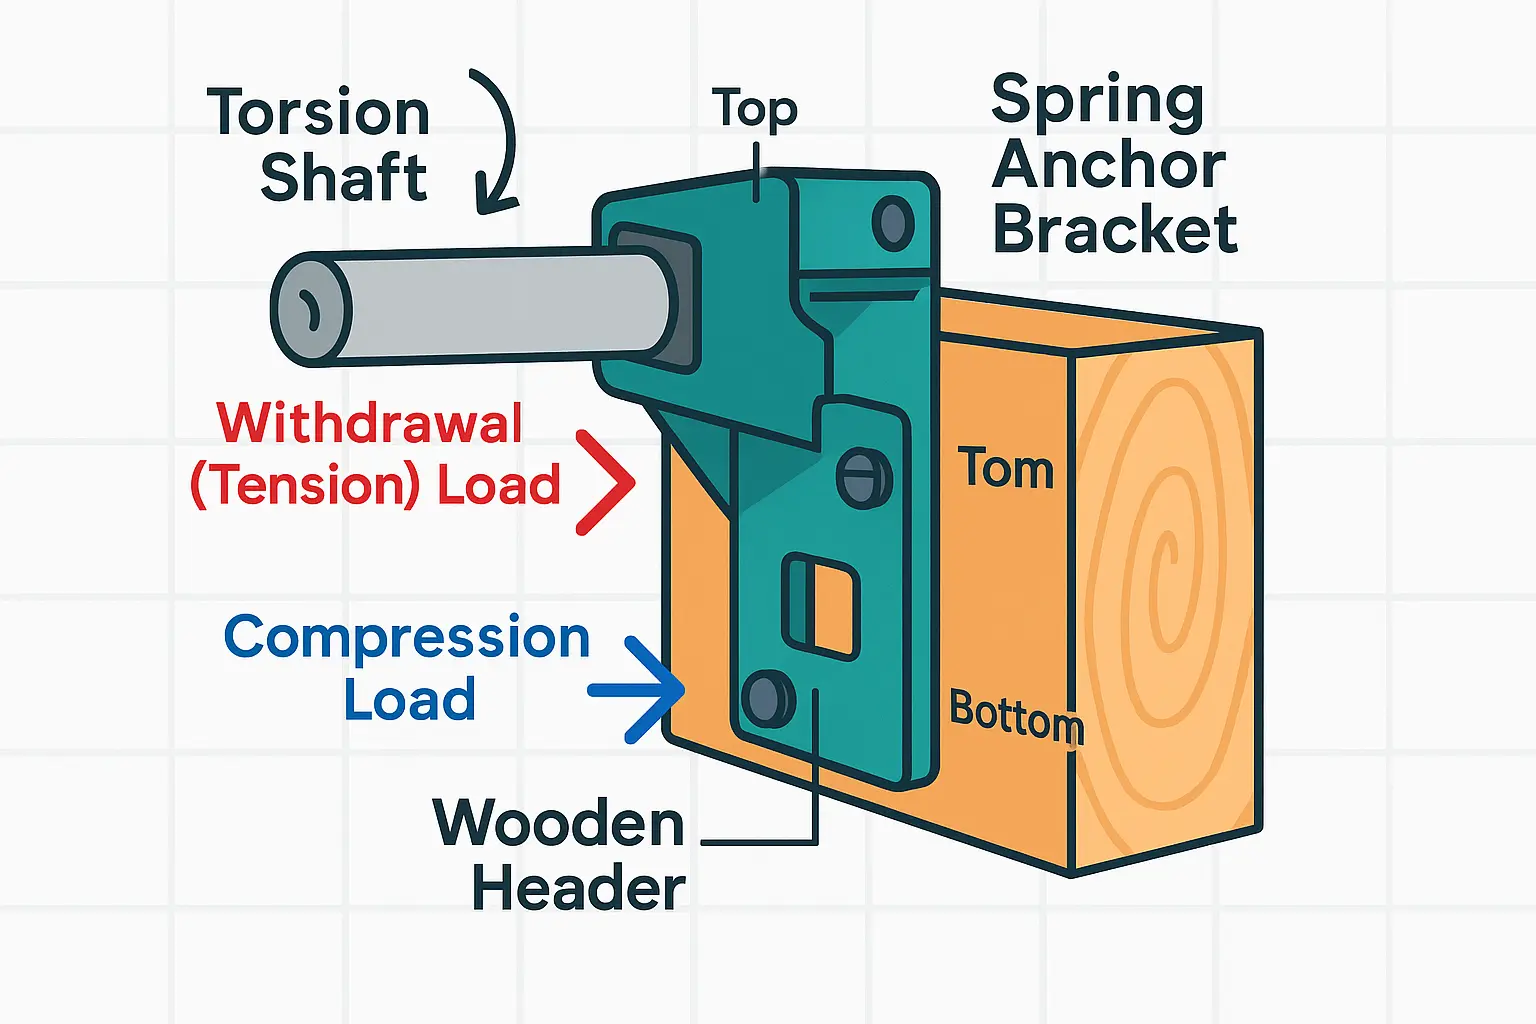 This diagram explains how torsion spring rotation causes the top lag screws to experience a high withdrawal (tension) load pulling them out of the wood, while the bottom of the bracket is compressed into the wood. Understanding this force ‘couple’ reveals why these screws fail structurally.
If the bracket pulls completely free, those 240 foot-pounds of stored kinetic energy will release in less than 0.1 seconds. The metal bracket, winding cones, and springs can violently twist, throw metal shrapnel, or cause the heavy door to crash down instantly.
Why the Structural Wood Pad Fails
Lag screws have incredibly high shear resistance, but their withdrawal resistance depends entirely on the health of the wood they are driven into. The bracket usually pulls away due to one of three common builder errors:
- The Drywall Sandwich: To save time, builders often mount the wooden spring pad directly over sheetrock. Over time, the heavy rotational forces crush the soft gypsum core of the drywall, creating a hollow void. The lag screws lose their tension and begin backing out of the wood framing behind it.
- Over-Torqued Split Grain: Wood fasteners must be installed with exact pilot holes. If an installer drives a thick lag screw without a pilot hole, it splits the wood fibers. This structural split reduces the screw’s holding power by up to 50%.
- The Moisture Trap: Slow roof leaks, condensation behind cold exterior walls, or high humidity can rot the header. Wood rot destroys the friction required to hold screw threads, causing them to slip out easily under load.
The 3-Step Non-Contact Diagnostic Checklist
You can safely check the health of your anchor bracket without getting close to the active tension zone. Use these simple steps as part of your standard garage door maintenance checklist:
- The Business Card Clearance Test: Try to gently slide a business card behind the top edge of the steel bracket. If the card slides into a gap, your lag bolts have already begun to back out.
- The Painter’s Tape Drift Test: Place a strip of blue painter’s tape across the edge of the bracket and onto the wooden wall pad. If the tape wrinkles, tears, or stretches over 24 hours, the bracket is actively drifting.
- The Wood Dust Shadow Line: Look closely at the top of the bracket for a pale line of unpainted wood or fine wood powder below. This is sawdust created as the screw threads chew through failing wood fibers.
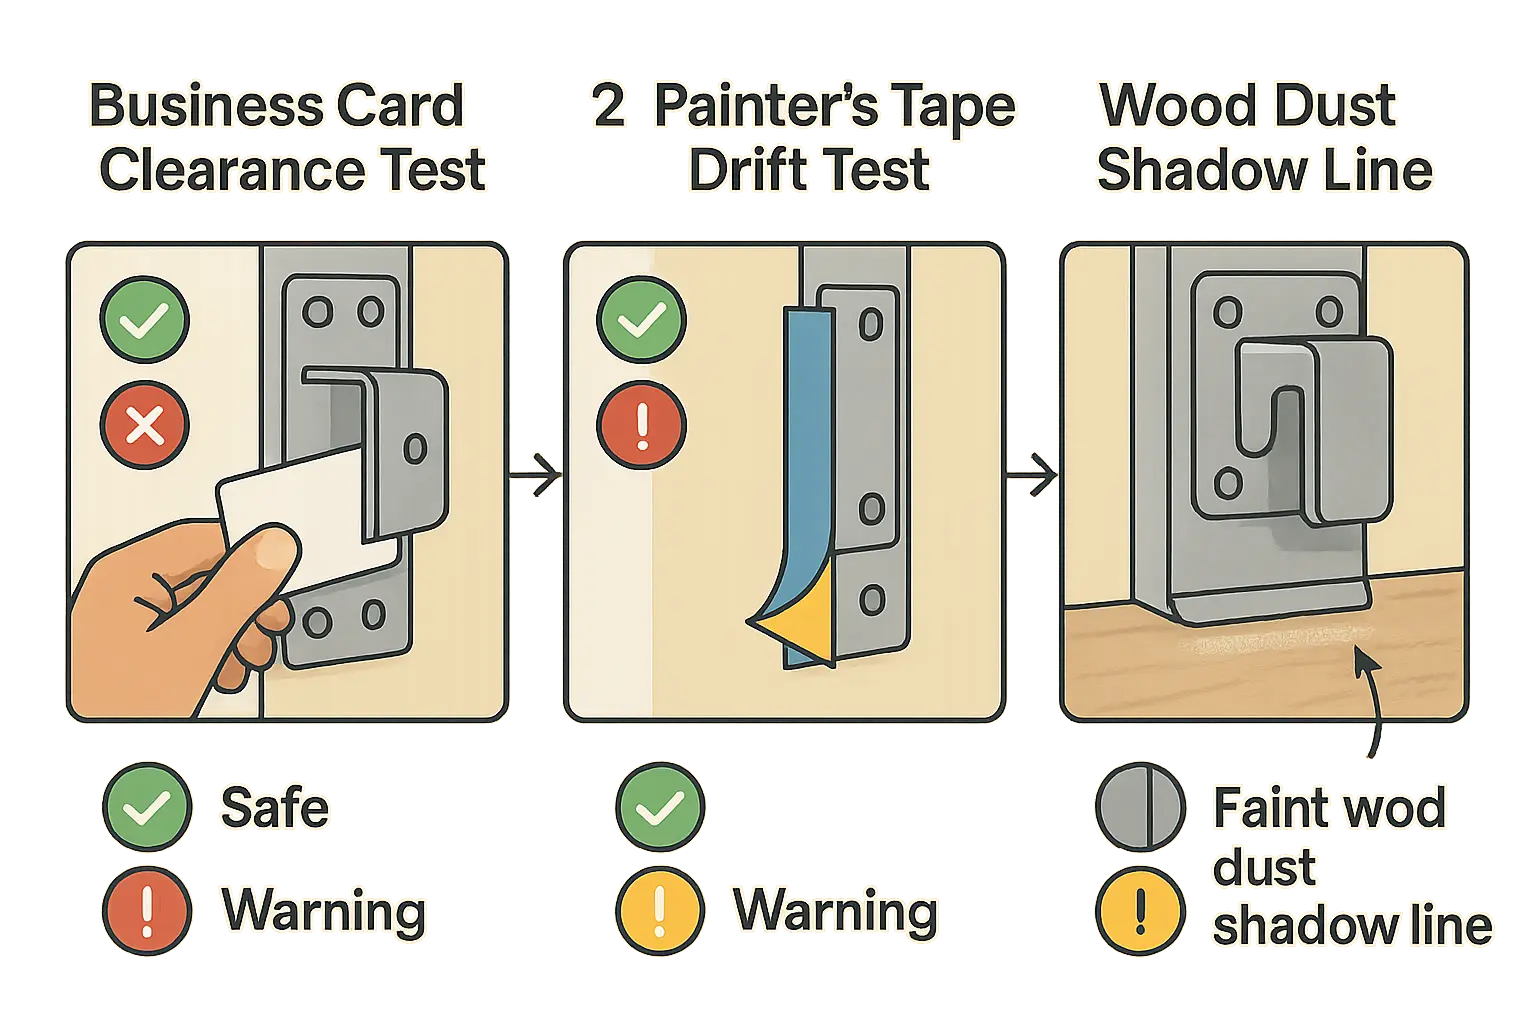 Learn these three simple, non-invasive tests to detect if your garage door spring anchor bracket is pulling away before dangerous failure occurs. Early detection helps prevent costly damages and ensures safety.
The "Tightening" Trap
The most common DIY mistake is attempting to tighten loose lag bolts with a socket wrench.
If the underlying wood pad is already split, rotten, or stripped, turning the screw will simply spin it in place, destroying any remaining holding power. Doing this while the springs are fully wound can trigger an instantaneous, violent failure of the bracket, causing severe hand or facial injuries as the wrench is violently thrown by the rotating shaft.
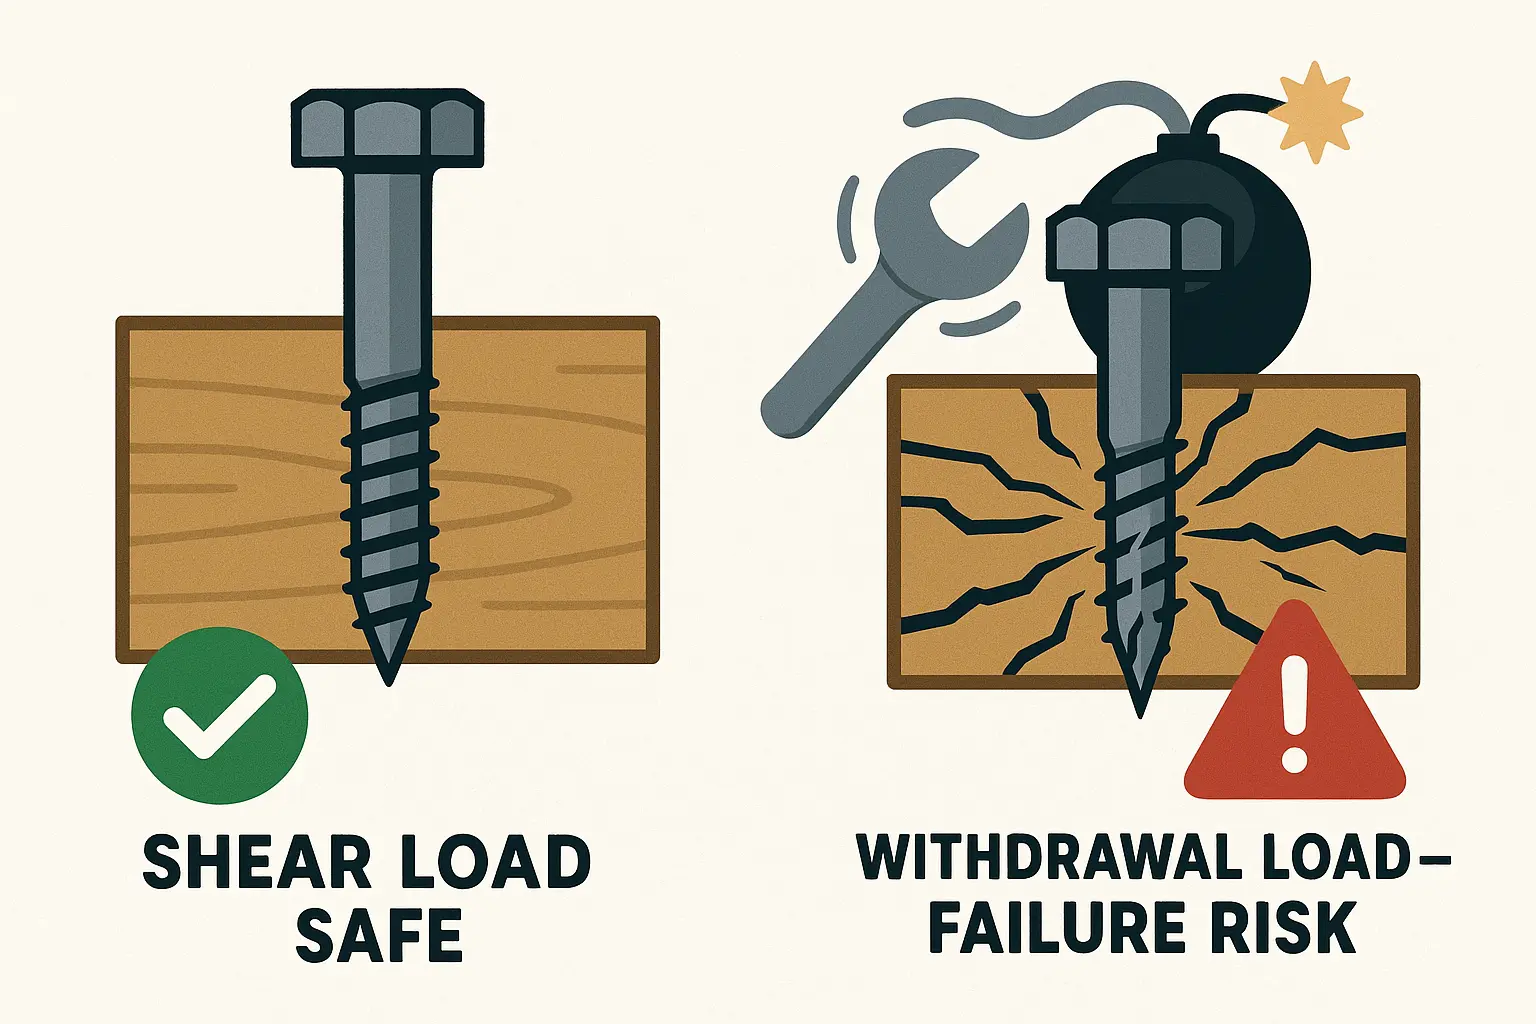 Remember: lag screws excel in shear force when installed correctly with pilot holes in solid wood. Over-tightening in damaged or wet wood causes withdrawal failures, potentially releasing the spring suddenly and dangerously. Avoid the ‘tightening trap’!
If you suspect structural wear, it is always safer to fix garage door issues professionally rather than risking a dangerous mechanical release.
How a Certified Technician Repairs It Safely
Resolving a pulling bracket requires systematic, professional steps to rebuild the structural connection safely:
- Controlled De-Tensioning: A certified technician will use solid steel winding bars to safely release the spring tension.
- Substructure Rebuilding: The tech will remove any compressed drywall and replace the damaged spring pad with a solid hardwood block or engineered lumber (LVL) backing plate, depending on your home’s framing.
- Engineering-Grade Fastening: The technician will drill precise pilot holes (typically 3/16″ for a 5/16″ lag screw) to maximize the wood’s natural withdrawal resistance without splitting the grain.
- Re-Tensioning and System Balance: After a secure replace garage door spring near me service, they will re-wind the springs, verify the balance of the door, and recalibrate the safety systems.
How to Evaluate a Professional Repair Company
When hiring a technician for this critical repair, ask these screening questions to ensure they follow safety protocols:
- “Will you replace the wooden spring pad, or just reuse the old holes?” (Red flag: If they suggest using the same stripped holes, or just moving the bracket slightly on rotten wood).
- “Do you use solid steel winding bars to release tension?” (Safety flag: They should never use screwdrivers, pliers, or pipe wrenches to wind springs).
- “Will you check the door balance and recalibrate the opener’s limits afterward?” (A professional will always test and reset garage door opener safety forces to ensure the entire system works in harmony).
Taking a shortcut on a failing spring anchor bracket is never worth the risk. By choosing a qualified team that understands the structural engineering behind your garage door, you protect your family, your home, and your peace of mind.
Frequently Asked Questions
Can I still use my automatic opener if the bracket is loose?
No. An automatic opener is designed to guide a balanced door, not lift the dead weight of an un-sprung door. Operating the door with a loose bracket can pull the bracket completely out of the wall, causing the door to crash and burning out your opener’s motor.
Why can’t I just use longer wood screws to fix the bracket myself?
Longer screws driven into a rotten, split, or drywall-backed header will not restore the necessary structural holding capacity. Without winding down the high-tension springs first, attempting to drive new screws is incredibly hazardous.
How long does a professional spring anchor bracket repair take?
A professional garage door spring replacement and anchor bracket rebuild typically takes between 1 to 2 hours. This includes safely de-tensioning the system, replacing the wood backing, re-mounting the bracket, and testing the system for balance.
You May Also Like
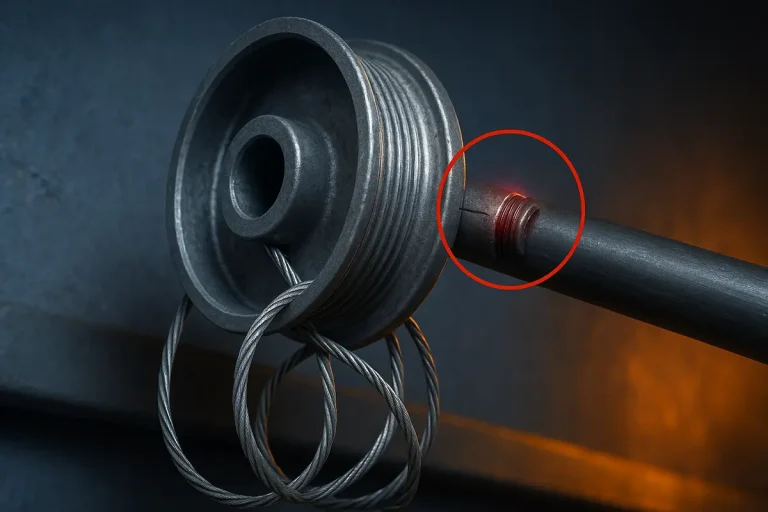
Cable Drum Slipping on the Shaft: Diagnosing and Fixing Set Screw Failures
Published Date: Oct 2, 2026
Torsion Shaft Bent or Sagging: Signs, Risks, and Repair Solutions
Published Date: Sep 29, 2026
The Bottom Bracket Cable Guide: Why the Bike Industry’s Smallest Screw Causes the Biggest Failures
Published Date: Sep 28, 2026