Opener Gear and Sprocket Failure: Motor Runs, Door Doesn’t Move
Published: Sep 29, 2026
You press your wall button, the familiar whir of the motor overhead starts up, but your garage door remains completely still. If you are experiencing this, you are facing a classic mechanical disconnect. Your motor is working, but the energy isn’t transferring to the chain or belt.
The 30-Second Triage: Why is the Motor Spinning but Nothing is Moving?
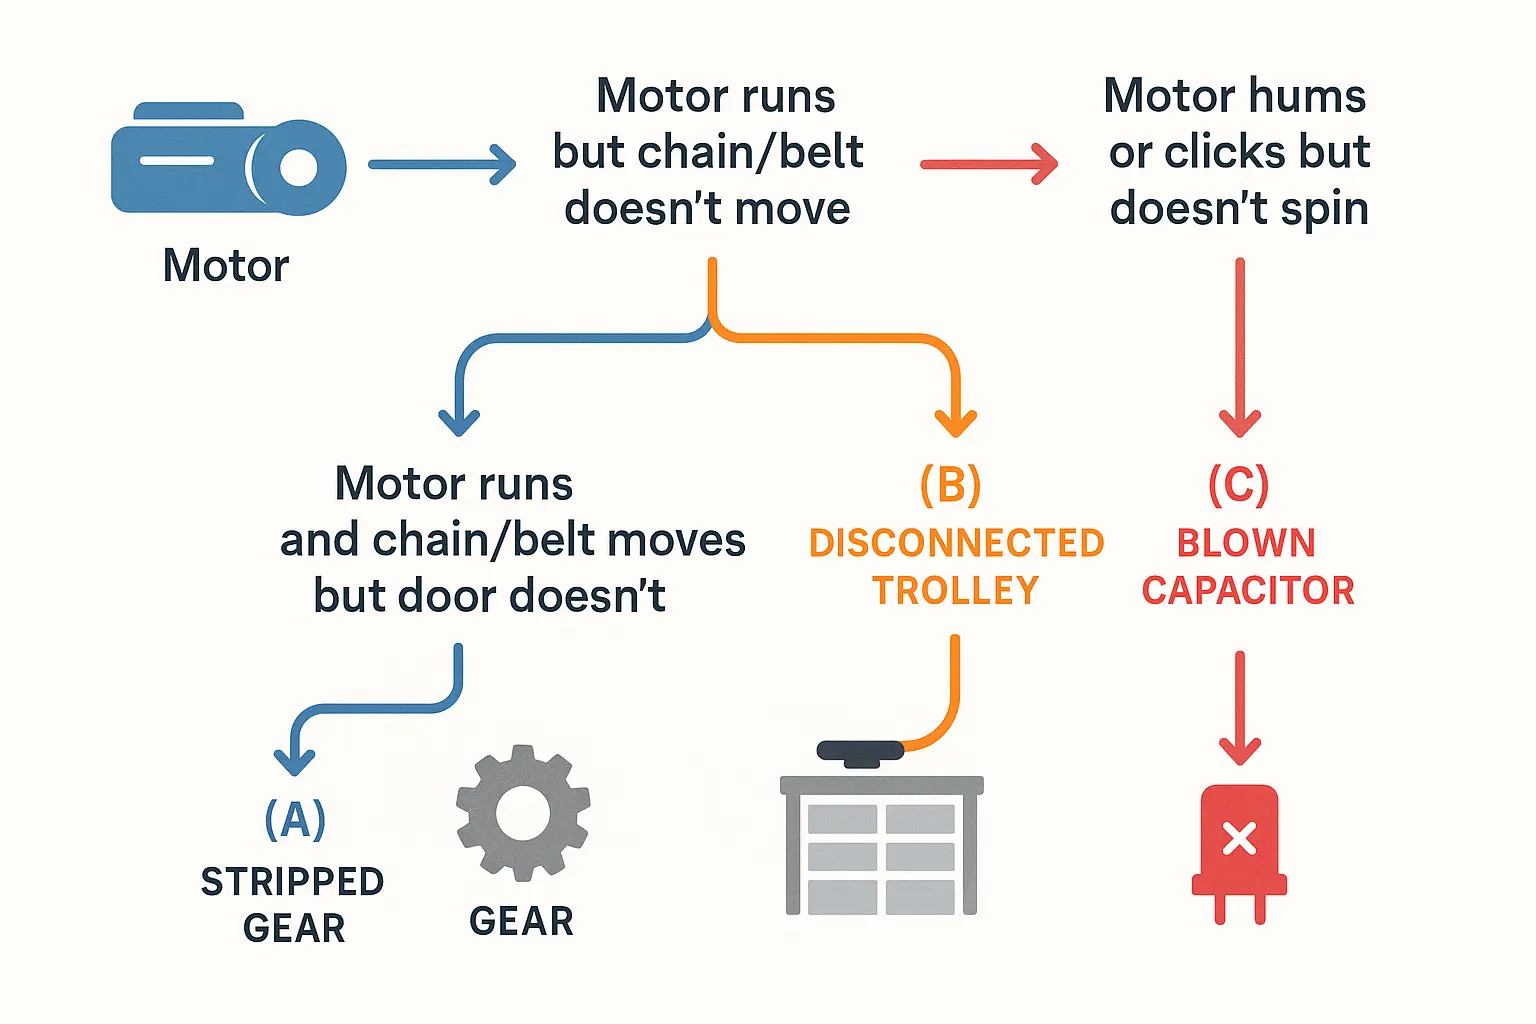
Before diving into repairs, you need to identify exactly where the physical disconnect is occurring. To triage the issue quickly, follow this simple diagnostic flow:
- Symptom A: The motor runs and makes a spinning sound, but the chain or belt does not move at all. This points to a stripped internal nylon gear or a broken drive shaft assembly.
- Symptom B: The motor runs, the chain or belt moves, but the door stays completely still. This indicates that your emergency release cord has been pulled, disconnecting the outer trolley. If so, learn how to reengage garage door opener carriage mechanisms.
- Symptom C: The motor hums or clicks but does not spin at all. This points toward a blown starting capacitor or a seized motor shaft. For this scenario, consult our guide on what to do when a garage door opener hums but won’t open.
The "White Snow" Check: Confirming a Stripped Gear & Sprocket Assembly
In more than 85% of cases where the motor runs but the drive sprocket does not turn on a Chamberlain-built unit (which includes Chamberlain, LiftMaster, and Craftsman openers), the culprit is a stripped nylon helical gear.
These manufacturers design the internal gear to be sacrificial. It is made of soft nylon so that if the door encounters severe resistance, the gear strips first, protecting the expensive electric motor from burning out.
To confirm this, unplug the opener unit, remove its outer metal cover with a nut driver, and peer inside. If you see white plastic shavings piled up inside the housing—what technicians call the “white snow” effect—your gear teeth have been stripped completely smooth. If you need step-by-step diagnostic help for specific brands, check our liftmaster garage door opener troubleshooting steps or the chamberlain garage door opener troubleshooting process.
The Economic Crossroad: Repair vs. Replace
When dealing with a stripped gear, you have to decide whether to replace the parts or buy a completely new unit. Use the matrix below to evaluate your options. If you want a deeper look at this choice, check our complete breakdown of garage door repair vs replacement.
| Factor | Option A: DIY Gear Replacement | Option B: Professional Repair | Option C: Install a New Opener |
|---|---|---|---|
| Total Cost | Low | Medium | High |
| Time Investment | 1.5 to 2.5 hours of DIY labor | 1 hour (Waiting for Pro) | 3 to 4 hours (DIY) or 2 hours (Pro) |
| Warranty | None (Self-warranted) | Usually 30–90 days (Limited) | 1 year to Lifetime (Motor/Belt) |
| Best Suited For | Budget-conscious DIYers; openers < 10 years old. | Homeowners short on time; openers < 8 years old. | Openers > 10 years old; users wanting quiet belt drives. |
If your system is over a decade old, you might want to read our advice on how to decide should i fix or replace my garage door opener.
Step-by-Step DIY Guide: The "Hanging Method" Pro Shortcut
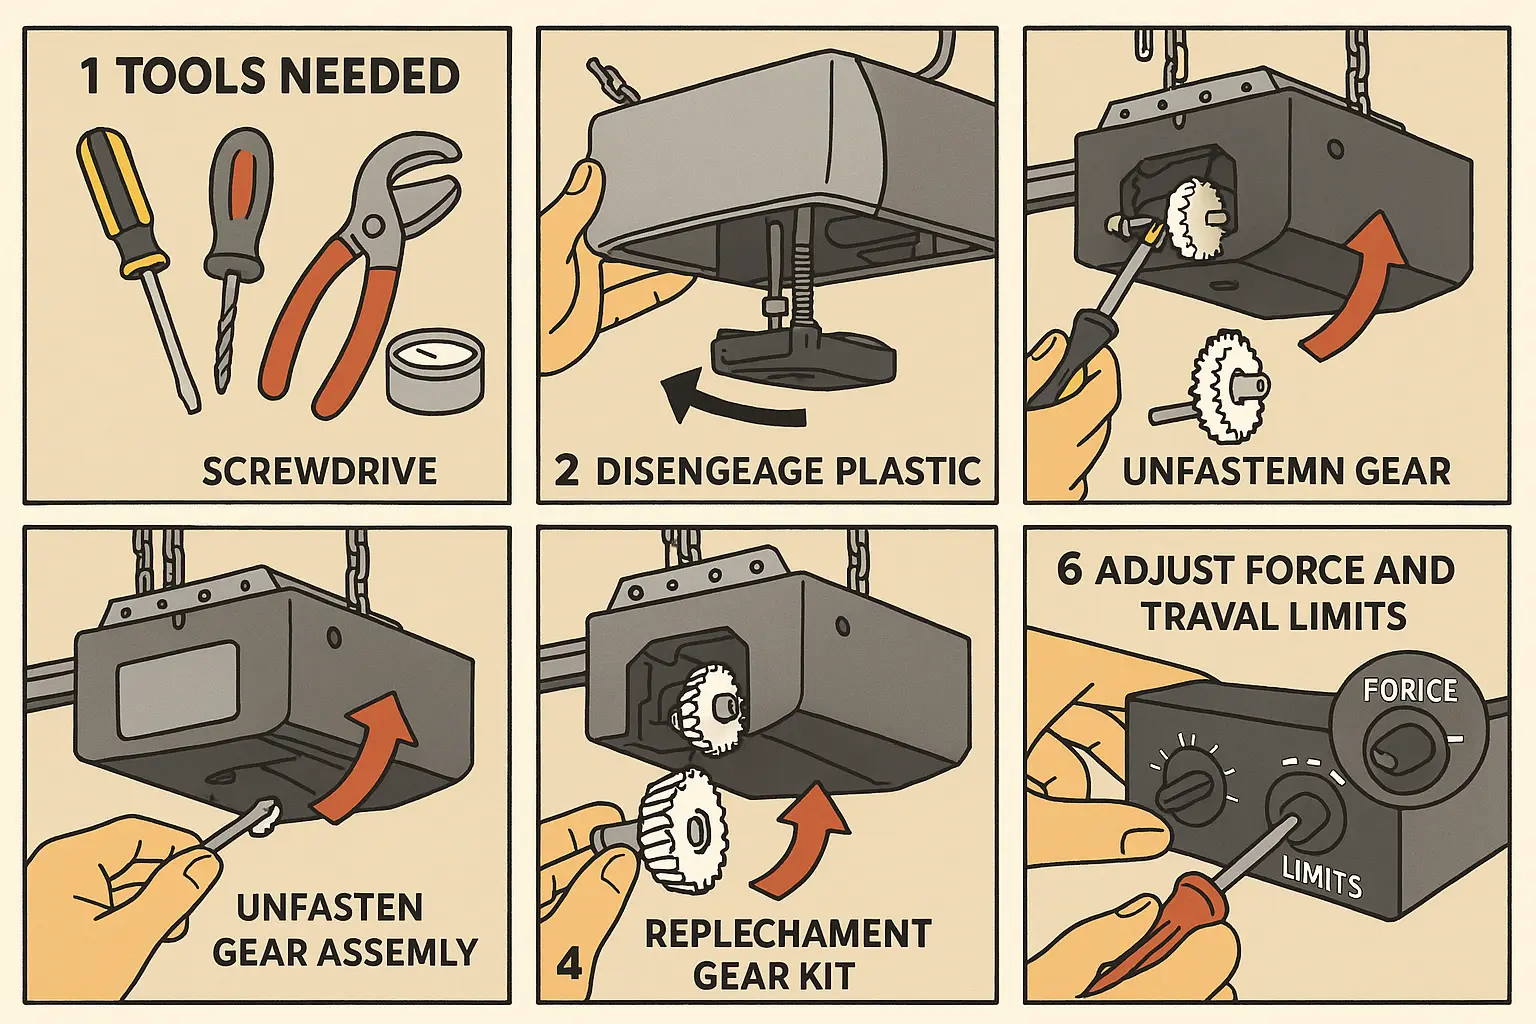
Standard manuals tell you to take the entire motor unit and rail assembly down from the ceiling to replace the gears. Professional technicians don’t do this. They save an hour of labor by using the “Hanging Method,” leaving the chassis in place.
Most chain-drive openers manufactured between 1993 and 2015 use standard gear kits like the 41C4220A (single gear/sprocket) or the 41A2817 (full gear and worm assembly).
To execute the hanging method:
- Safety First: Unplug the opener and detach the chain from the drive sprocket to release the tension.
- Remove the Cover: Take off the plastic light cover and metal housing.
- Extract the Shaft: Loosen the set screws on the drive gear. Use snap-ring pliers to remove the retaining ring at the top of the sprocket shaft, then slide the old gear and sprocket assembly out of the top of the unit.
- Grease and Reassemble: Install the new gear and shaft. Apply a generous amount of the white lithium grease included in your kit directly to the nylon teeth. Skipping this step causes friction that will destroy the new gear within a few weeks.
- Adjust Limits: After putting everything back together, adjust the travel and force limits. If the downward force is set too high, the door will slam into the floor, stripping your brand-new gear immediately.
When to Abandon DIY and Call a Professional
Gears rarely strip without a reason. Often, they fail because the garage door is out of balance or has a broken spring, forcing the opener to lift far more weight than it was designed to handle.
Before running your repaired opener, pull the emergency release cord and lift the door manually. It should feel light and stay in place halfway up. If it falls or feels incredibly heavy, stop. You likely have a broken spring. Working with high-tension springs is dangerous, so you should learn how to tell if garage door spring is broken and call an expert.
For general troubleshooting, check our complete guide on garage door motor troubleshooting or reference our garage door maintenance checklist to keep your system running smoothly. If you decide a professional touch is needed, Up & Down Garage Doors offers reliable service with a personal touch across CT, TX, NY, IL, and AZ.
Frequently Asked Questions
Can I use WD-40 to lubricate my new nylon gears?
No. WD-40 is a solvent, not a lubricant, and it can actually degrade the nylon material. You must use a high-quality white lithium grease or the specific silicone-based lubricant included in your replacement kit to protect the gear teeth from friction.
Why did my new replacement gear strip again after only a few days?
This usually happens because the underlying problem was not fixed. If your garage door is unbalanced, has broken springs, or the opener’s downward force limits are set too high, the motor will put too much stress on the sacrificial nylon gear, stripping it again almost instantly.
How long does a garage door opener gear and sprocket assembly typically last?
Under normal operating conditions and with a well-balanced door, a standard nylon gear and sprocket assembly lasts between 8 to 15 years. Regular yearly lubrication of the gear teeth can help extend this lifespan significantly.
You May Also Like