Electrical and Opener System Risks in DIY Garage Door Repair
Published: Sep 14, 2026
When a garage door fails to close or reverses unexpectedly, the temptation to attempt a quick DIY fix is strong. However, modern garage door openers are complex electromechanical appliances. Underestimating the hazards of their high-voltage capacitors, motorized drive gears, and delicate control boards can lead to severe injury, voided warranties, or catastrophic failure.
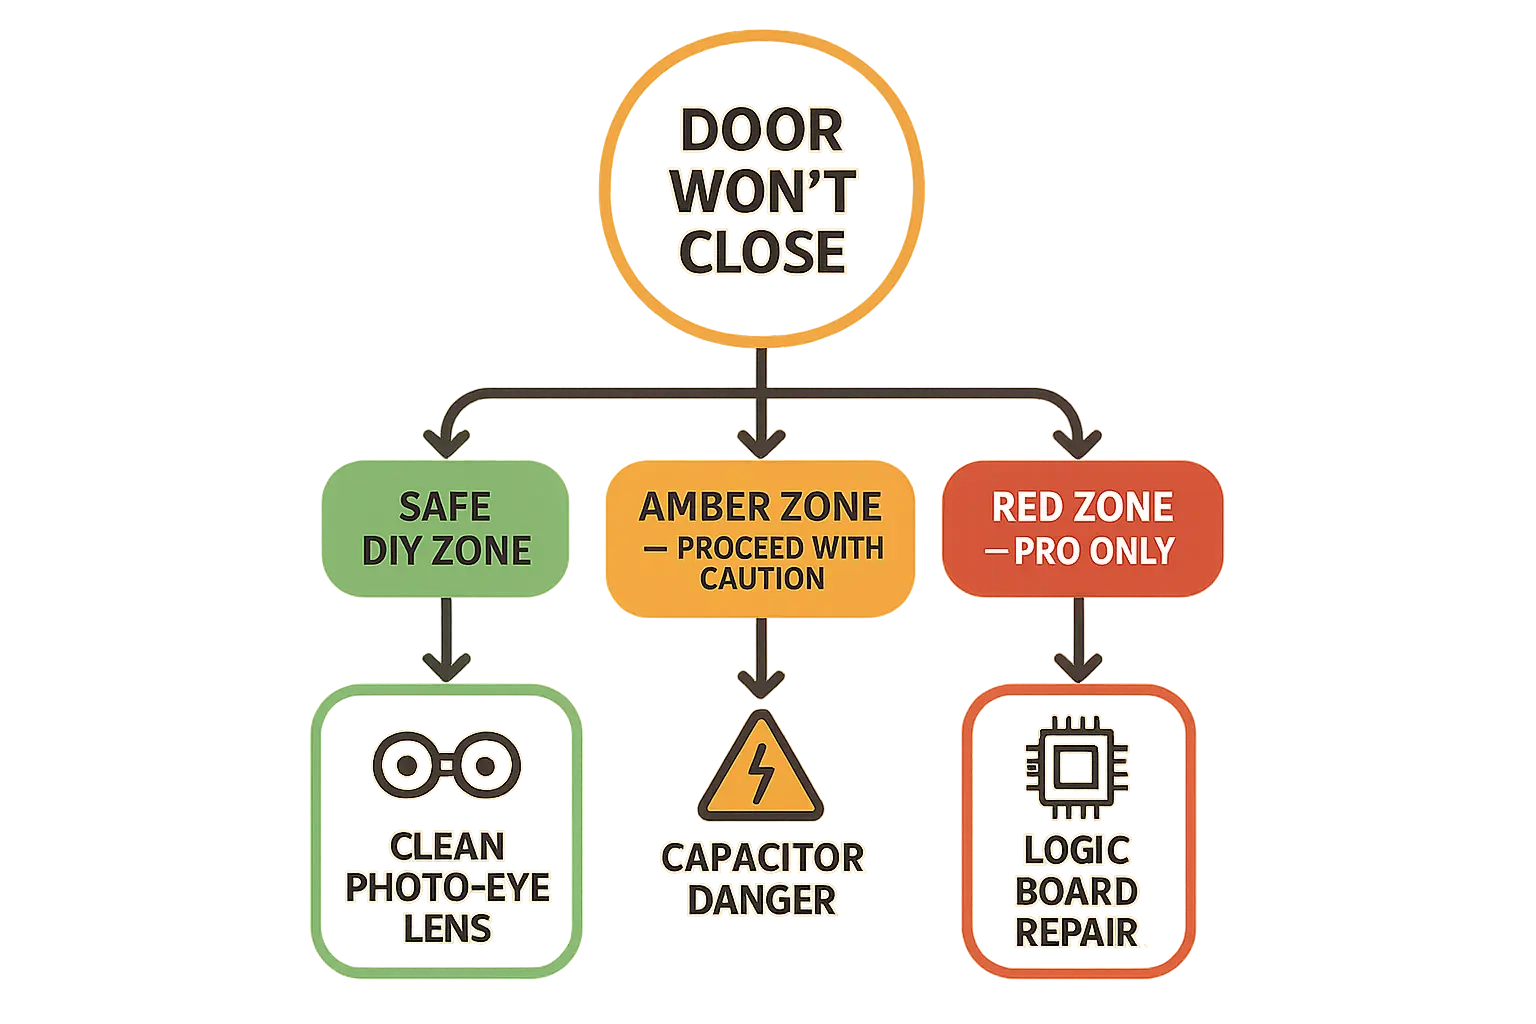
To help you navigate these issues safely, this guide establishes a clear diagnostic framework. It separates safe, low-risk DIY tasks from the high-risk “Red Zones” that require a certified professional.
Smart Diagnostic Symptom Assessment
Before touching a single wire or bracket, it is crucial to analyze how your system is behaving. Correctly identifying symptoms prevents dangerous misdiagnoses.
Common system warning signs include:
- The door reverses and the light flashes 10 times: This is a classic indication of a safety sensor obstruction, misalignment, or wire fault.
- The opener hums but does not move: If your garage door opener hums but won’t open, you may have a stripped drive gear, a seized motor, or a blown capacitor.
- The motor runs but the door remains static: Seeing your garage door motor running but door not opening usually points to a disengaged emergency release carriage, broken drive belt, or damaged internal gears.
- The unit has no power at all: If your garage door opener has power but not working, the issue may range from a tripped GFCI outlet to a completely burned logic board.
The Safe DIY Zone: Low-Risk Maintenance
Homeowners can safely handle basic adjustments that do not require opening the motor chassis or modifying high-voltage circuits.
Lens Cleaning and Realignment
Dust, spiderwebs, and moisture can block the infrared safety beam. Clean both the sending (amber LED) and receiving (green LED) lenses with a dry microfiber cloth. If the LEDs are flickering, gently adjust the brackets until both lights shine solid.
Height and Bracket Integrity
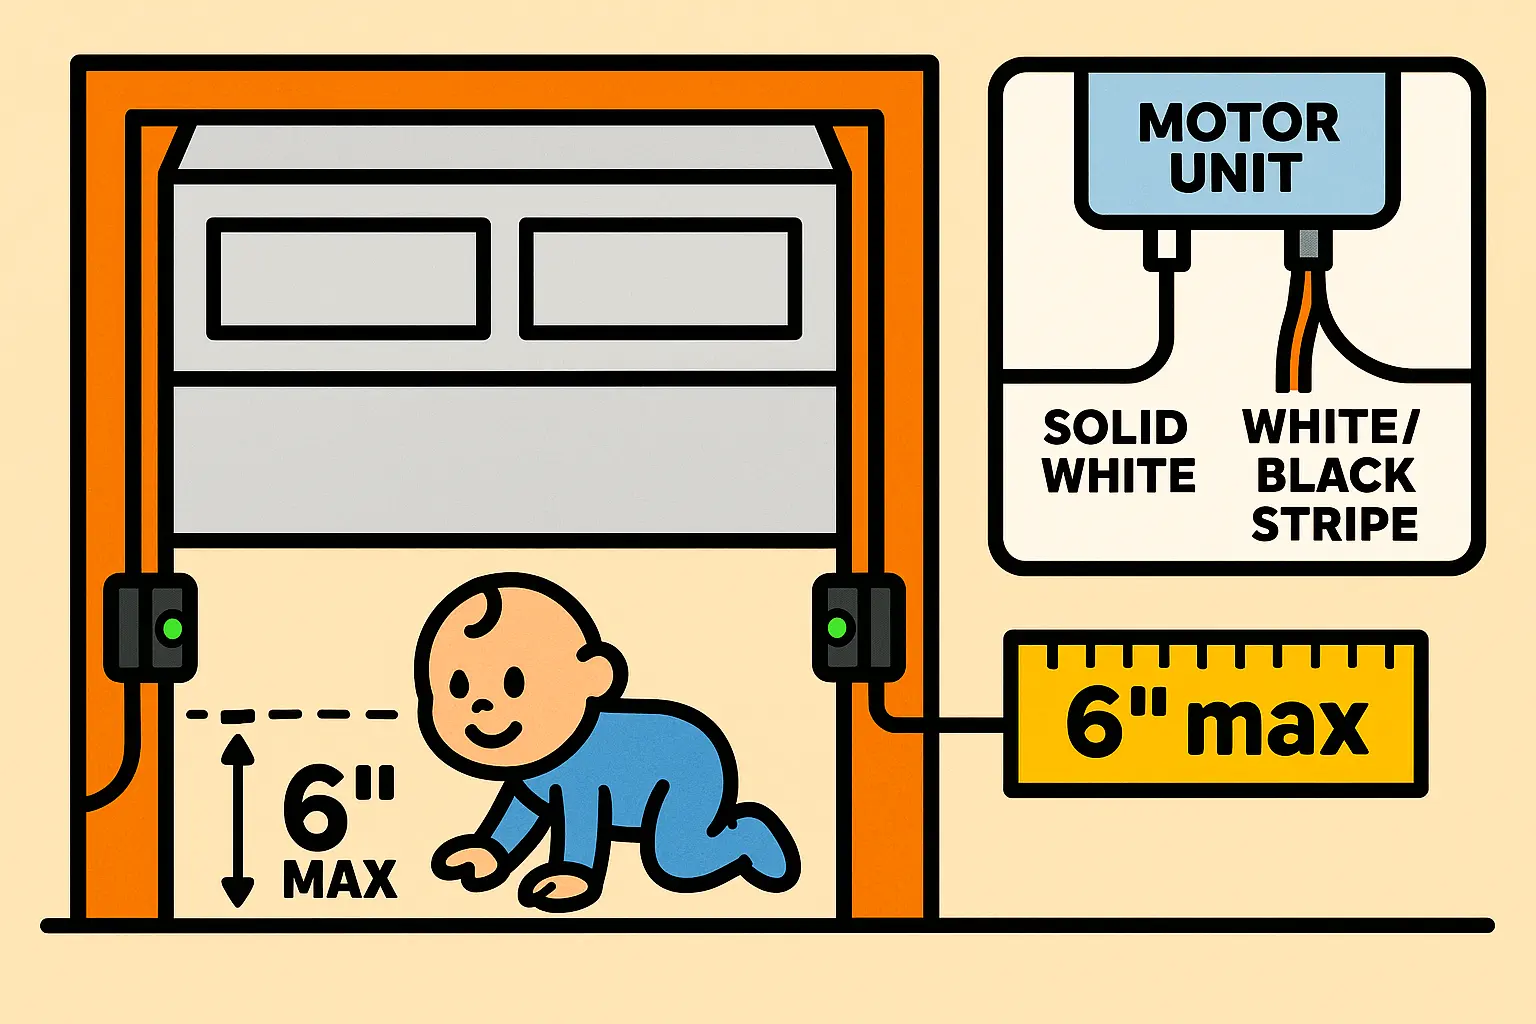
Under UL 325 regulations, safety sensors must be installed no higher than 6 inches above the garage floor to protect infants and pets. Intermittent sensor failure is often caused by track vibrations that shake the brackets. Tighten the wing nuts on the mounting brackets to ensure they stay firmly aligned.
Low-Voltage Wiring Inspections
If your sensors remain unlit, you may need to learn how to fix garage door sensor connections. Verify that the 18-gauge bell wire is clean and properly polarized. Reviewing a reliable garage door safety sensor wiring diagram will show how to bundle solid white and striped wires. When connections are severed, knowing how to rewire garage door sensors safely allows you to restore power to your low-voltage safety circuit.
The Amber Zone: Technical Troubleshooting
When simple alignment fails, troubleshooting enters the “Amber Zone.” This involves checking for physical shorts in the low-voltage lines using a multimeter. Ensure you completely unplug the opener from its power source before touching any terminal blocks.
Never attempt to bypass safety sensors. Homeowners often ask will chamberlain garage door opener work without sensors or search for how to bypass garage door sensors. Defeating these safety devices turns a standard door into an unmonitored crushing hazard, violating federal UL 325 safety standards.
The Red Zone: High-Voltage and Mechanical Perils
DIY repair becomes highly dangerous when dealing with the opener’s motor casing and main electrical systems.
The Danger of Start/Run Capacitors
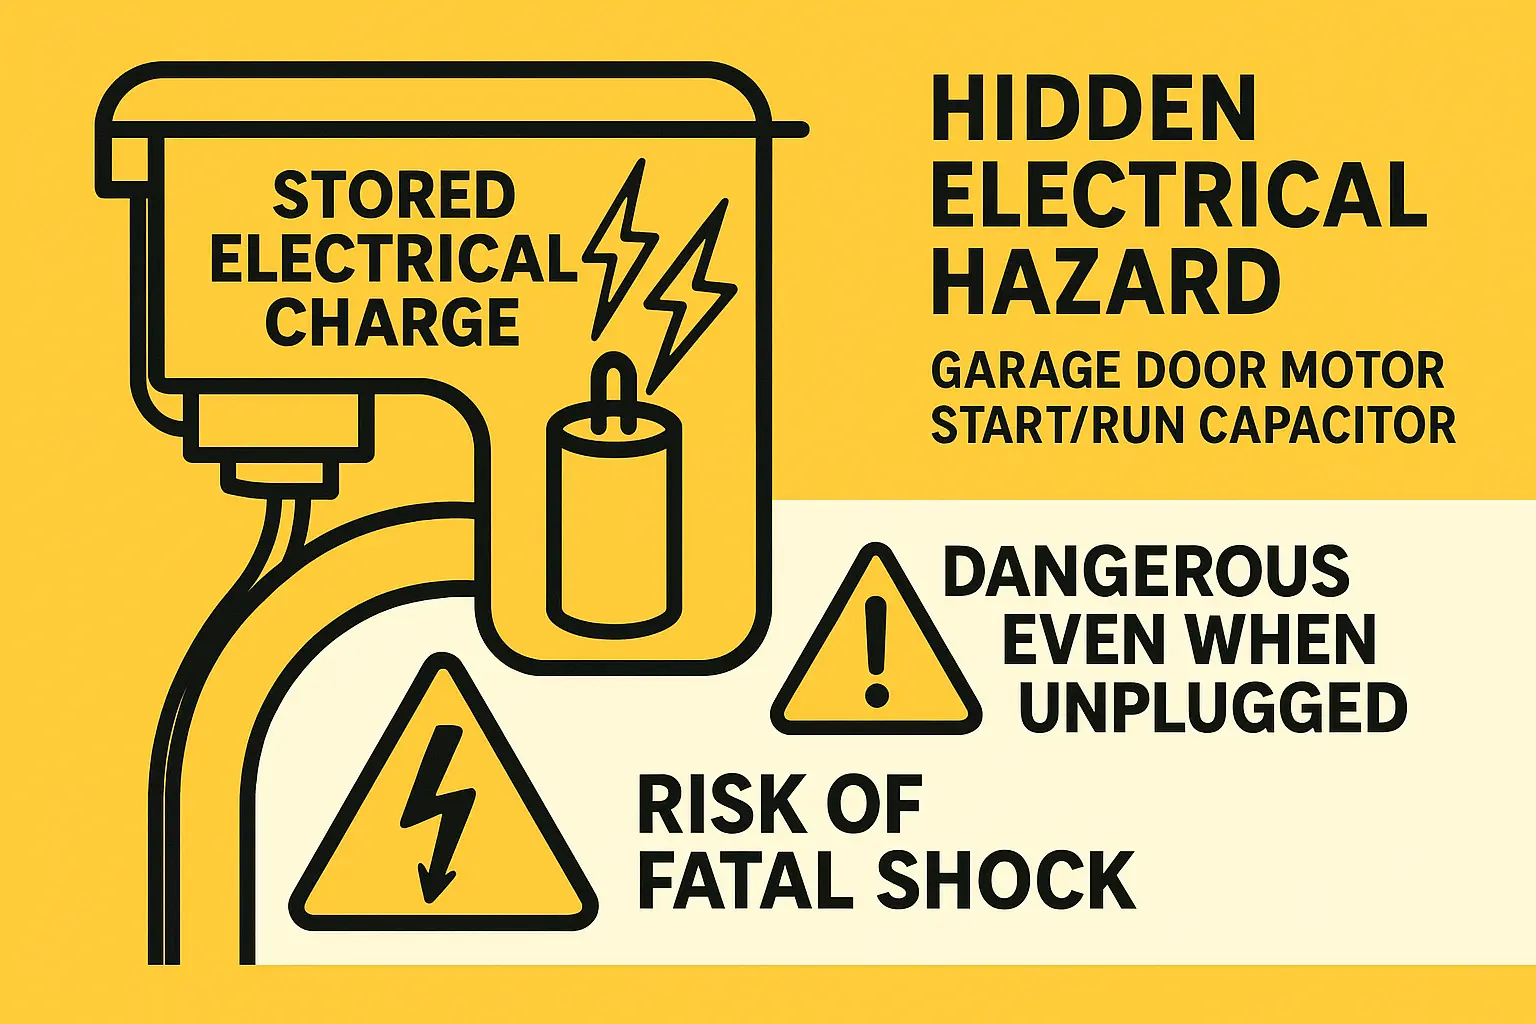
The start/run capacitor inside the motor casing stores 220V to 450V of electrical energy. This charge remains trapped even if the unit is completely unplugged. A slip of a screwdriver during a DIY garage door opener motor replacement can discharge this current instantly, leading to severe shock, cardiac arrest, or deep tissue burns.
What the Safety Data Reveals
National injury databases underscore the risks of these heavy-duty mechanical and electrical systems:
- Over 20,000 to 30,000 garage door-related injuries occur annually in the United States [1, 3].
- More than 1,600 injuries occur annually during active DIY garage door maintenance and repair [4].
- Crush and entrapment events cause over 2,000 injuries per year, while track and section pinch points cause more than 7,500 injuries [5].
- Federal safety standard UL 325 was enacted in 1993 following 85 documented pediatric brain injuries or deaths caused by failing reversal systems between 1974 and 1996 [6].
Electrical Shorts and Fire Hazards
If your garage door breaker keeps tripping, you are dealing with a critical electrical short. Continuing to reset the breaker or attempting to wire around the issue can melt internal insulation, ruin the logic board, or spark a house fire.
Warranty and Insurance Risks
Uncertified repairs on logic boards, transformers, and motor assemblies instantly void manufacturer warranties. Additionally, if an uncertified modification leads to property damage or personal injury, your homeowners insurance carrier may deny your liability claim due to unpermitted, non-compliant repairs.
For complex electrical issues, motor problems, or recurring breaker trips, rely on the certified technicians at Up & Down Garage Doors to restore your system safely and protect your home.
Frequently Asked Questions
Can I legally bypass my garage door safety sensors?
No. Bypassing or disabling garage door safety sensors violates the federal UL 325 safety standard. If an injury or property damage occurs because the safety sensors were bypassed, you could be held legally liable, and your homeowners insurance claim may be denied.
Why is my garage door opener motor humming but not moving the door?
A humming motor that does not move the door usually indicates a stripped internal drive gear, a failed start/run capacitor, or a seized motor. Because replacing these parts requires opening the main chassis and working near high-voltage electrical charges, this repair should only be performed by a professional.
What should I do if my garage door opener keeps tripping the circuit breaker?
If your opener repeatedly trips the circuit breaker, there is an active short circuit in the wiring, the transformer, or the internal logic board. Do not continue resetting the breaker; instead, unplug the unit immediately and call a certified technician to locate and repair the short to prevent a potential fire hazard.
You May Also Like