





How to Diagnose and Fix Garage Door Opener Electrical Issues
Published: Aug 7, 2026
When your automatic garage door refuses to budge, it is rarely just an inconvenience—it is a security vulnerability and a disruption to your day. Homeowners and facility managers often struggle to determine whether a malfunctioning opener requires a quick DIY adjustment or dangerous high-voltage diagnostic work.
Understanding the difference between a simple sensor misalignment and a fried logic board can save you hundreds of dollars in unnecessary part replacements. This technical triage guide will help you isolate the issue, safely bypass a failing system in emergencies, and maintain compliance with modern safety codes.
The Electrical Diagnostic Matrix: Capacitor vs. Logic Board
When an opener behaves erratically, the root cause is usually electrical. Systematically evaluating garage door opener troubleshooting protocols prevents you from replacing the entire unit when only a single component is compromised.
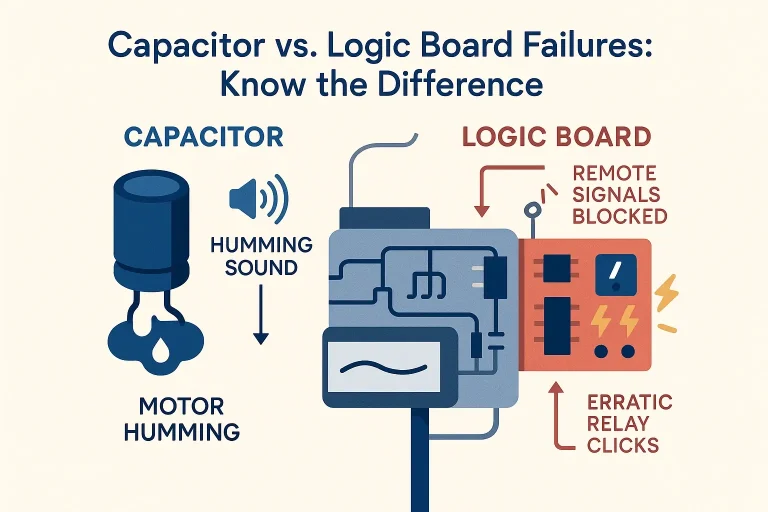
The two most common high-level electrical failures occur within the start/run capacitor or the logic board. Here is how to diagnose them:
Start/Run Capacitor Failure
The capacitor acts like a short-term battery, providing the high-voltage electrical burst required to cycle the motor.
- Physical Symptoms: The motor emits a distinct humming sound but the door does not move. You may observe visible bulging, cracks, or a white/grey crystalline leakage on the capacitor casing inside the chassis.
- Testing Method: Safely unplug the opener, remove the outer housing, and inspect the cylinder. If you own a multimeter with a capacitance setting (µF), discharge the capacitor using an insulated screwdriver across the terminals before testing.
- Resolution: This is a low-cost ($15–$30) part that can be swapped in 15 minutes by matching the exact microfarad rating.
Logic Board Failure
The logic board is the computer of your system, processing radio signals and safety inputs.
- Physical Symptoms: The wall button operates normally, but garage door remote not working issues persist despite fresh remote batteries. You might also notice erratic door reversals, clicking relays inside the unit, or a complete lack of response after a power surge or lightning storm.
- Resolution: A replacement logic board typically costs $80–$150. If your unit is more than 10 to 12 years old, upgrading to a modern, energy-efficient system is often more economical than replacing a board.
For those operating Chamberlain or LiftMaster units, you can cross-reference the flashing LED diagnostic arrow on the motor head. Reviewing a chamberlain garage door opener troubleshooting index will translate those blink patterns (e.g., 5 flashes pointing to a shorted sensor wire) instantly. Additionally, if your remote range has dropped significantly, verify you aren’t using standard LED bulbs in the opener housing; these emit high-frequency signals that cause garage door remote range degradation.
Panic Press: "Garage Door 911" Emergency Guide
If your car is trapped inside or your home is exposed to the elements, you need a safe bypass protocol immediately.
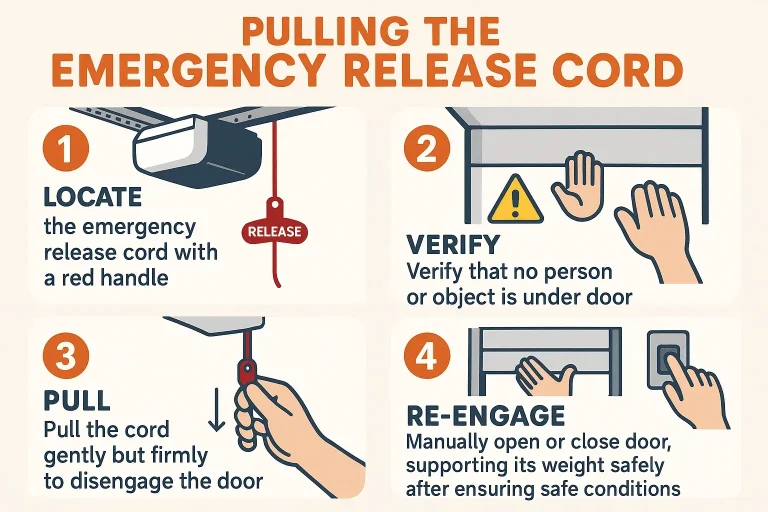
How to Safely Pull the Red Emergency Cord
The red emergency release handle disconnects the garage door trolley from the opener carriage.
- Safety Warning: Never pull the cord if the door is open unless you have absolute confirmation that the garage door springs are intact. If a spring is broken, pulling the cord will cause the heavy door to crash down instantly, causing catastrophic injury or property damage.
- The Pull: Pull the red cord down and back toward the motor unit. This locks the spring-loaded lever in the disengaged position, allowing you to manually lift the door.
- Restoring Power: Once power returns, learn how to reengage garage door after power outage settings by pulling the cord forward (toward the door) and manually lifting the door until the trolley clicks back into the opener track.
The Blinking Wall Button (Lock Mode Override)
If your remotes suddenly stop working but the wall button functions, check the small light on your wall panel. If it is flashing rapidly, “Lock Mode” has been accidentally activated. To deactivate it, press and hold the “Lock” button on the wall station for 3 to 5 seconds until the flashing stops.
The GFCI Reset Protocol
If your opener has completely lost power, check the nearest GFCI outlet on your garage wall or even in an adjacent bathroom. Garages are wired in series, meaning a tripped GFCI outlet on a wall can completely cut power to the ceiling outlet. Resetting the wall outlet will instantly restore power to your opener. If you cannot safely bypass or power your system, contact a local emergency garage door service provider.
Smart Alerts, UL 325, & Commercial Compliance
Safety is not just a best practice—it is a legal requirement. When evaluating smart upgrades or performing inspections, keeping up with regulations is critical for residential safety and commercial liability.
Residential UL 325 Standards
Since January 1, 1993, all residential automatic openers must feature dual safety protection: inherent force-sensing mechanisms and secondary external reversing devices (safety photo-eyes).
- Sensor Height: Safety photo-eyes must be mounted no higher than 4 to 6 inches (10 to 15 cm) above the finished floor. Any higher, and the system fails to detect small pets or children.
- The 2×4 Reversing Test: Lay a 2×4 block flat on the ground under the path of the door. Close the door. Upon contact, the door must reverse within two seconds. If it stops instead of reversing, execute immediate garage door sensors troubleshooting steps to adjust the limit switches.
Commercial OSHA Standards
OSHA does not maintain a single, dedicated standard for overhead doors. Instead, they enforce operations under the General Duty Clause (Section 5(a)(1)) and 29 CFR 1910. Businesses face major fines if commercial garage doors are operated with disabled safety edges, bypassed sensors, or if employees are not trained on proper safety zones. Ensure you document regular inspections using a professional garage door maintenance checklist.
Troubleshooting FAQ
What does it mean when my garage door will not open but motor is running?
If the motor is whirring but the door remains stationary, the emergency release cord has likely been pulled, or the internal drive gear (made of nylon) has stripped. You can verify this by checking if the trolley on the rail is moving while the door is not. If you hear the motor running, you may need a garage door will not open but motor is running diagnostic review to decide if the gear kit needs a replacement.
Can a power surge damage my garage door opener?
Yes. A lightning strike or local grid power surge can easily fry the sensitive microchips on the logic board. Safeguard your system by plugging your opener into a dedicated single-outlet surge protector rated for at least 900 joules.
Why do my safety sensors lose alignment?
Vibrations from the garage door track can slowly loosen the mounting brackets over time. Additionally, dirt, cobwebs, or direct sunlight hitting the receiving lens can cause the opener to think an object is blocking the path, preventing the door from closing.
Deciding Your Next Step
While minor adjustments like sensor cleanings or battery swaps are excellent DIY projects, handling high-voltage components or diagnosing heavy mechanical tension should always be left to certified professionals. At Up & Down Garage Doors, our family-owned team brings over 15 years of industry-leading experience across Connecticut, Texas, New York, Illinois, and Arizona.
Whether you need a simple capacitor replacement, a smart home integration, or commercial safety compliance support, our fully licensed technicians are available 24/7 to keep your home safe and secure. Reach out today for transparent, flat-rate pricing and reliable service.
You May Also Like
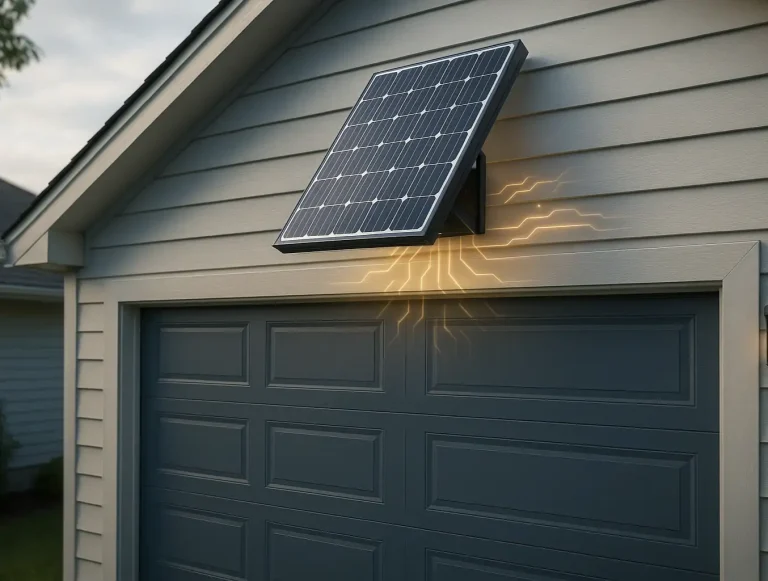
How to Optimize Solar Garage Openers on North-Facing Roofs
You’ve probably heard it a dozen times: "Putting solar panels on a north-facing roof is useless." For a whole-home system designed to slash your electric bill, that advice is generally sound. But what if you're not…
Published Date: Jul 29, 2026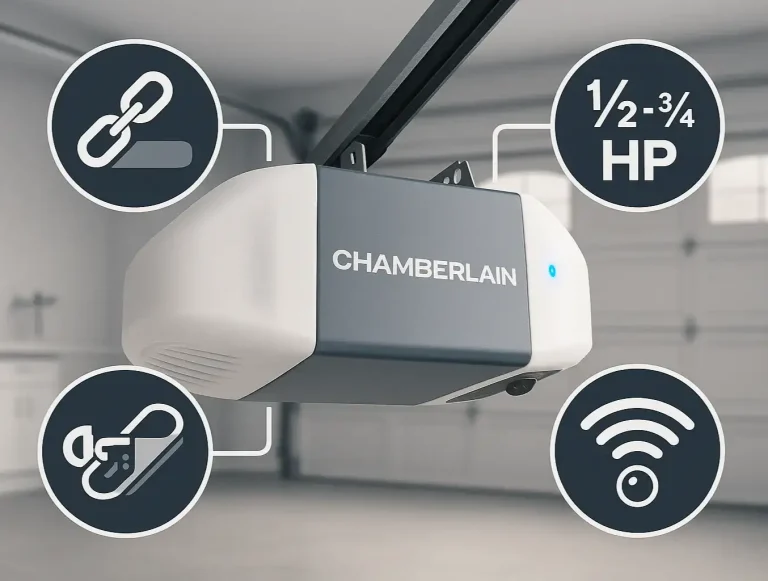
Your Complete Guide to Chamberlain Garage Door Opener Models
Trying to figure out the world of Chamberlain garage door openers can feel a bit like decoding a secret language. You see model numbers like B4613T, hear terms like "HPc," and wonder if you need a "Secure View™" or a…
Published Date: Jun 30, 2026
Legacy Fixed Code Garage Openers and Modern Security Risks
You pull into your driveway, press a button, and like magic, your garage door glides open. It’s a moment of convenience we take for granted. But what if that simple remote in your car is broadcasting an open…
Published Date: Jul 22, 2026