





Engineering the Perfect Garage Door Frame: Materials, Math, and Structural Best Practices
Published: Aug 5, 2026
A garage door is the single largest moving wall in your home. Yet, many builders treat its frame as an afterthought, relying on standard framing assumptions that lead to structural failure. When a frame fails, it is rarely the door itself that breaks first; instead, wood rot, metal corrosion, and structural warping bind the tracks, strain the opener, and compromise your home’s security.
To ensure long-term performance, you must understand the exact science behind framing dimensions, material chemistry, and water management.
The 3-Second Sizing Decoder
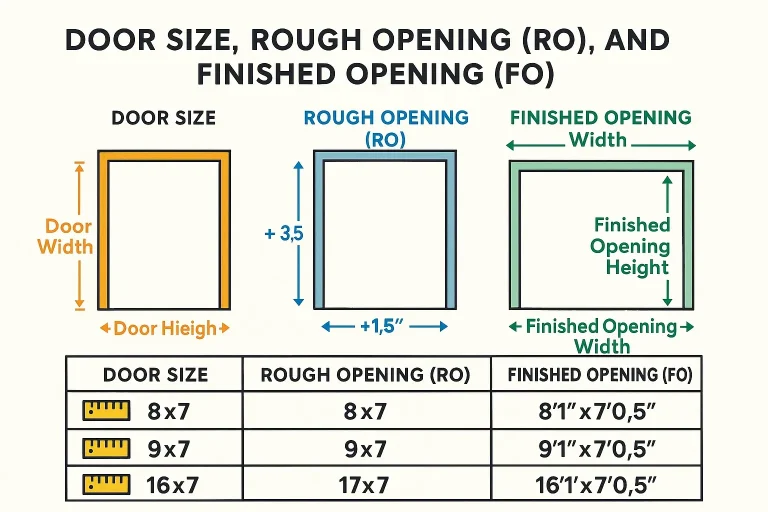
To build a square, stable opening, you must calculate the difference between your Rough Opening (RO) and your Finished Framed Opening (FO). The math is governed entirely by the 1.5-inch actual thickness of standard 2×6 framing lumber.
When planning your how to frame a garage door opening, use these two infallible formulas:
Rough Opening Width: Take the width of your garage door and add 3 inches (this leaves room for two 1.5-inch side jambs).
Rough Opening Height: Take the height of your garage door and add 1.5 inches (this leaves room for the top 1.5-inch head jamb).
Standard Framing Sizing Matrix
| Target Door Size | Required Rough Opening (RO) | Finished Opening (FO) | Recommended Header Size (Load-Bearing) |
|---|---|---|---|
| 8′ x 7′ | 8’3″ Wide x 7’1-1/2″ High | 8′ Wide x 7′ High | Double 2×12 SPF or 11-7/8″ LVL |
| 9′ x 7′ | 9’3″ Wide x 7’1-1/2″ High | 9′ Wide x 7′ High | Double 2×12 SPF or 11-7/8″ LVL |
| 16′ x 7′ | 16’3″ Wide x 7’1-1/2″ High | 16′ Wide x 7′ High | Triple 2×12 SPF or Double 11-7/8″ LVL |
If your project requires advanced structural modifications, utilizing a professional garage door framing service ensures that the header load is safely distributed without risking structural sag.
The Material Matrix: Choosing the Right Foundation
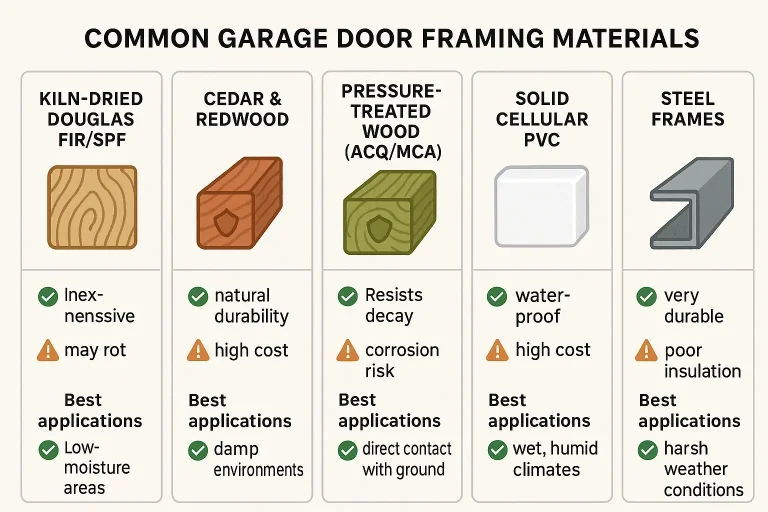
Selecting the best wood for garage door frame construction requires balancing structural strength, moisture resistance, and dimensional stability.
- Premium Douglas Fir / SPF: Highly stable and strong, but must be kept dry with robust flashing.
- Natural Redwood / Cedar: Exceptionally decay-resistant and stable. However, they are costly and soft, making them prone to denting.
- Pressure-Treated Lumber (ACQ/MCA): Highly rot-resistant but prone to severe twisting and warping as it dries. It also reacts chemically with raw metals.
- Solid Cellular PVC: Completely waterproof and immune to rot. Because it lacks structural holding power, it must be paired with structural wood backing to hold heavy-duty tracks. This material pairs beautifully with modern composite garage doors for a completely maintenance-free exterior.
- Hollow Metal / Structural Steel: Offers unmatched durability and protection. When paired with steel garage door benefits, it creates an impenetrable barrier against both weather and forced entry.
The Invisible Killer: Galvanic Corrosion and Dimensional Instability
Standard construction practices often overlook material chemistry, creating two primary risks:
1. Galvanic Corrosion
Modern pressure-treated wood is treated with alkaline copper quaternary (ACQ) or micronized copper azole (MCA). When bare aluminum trim coil (typically 0.019″ thick) is wrapped directly over this wood in wet conditions, it acts as a battery. This galvanic reaction causes severe pinhole corrosion and cladding failure within 12 to 24 months. To prevent this, you must install a physical barrier, such as synthetic butyl self-adhering flashing tape, between the metal trim and the treated wood.
2. The Track Tolerance Threshold
Standard garage door track brackets allow for only 1/4 inch of lateral adjustment. If you use “green” wet pressure-treated wood for your side jambs, it can twist, cup, or shrink by up to 3/8 inch as it cures. This warping binds the roller wheels, forcing the opener to work harder and triggering safety-reverse mechanisms. Ensuring correct garage door track installation requires using kiln-dried lumber (such as KDAT) to keep the tracks perfectly aligned.
Step-by-Step Construction Best Practices
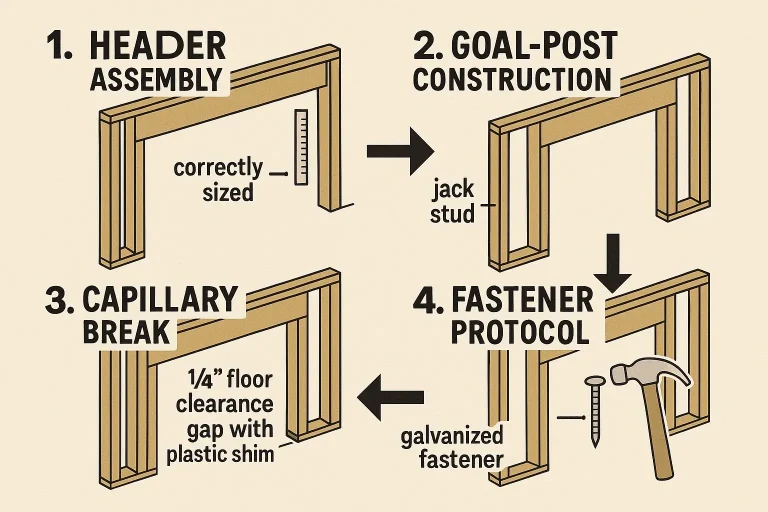
To build a frame that lasts for decades, you must focus on moisture management and structural integrity.
Phase 1: Establish a Capillary Break
Concrete slabs are porous and absorb water. Untreated wood in direct contact with concrete wicks moisture up to 3 inches vertically, starting rot within 24 to 48 hours. Always cut your wood side jambs 1/4-inch short of the concrete floor. Fill this capillary gap with a non-wicking plastic shim or high-grade polyurethane sealant to isolate the wood.
Phase 2: Proper Flashing
Install metal garage door flashing above the head jamb to direct water away from the header. Ensure all joints are sealed with exterior-grade elastomeric sealant.
Phase 3: Fastener Specification
Always use hot-dipped galvanized or 316 stainless steel fasteners. Standard steel screws or nails will corrode rapidly when exposed to the corrosive chemicals in pressure-treated wood.
Remediation & Security: Solving Common Frame Failures
Splicing Out Rotted Wood (The “Surgical Cut” Method)
If the bottom of your door frame has rotted, you do not need to replace the entire vertical jamb:
- Probe the wood with an awl to find where the healthy wood begins.
- Cut out the rotted section using a 45-degree bevel cut (a scarf joint) angled downward. This shape sheds water outward.
- Cut a matching replacement piece out of solid cellular PVC or KDAT lumber.
- Secure the joint with exterior construction adhesive and structural screws, then seal the seam.
Protecting Against Forced Entry
A weak frame compromises your home’s security. Intruders often target the center bracket where the opener rail meets the head frame. If this bracket is secured with basic wood screws, a strong push can tear it free. Reinforce this connection by using through-bolts with backing plates to how to secure garage door assemblies against physical force.
If structural shifting has already caused your door to misalign or bind, learn how to put garage door back on track safely before attempting to service the high-tension hardware yourself.
Frequently Asked Questions
Can I use standard framing nails for pressure-treated wood?
No. Standard fasteners will corrode quickly when exposed to the copper in modern pressure-treated wood. Always use hot-dipped galvanized or stainless steel fasteners to prevent structural failure.
What is the difference between a rough opening and a finished opening?
The rough opening is the unlined structural frame of the wall. The finished opening is the final, clad opening (typically lined with 2×6 wood jambs) that matches the exact dimensions of your garage door.
Why is my garage door binding even though the frame is brand new?
This is usually caused by using wet, green-treated lumber that warped, twisted, or shrunk as it dried. This shifting moves the tracks out of their strict 1/4-inch alignment tolerance.
You May Also Like
Finding and Sealing the Hidden Drafts Behind Your Garage Door Frame
You’ve done everything right. You replaced that worn-out rubber strip at the bottom of your garage door and even upgraded the weatherstripping along the sides. Yet, on a windy day, you still feel that unmistakable…
Published Date: Jul 21, 2026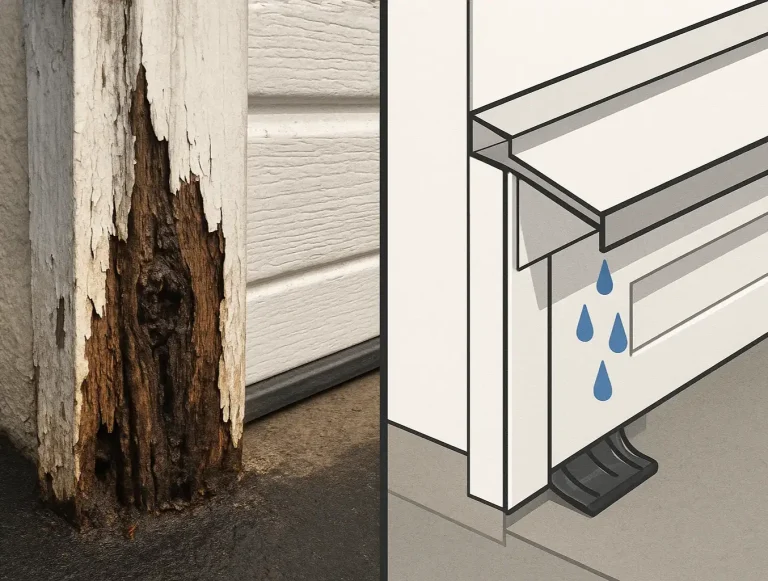
The Role of Proper Flashing and Sealant in Extending Garage Door Frame
You’ve seen it before. The paint on your garage door frame is bubbling. The wood near the bottom feels a little soft after it rains. You figure it’s time to replace the rubber weatherstripping—the black seal running…
Published Date: Apr 21, 2026
Assessing Hail, Storm, and Impact Damage on Garage Door Frames
That sinking feeling is unmistakable. After a wild hailstorm, a wind-lashing storm, or the accidental tap from a car bumper, you see it—the damage to your garage door frame. It’s more than just an eyesore. A…
Published Date: Apr 20, 2026